35
Adjusting the stitch width
The maximum stitch width for zigzag stitching is "7.0";
however, the width can be reduced for most patterns.
The width increases or decreases as you press the "+"
or " " stitch width adjustment buttons from "0.0-7.0".
Adjusting the stitch length
The density of zigzag stitches increase as the setting
of stitch length approaches "0.3".
Neat zigzag stitches are usually achieved at "1.0-2.5".
Closed up zigzag stitches (close together) are
referredtoasasatinstitch.
7.05.0
3.0
1.0
4.5
3.0
2.01.00.5
0.0
T
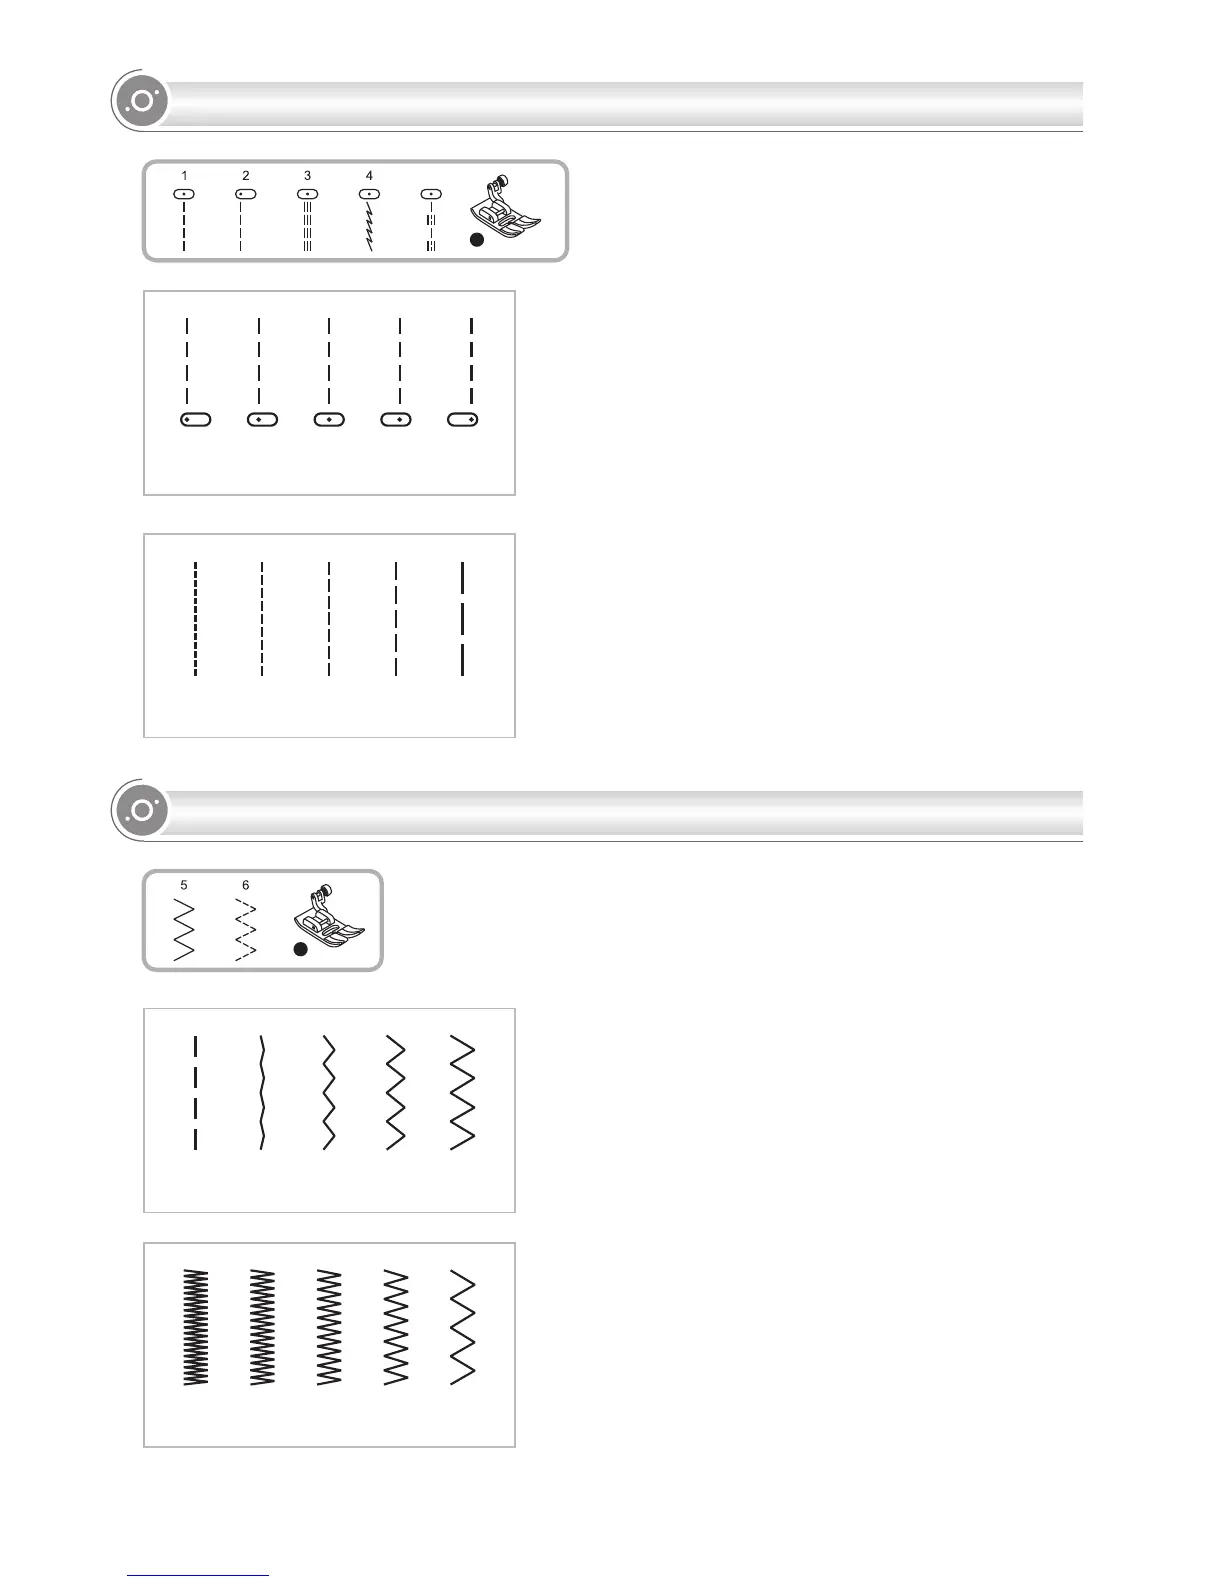
Changing the needle position
These setting apply only to
. The pre-set position is "3.5",
center position. When you press the " " of stitch
width adjustment button, the needle position will be
moved to the left. When you press the " + " of stitch
width adjustment button, the needle position will be
moved to the right. On the LCD screen, the point
illustration and the number indicate the needle
position.
Direct Patterns 1-4, or B
Group Patterns 01-05
Changing the stitch length
To shorten the stitch length, press the " " of stitch
length adjustment button. For a longer stitch length,
press the " + " of stitch length adjustment button.
Generally speaking, the thicker the fabric, thread and
needle, the longer the stitch should be.
4.5
3.0
2.01.00.5
0.0 2.0
3.5
5.0 7.0
B-05
ZIGZAG STITCHES
NEEDLE POSITION AND STITCH LENGTH
T