EasyManua.ls Logo

Singer 93234 User Manual

Singer 93234
57 pages
To Next Page IconTo Next Page
Page #1 background imageLoading...
Page #1 background image
_.o
7
. oi
k_- ]
/
137595-001
4572/93220/93234
SINGER
Question and Answer IconNeed help?

Do you have a question about the Singer 93234 and is the answer not in the manual?

Singer 93234 Specifications

General IconGeneral
CategorySewing Machine
Free ArmYes
Needle ThreaderYes
Bobbin SystemTop Drop-in
Bobbin TypeClass 15
Included AccessoriesNeedles, bobbins, spool caps, spool pin felt, auxiliary spool pin, screwdriver, seam ripper / lint brush

Summary

CAUTION! POLARIZED PLUG FOR NORTH AMERICAN TERRITORIES

Important Safety Instructions

Provides essential safety guidelines for operating the sewing machine.

IMPORTANT SAFETY INSTRUCTIONS

DANGER: Electric Shock Precautions

Warns about electric shock hazards and necessary precautions.

WARNING: Fire, Burn, and Injury Prevention

Lists warnings for burns, fire, electric shock, and personal injury.

SECTION 1: GETTING TO KNOW YOUR MACHINE

Principal Parts Overview

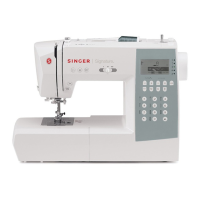
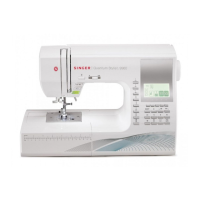
Identifies and illustrates the main components of the sewing machine.

ACCESSORIES

Specialized Presser Feet

Details presser feet for specific sewing tasks like hemming, buttons, and decorative stitches.

Essential Sewing Aids

Covers guides, cleaning tools, and sewing supplies like needles and bobbins.

SECTION 2: GETTING READY TO SEW

Connecting and Running the Machine

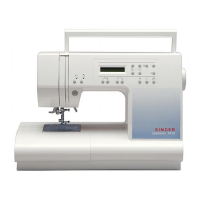
Instructions for connecting power and operating the sewing machine.

CHOOSING AND CHANGING NEEDLES

Free Arm Sewing Conversion

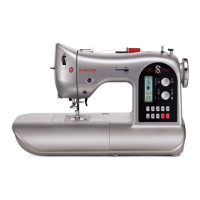
How to convert the machine for free arm sewing to reach difficult areas.

CHANGING THE PRESSER FOOT

REPLACING PRESSER FOOT WITH SHANK

ATTACHING THE FEED COVER

WINDING A BOBBIN

IMPORTANT THREADING INSTRUCTIONS

Easy Threading System Operation

Instructions for using the machine's special threading system.

BOBBIN CASE THREADING

SELECTING BUILT-IN STITCH PATTERNS

SECTION 3: STRAIGHT STITCHING

Attaching Straight Stitch Needle Plate and Foot

Instructions for using the straight stitch needle plate and presser foot.

ADJUSTING STITCH LENGTH

ADJUSTING THREAD TENSION

SEWING A SEAM

Basting Techniques

Methods for temporary basting before machine sewing.

Placing Fabric Under Presser Foot

Correctly positioning fabric under the presser foot for sewing.

Stitching in Reverse

How to reinforce seams using reverse stitching.

KEEPING SEAMS STRAIGHT

TURNING SQUARE CORNERS

SEWING CURVED SEAMS

USING THE SEAM GUIDE

INSERTING A ZIPPER

SECTION 4: BUILT-IN STITCH PATTERNS

Adjusting Stitch Width and Length

How to adjust stitch width and length for different patterns.

Adjusting Thread Tension and Balance

Setting thread tension and fine-tuning stitch balance for patterns.

BUILT-IN STITCH PATTERNS CAPABILITY AND GRAPHICS

ZIG-ZAG STITCH

Zig-Zag Stitch for Seam Finishing

Using the zig-zag stitch to finish fabric edges that may unravel.

ZIG-ZAG BLINDSTITCH

Blindstitch Hemming Technique

Step-by-step guide for performing blindstitch hemming.

USING ADJUSTABLE BLINDHEM FOOT (K)

ATTACHING EVEN FEED FOOT (M)

ATTACHING OVEREDGE FOOT

ATTACHING ROLLED HEMMER FOOT

MULTI-STITCH ZIG-ZAG

Mending Tears with Multi-Stitch Zig-Zag

Using the multi-stitch zig-zag stitch for repairing fabric tears.

"M" STITCH / SANDCASTLE STITCH

Applying Lace Trim

Applying lace trim using the "M" or Sandcastle stitch.

CRESCENT / CHINESE DYNASTY / SOLID SCALLOP STITCH

Border Designs with Decorative Stitches

Using stitches for creating decorative border designs.

ARROW / BUNTING / PRIVET STITCH

Border Designs with Decorative Stitches

Applying decorative stitches as borders on fabric edges.

WIZARD / RANDOM RIC-RAC STITCH

Hemstitching Applications

Using stitches for decorative hemstitching on linens.

STRETCH OVEREDGE STITCH

Overedge Seam Finishing

Finishing seams with a stretch overedge stitch.

RIC-RAC / STRAIGHT STRETCH STITCH

Topstitching Applications

Using stitches for topstitching garments, especially hard-to-reach areas.

ROAD RUNNER / FAGOTING STITCH

HONEYCOMB STITCH

Smocking with Honeycomb Stitch

Using honeycomb stitch for decorative smocking on garments.

SLANT OVEREDGE / SEAGULL STITCH

Edging and Appliquéing

Using stitches for decorative edging and appliquéing fabric.

SECTION 5: FOUR-STEP BUTTONHOLING

Recommended Settings for Buttonholes

Recommended settings for sewing buttonholes using the four-step method.

Four-Step Buttonholing: Step 1

First step in creating a four-step buttonhole.

Four-Step Buttonholing: Step 2

Second step in creating a four-step buttonhole.

Four-Step Buttonholing: Step 3

Four-Step Buttonholing: Step 4

ADJUSTING BUTTONHOLE BALANCE

SECTION 6: ADDITIONAL STITCH FUNCTIONS

Sewing on Buttons

How to sew buttons securely using the zig-zag stitch.

Attaching Button Sewing Foot (H)

Instructions for attaching the button sewing foot accessory.

DARNING

Attaching Darning and Embroidery Foot (G)

Attaching the darning and embroidery foot for better fabric control.

SATIN STITCHING

FREE MOTION EMBROIDERY

MONOGRAMS

APPLIQUES

SECTION 7: CARING FOR YOUR MACHINE

Removing and Replacing Bobbin Case

Steps to remove and replace the bobbin case for cleaning or maintenance.

REMOVING AND REPLACING LIGHT BULB

CLEANING THE MACHINE

BEFORE STORING YOUR MACHINE

PERFORMANCE CHECKLIST

FABRIC, THREAD AND NEEDLE TABLE

OPTIONAL ACCESSORIES (SOLD SEPARATELY)

Specialized Presser Feet

Details presser feet for specific sewing tasks like hemming, buttons, and difficult fabrics.

Basic and Decorative Accessories

Covers seam guides, twin needles, seam rippers, and needle threaders.

ADDENDUM INSTRUCTIONS

24 PATTERN SPECIAL MODEL SEWING MACHINE

ONE-STEP BUTTONHOLING

FASTENING THE BUTTONHOLE ATTACHMENT

SETTING THE LENGTH OF BUTTONHOLE

ADJUSTING BUTTONHOLE WIDTH

ADJUSTING BUTTONHOLE BALANCE

NEW STYLE PATTERNS RECOMMENDED SETTINGS

Related product manuals