SECTION 6 ADDITIONAL STITCH FUNCTIONS
SEWING ON BUTTONS
Flat buttons can be sewn on quickly and easily using the plain zig-zag stitch.
III
RECOMMENDED SETTINGS
Stitch Selection: Zig-Zag Stitch
Stitch Width: I! | _
II I
Stitch Length: 0
Foot: General Purpose (B) or
Button Sewing (H)
Needle Plate: General Purpose (A)
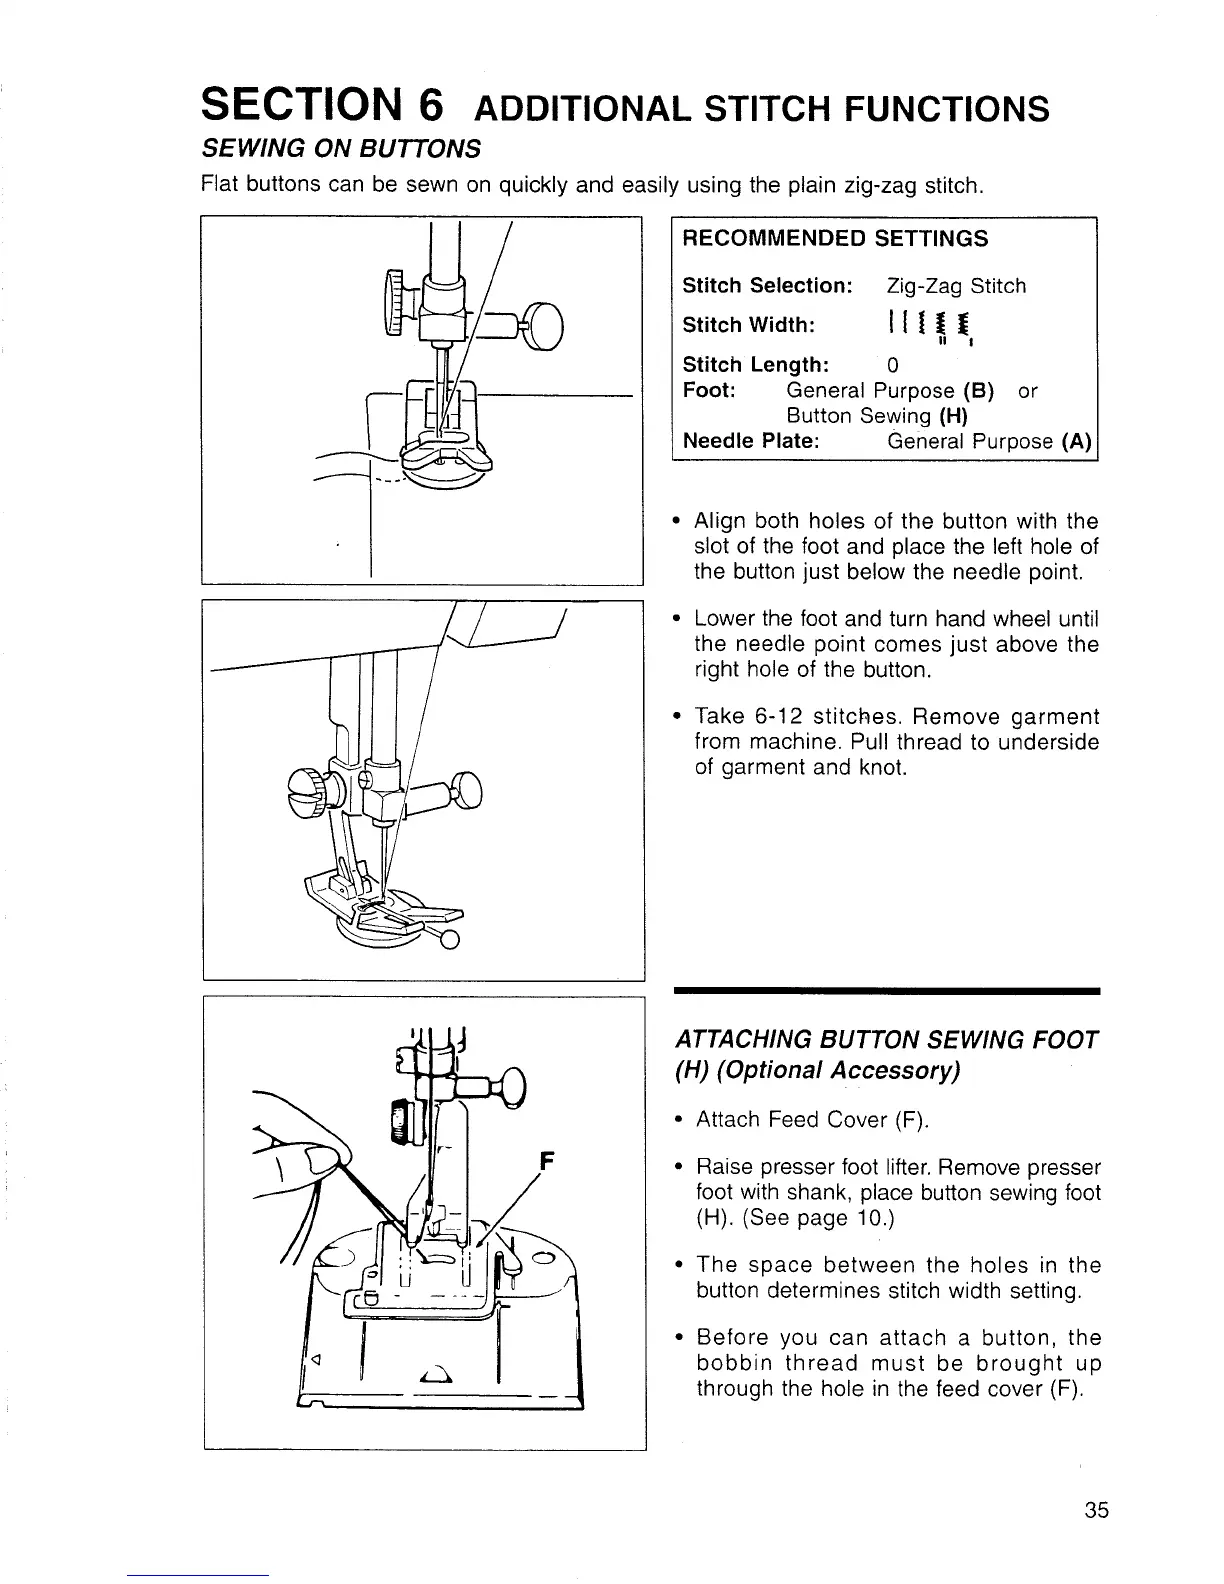
Align both holes of the button with the
slot of the foot and place the left hole of
the button just below the needle point.
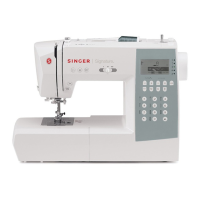
Lower the foot and turn hand wheel until
the needle point comes just above the
right hole of the button.
Take 6-12 stitches. Remove garment
from machine. Pull thread to underside
of garment and knot.
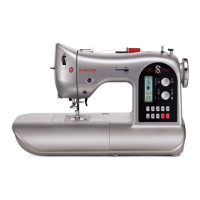
F
ATTACHING BUTTON SEWING FOOT
(H) (Optional Accessory)
• Attach Feed Cover (F).
• Raise presser foot lifter. Remove presser
foot with shank, place button sewing foot
(H). (See page 10.)
• The space between the holes in the
button determines stitch width setting.
• Before you can attach a button, the
bobbin thread must be brought up
through the hole in the feed cover (F).
35