_efore beginning a sewing project,check the Fabric,Thread and NeedleTableon page
44for the best needle and thread combination for your fabric.
3 4 I '_
I
I
I
1
RECOMMENDED SETTINGS
Stitch Selection:
Stitch Width:
Stitch Length:
Foot:
Needle Plate:
Straight Stitch
i!II
II I
0 l l 1 4 I
General Purpose (B)
General Purpose (A)
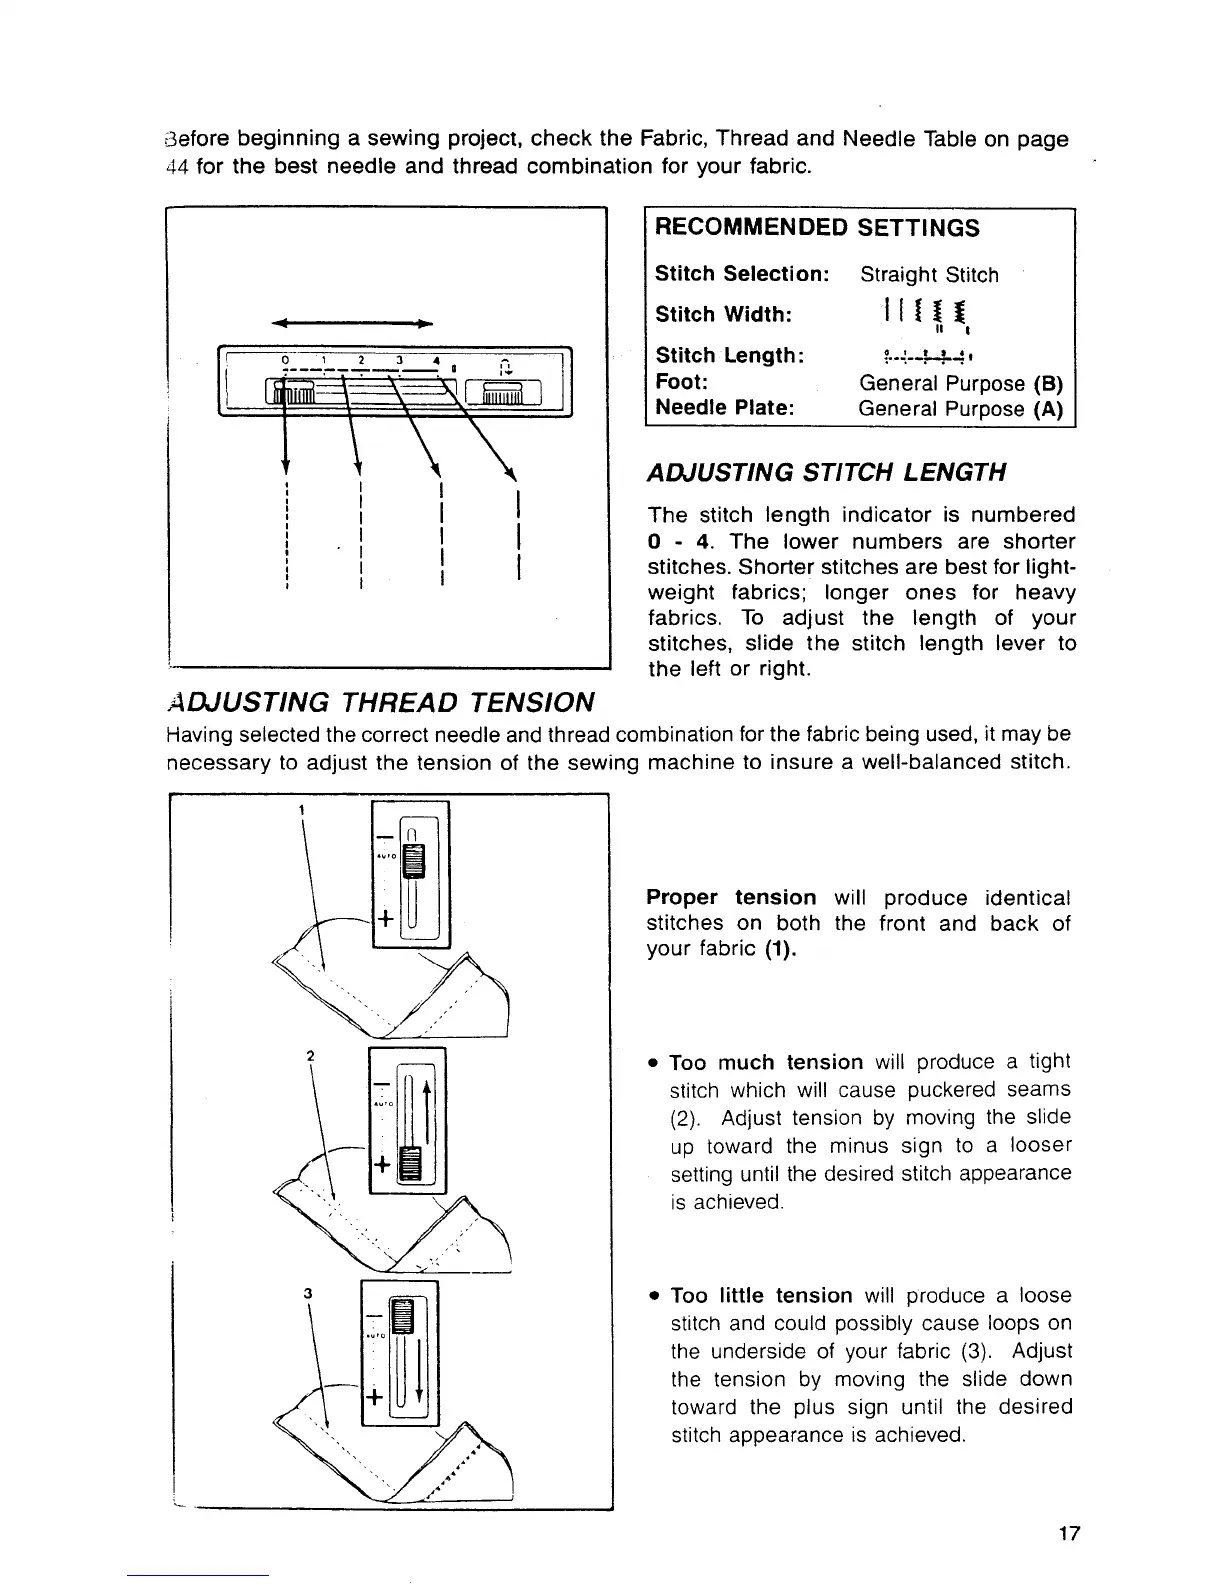
ADJUSTING STITCH LENGTH
The stitch length indicator is numbered
0 - 4. The lower numbers are shorter
stitches. Shorter stitches are best for light-
weight fabrics; longer ones for heavy
fabrics. To adjust the length of your
stitches, slide the stitch length lever to
the left or right.
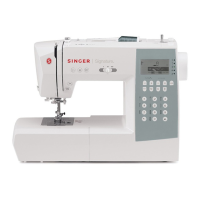
ADJUSTING THREAD TENSION
Having selected the correct needle and thread combination for the fabric being used, it may be
necessary to adjust the tension of the sewing machine to insure a well-balanced stitch.
mill
2
Proper tension will produce identical
stitches on both the front and back of
your fabric (1).
• Too much tension will produce a tight
stitch which will cause puckered seams
(2). Adjust tension by moving the slide
up toward the minus sign to a looser
setting until the desired stitch appearance
is achieved,
• Too little tension will produce a loose
stitch and could possibly cause loops on
the underside of your fabric (3). Adjust
the tension by moving the slide down
toward the plus sign until the desired
stitch appearance is achieved.
17