38
SELECTING UTILITY
STITCH PATTERNS
Utility stitches are indicated on the pattern chart
located inside of the top cover.
All utility stitches are numbered from 1 to 64.
When you turn on the machine, straight stitch (No.
1) will be selected automatically.
Select utility stitch pattern as follows.
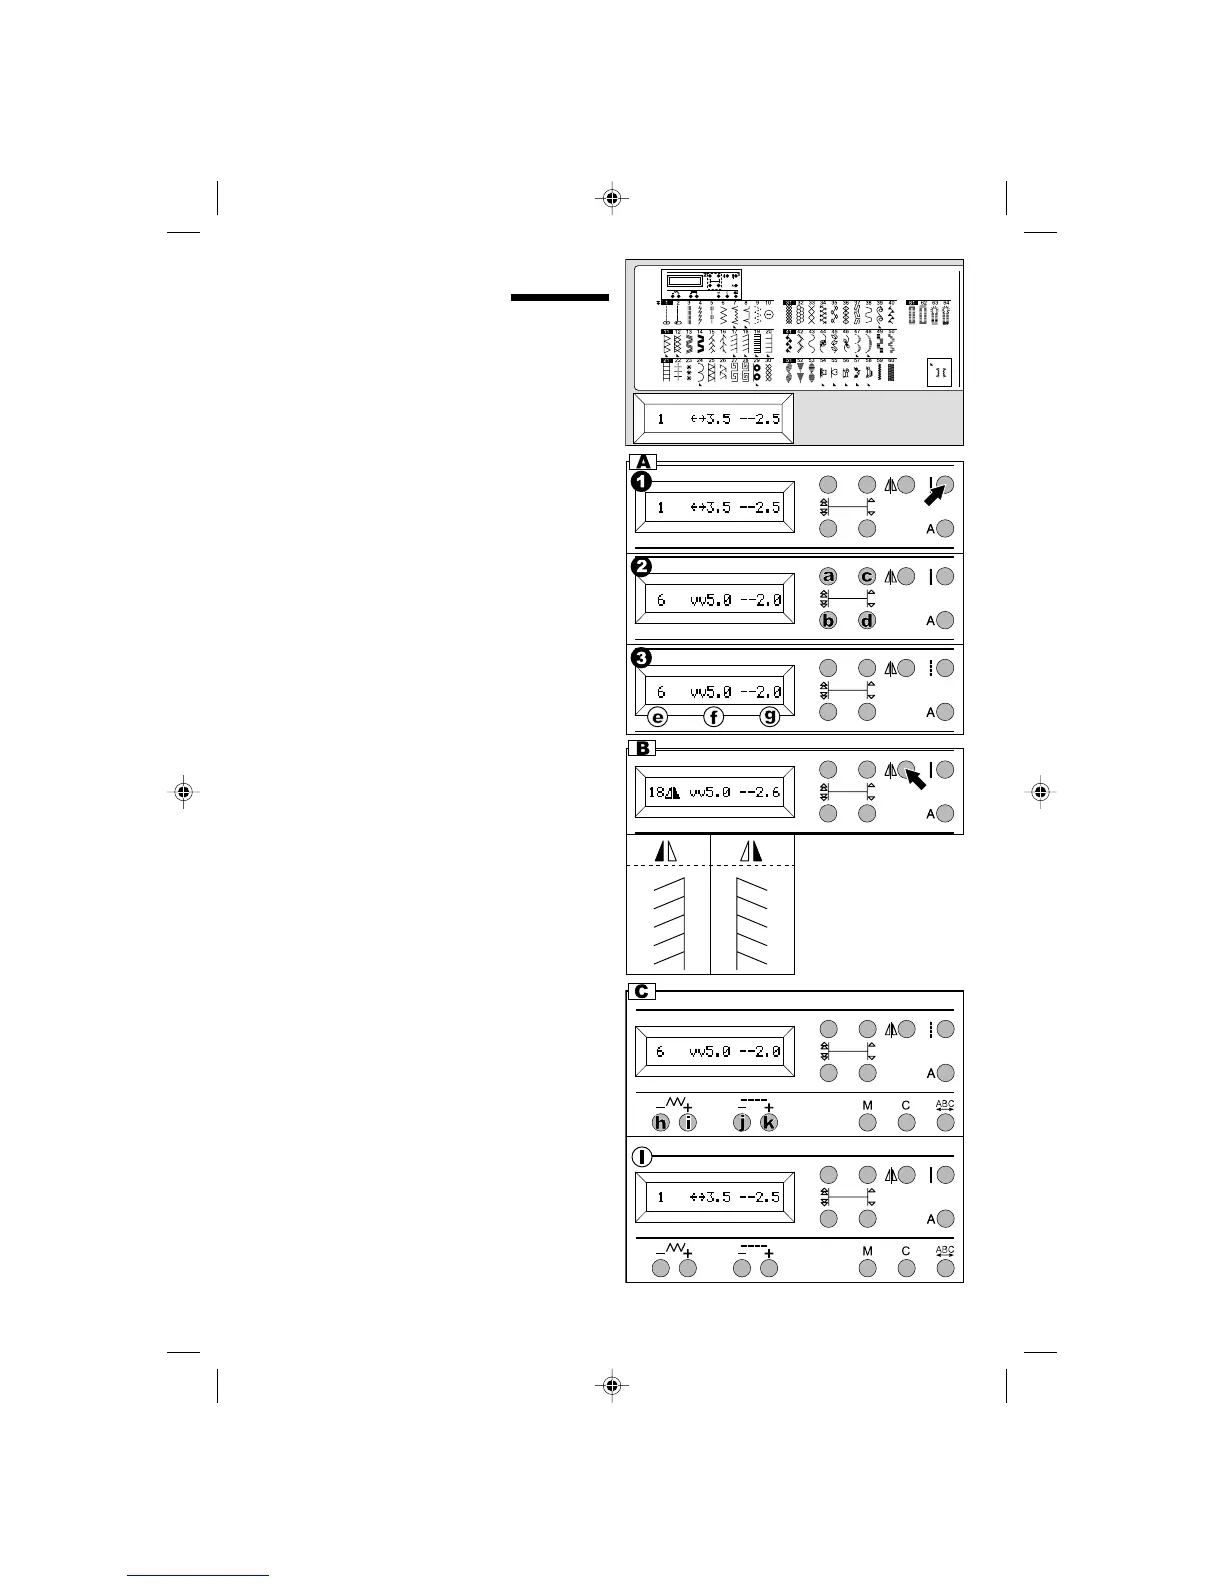
A.SELECTING THE PATTERN
1. Press the utility button.
Pattern number 1 will be selected.
2. Select pattern number using selector buttons.
a. 10 number up
b. 10 number down
c. 1 number up
d. 1 number down
3. When pattern is selected, LCD will indicate the
following information of selected pattern.
e.Pattern number, f. Stitch Width
g.Stitch Length
C.SETTING STITCH WIDTH AND LENGTH
Machine will set the stitch width and length
suitable for the pattern. You can change them by
pressing stitch width and length buttons.
For narrower width, press stitch width - button (h).
For wider width, press stitch width + button (i).
For shorter length, press stitch length - button (j).
For longer length, press stitch length + button (k).
l. For straight stitch patterns (No. 1, 2, 3, 5),
Stitch width buttons will change the needle
position.
Note: When further width or length adjustment is
not possible, machine will emit multiple audible
beeps.
B. MIRROR STITCH
When you have selected certain pattern numbers,
Mirror mark will appear on the LCD.
In this case, you can sew mirror image by pressing
the Mirror button.
If you press this button, Mirror mark will change to
mirror image.
To cancel mirror stitch, press this button once
more.
9910EFSt.pm6 2003.9.10, 8:46 PM38