Sinterit LISA PRO User Manual | 18
6. Preparing the Lisa PRO printer to work after delivery
A. FIRST STEPS
1. REMOVE THE PROTECTION
FOIL FROM THE NITROGEN
CHAMBER
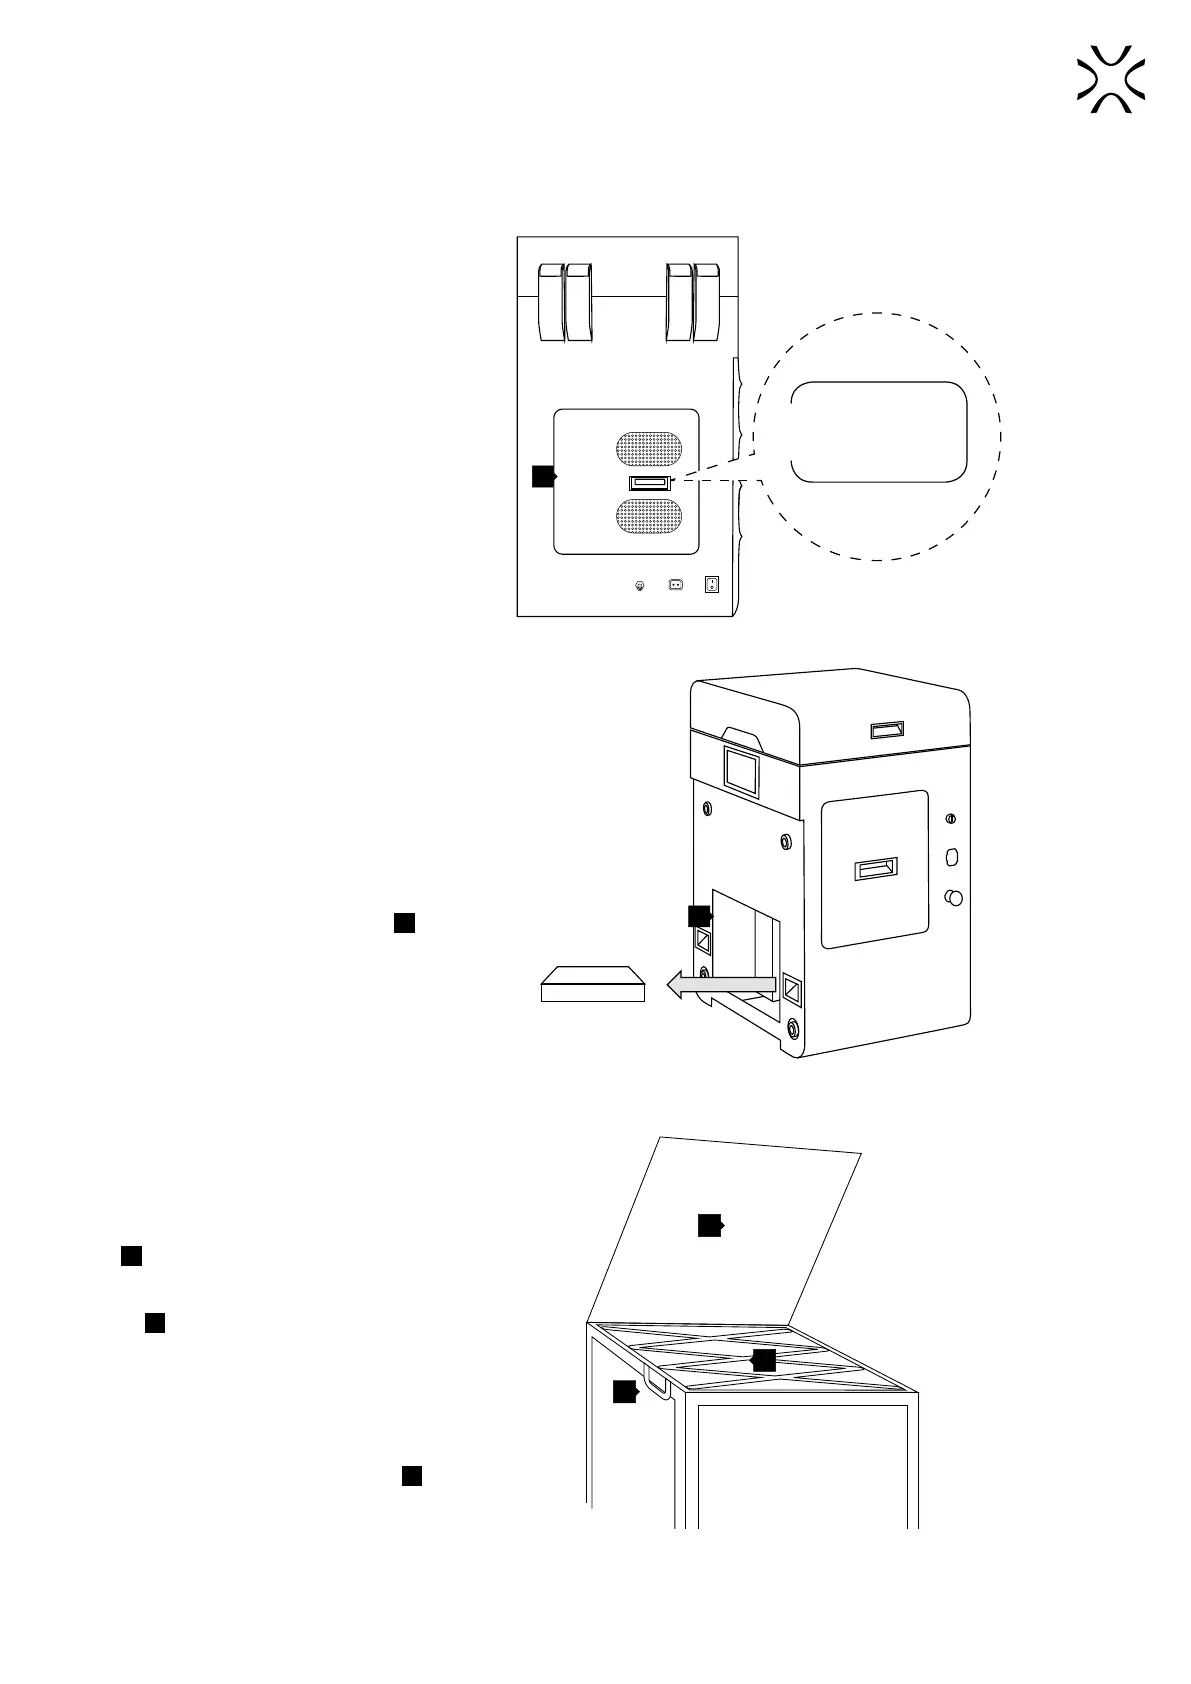
Grab the Nitrogen chamber handle,
pull hard and open it.
Remove the protective foil from the lid.
Check for damage inside the chamber.
Close the Nitrogen chamber.
12
!
PULL HARD
to open
The Nitrogen installation chamber.
2. REMOVE THE “STARTUP BOX”
FROM THE SERVICE AREA
UNDER THE BEDS
Remove the protection foil with the
information „STARTUP BOX in service
area” and remove the box from the
service area underneath the BEDs
18
.
Never put objects there! This is the
service area of the printer.
18
STARTUP
BOX
The STARTUP BOX is located in the service area under the BEDs.
3. FIND THE REMOVABLE
FRONT PANEL
The Removable Front Panel is located
in a recess under the lid of a Flightcase
A
.
Unlock the locks of the Flightcase’s
lid
F
(one on the right and one on the
left side of the top of Flightcase). The
locks of the lid open the same way as
the locks of Flightcase’s cover.
Lift the Flightcase lid by 90 degrees.
Inside there should be the Removable
Front Panel of the Lisa PRO printer
1
.
Lift up the panel.
Look out, it’s heavy!
A
F
1
The raised lid of the Flightcase and showing recess
with Removeable Front Panel for Lisa PRO.