Sinterit LISA PRO User Manual | 31
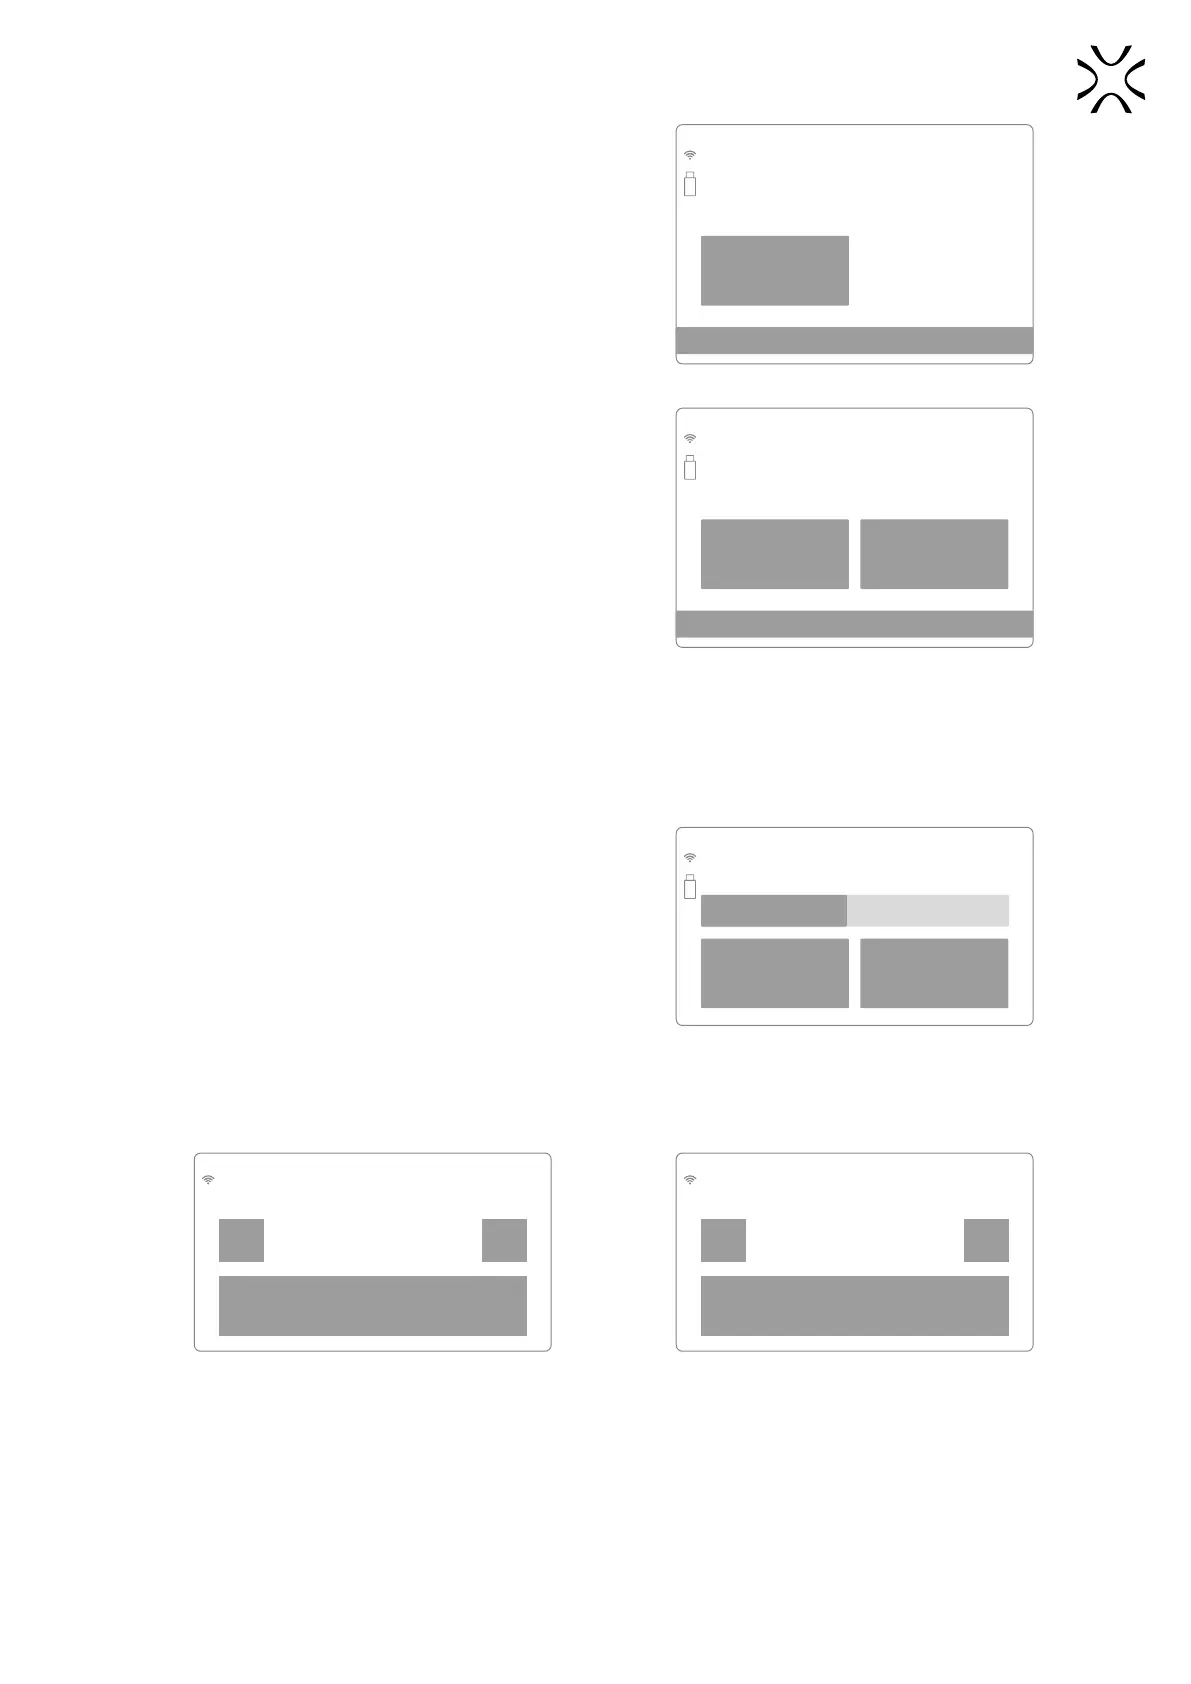
26. Check that there are no unnecessary elements in the Print
Chamber. If not, close the printer Lid.
BACK Lid: Open
PREPARATION STEP 9/9
sample.scode
If you are ready to start printing,
make sure there are no items
left inside the printer and close the lid
Check the Print Chamber and close the Lid.
27. The printer is ready to print. Press START PRINTING to start
the process.
BACK START PRINTING
PREPARATION STEP 9/9
sample.scode
The printer is ready
Press START PRINTING to start the printing process.
9. Information and tasks while printing
1. The printing process is divided into 3 steps: heating,
printing and cooling down. The actual, active step is shown
on the screen (bold).
2. The screen displays all important information for the
user: the le name, the active step, the process done in
percentage, the remaining time.
3. If you want to see the view from the internal camera, press
CAMERA VIEW. The view will be displayed for 10 seconds.
After that, the display will return to the main screen.
36.6°C
CAMERA VIEW
FOR 10s
sample.scode
• Warmp • Printing • Cooldown
48.06% (1h45m left)
The main screen during printing.
4. During printing, if there are any visible problems observed by the internal camera or the upper Viewing window, the
user can precisely change the temperature by pressing the button on the left (shows the current temperature inside
the printer). The next window allows you to change the temperature.
sample.scode
Print surface temperature offset:
- +
36.6°C
BACK
sample.scode
Print surface temperature offset:
- +
36.6°C
(+1.5°C)
BACK
Screen for temperature change during printing (before and after change).