ASSEMBLY STEPS
18
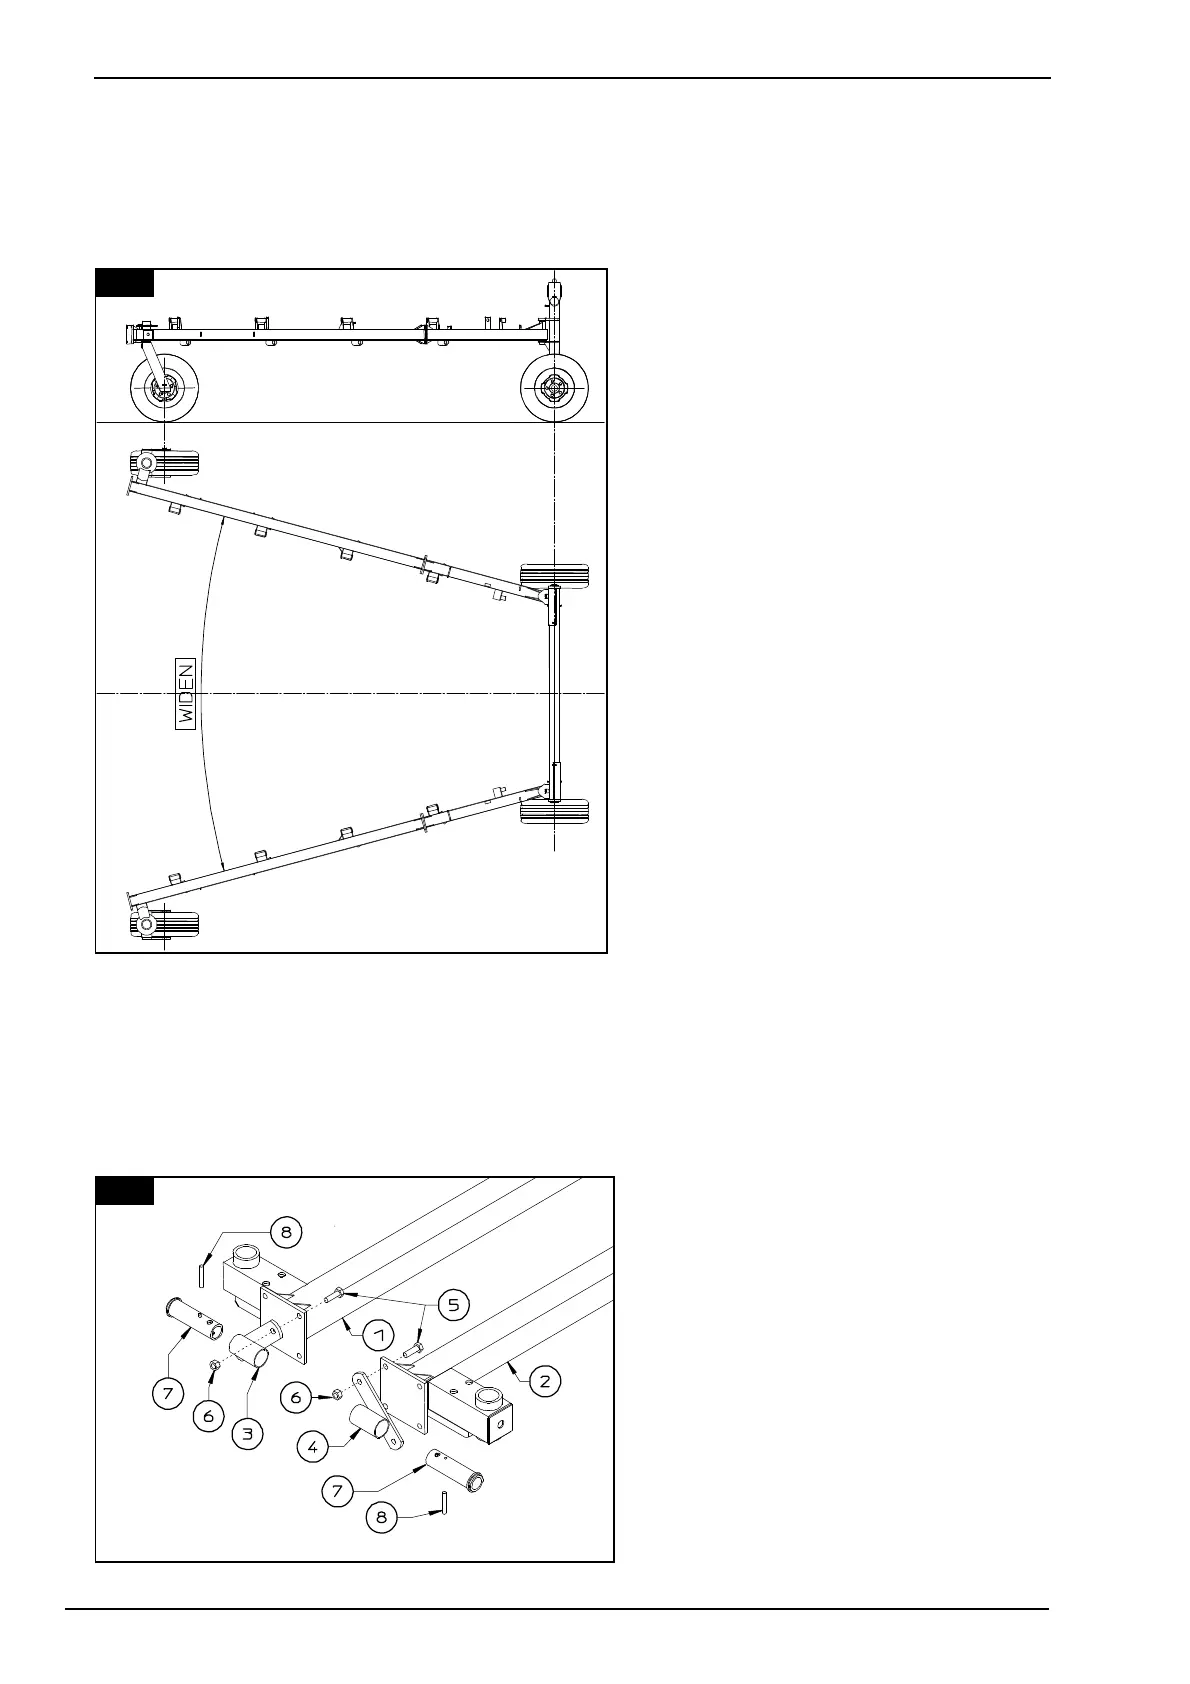
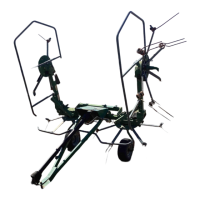
13.
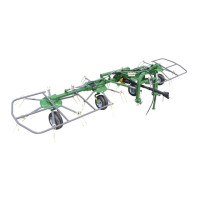
The machine is now resting on four wheels and is thus more stable; however, caution should still
be used for the remaining assembly
steps. To make assembly easier, it is
recommended that the machine
sections opened out.
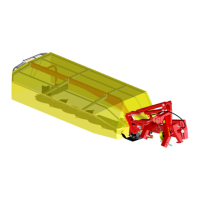
14. (MX 8 only)
Mount attachments 3 & 4 (LH - RH) to sections 1 & 2 (LH - RH) using screws 5 and nuts 6. Insert
bushings 7 in the correct openings in
attachments 3 & 4 (LH - RH) and
fasten in place with spring pins 8.
In this step, you will use:
Item 5:
4 - screws M 16 x 45
(5/8" x 3/4")
Item 6:
4 - nuts M 16
(5/8")
Item 8:
2 spring pins D 8 x 70
(D 5/16" x 2" 3/4)
13
14