-12-
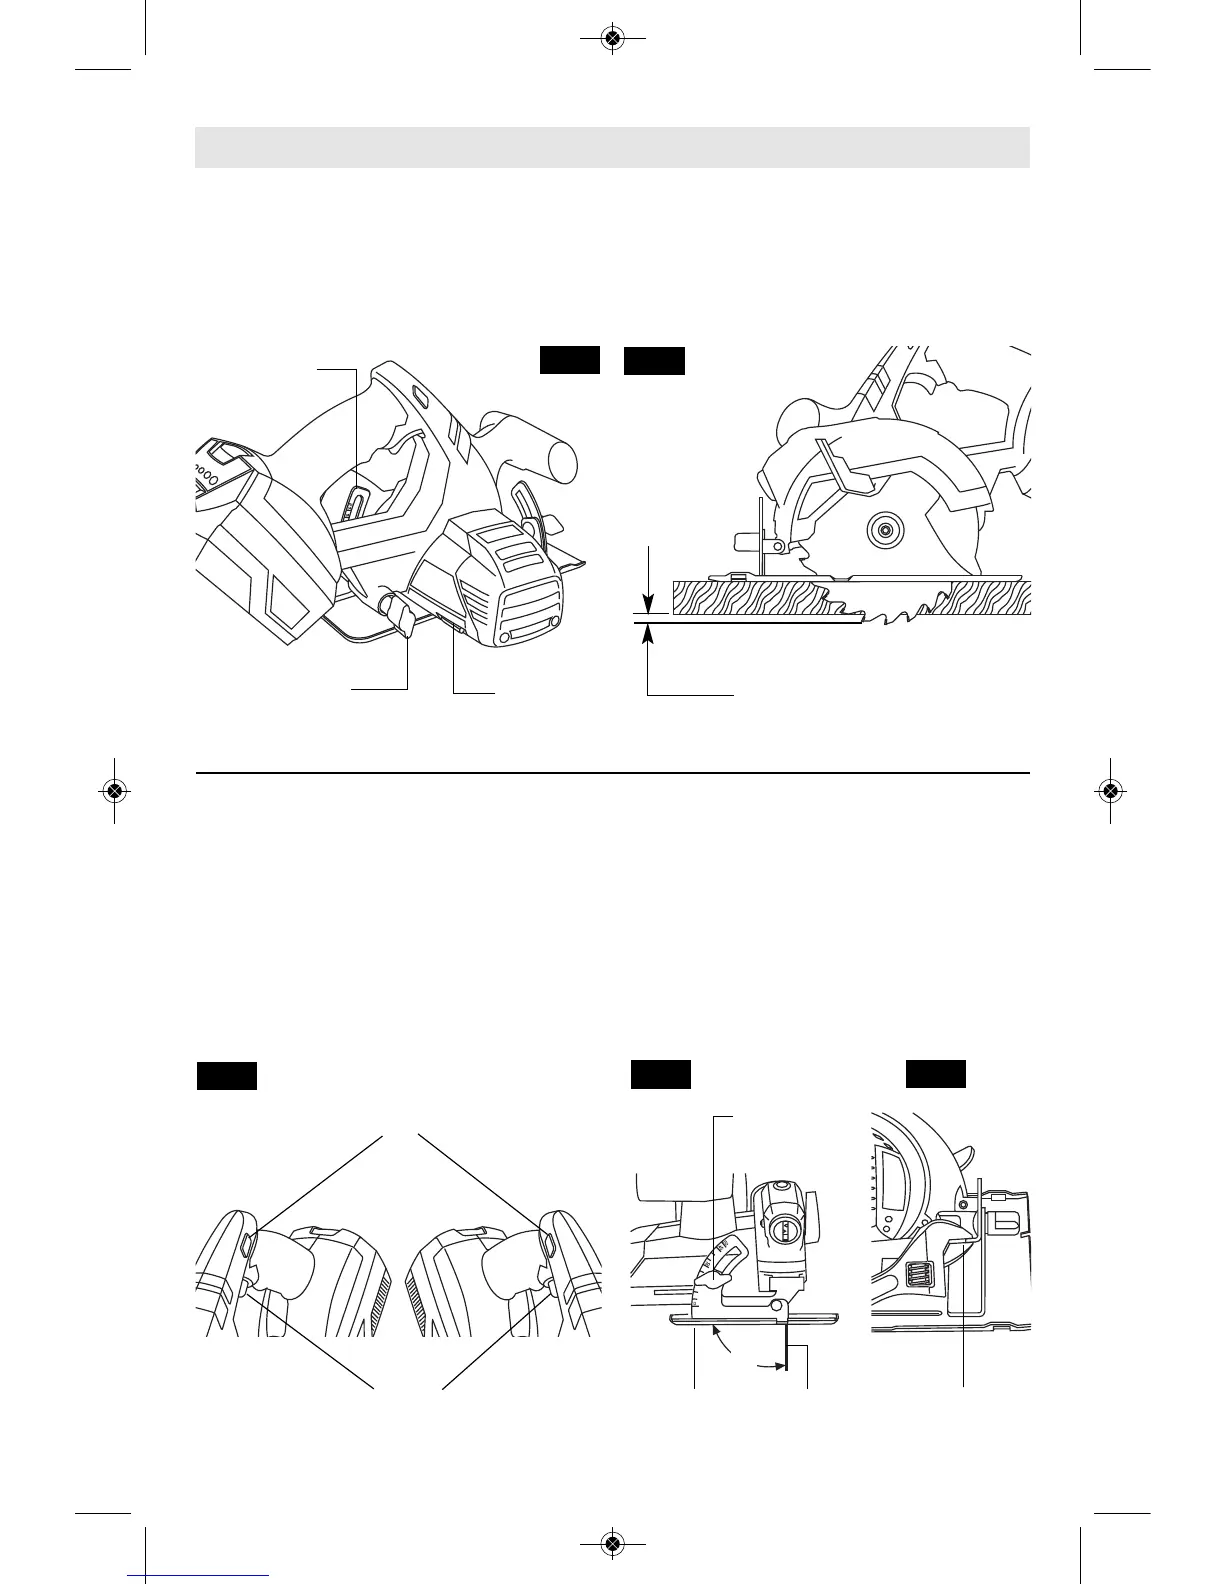
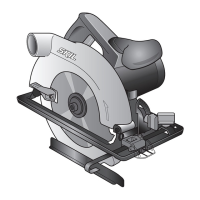
Disconnect battery pack from tool. Loosen the
depth adjustment knob located on the right
side of the tool. Hold the foot down with one
hand and raise or lower saw by the handle.
Tighten knob at the depth setting desired.
Check desired depth (Fig. 3).
Not more than one tooth length of the blade
should extend below the material to be cut, for
minimum splintering (Fig. 4).
&',&*'
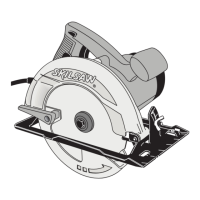
The safety switch is designed to prevent
accidental starts. To operate safety switch,
press the release button with your thumb on
either side of handle to disengage the lock,
then pull the trigger (Fig. 5). When the trigger
is released the button will engage the safety
switch automatically, and the trigger will no
longer operate. (See Switch & General Cuts
on page 13.)
H(''!!
Disconnect battery pack from tool. Set foot to
maximum depth of cut setting. Loosen bevel
adjustment knob, set to 0° on quadrant,
retighten knob and check for 90° angle
between the blade and bottom plane of foot
with a square (Fig. 6). If adjustment is
necessary, tilt foot to 50°, tighten bevel
adjustment knob and bend "TAB" with an
adjustable wrench or pliers (Fig. 7).
#'(&' !'
"=2?.A6;4;@A?B0A6<;@
FIG. 3
FIG. 4
FIG. 5
FIG. 7
FIG. 6
ONE TOOTH LENGTH SHOULD
PENETRATE WOOD FOR
MINIMUM SPLINTERING
DEPTH
ADJUSTMENT
KNOB
CALIBRATED
DEPTH BRACKET
BLADE
WRENCH &
STORAGE AREA
SAFETY SWITCH
RELEASE BUTTON
TAB
BEVEL
ADJUSTMENT
KNOB
BLADE
TRIGGER
FOOT
90°
SM 1619X02639 06-10:1619X02639 12-08 6/18/10 3:04 PM Page 12