CAUTION
To avoid installation difficulties, do not run the garage door
opener until instructed to do so.
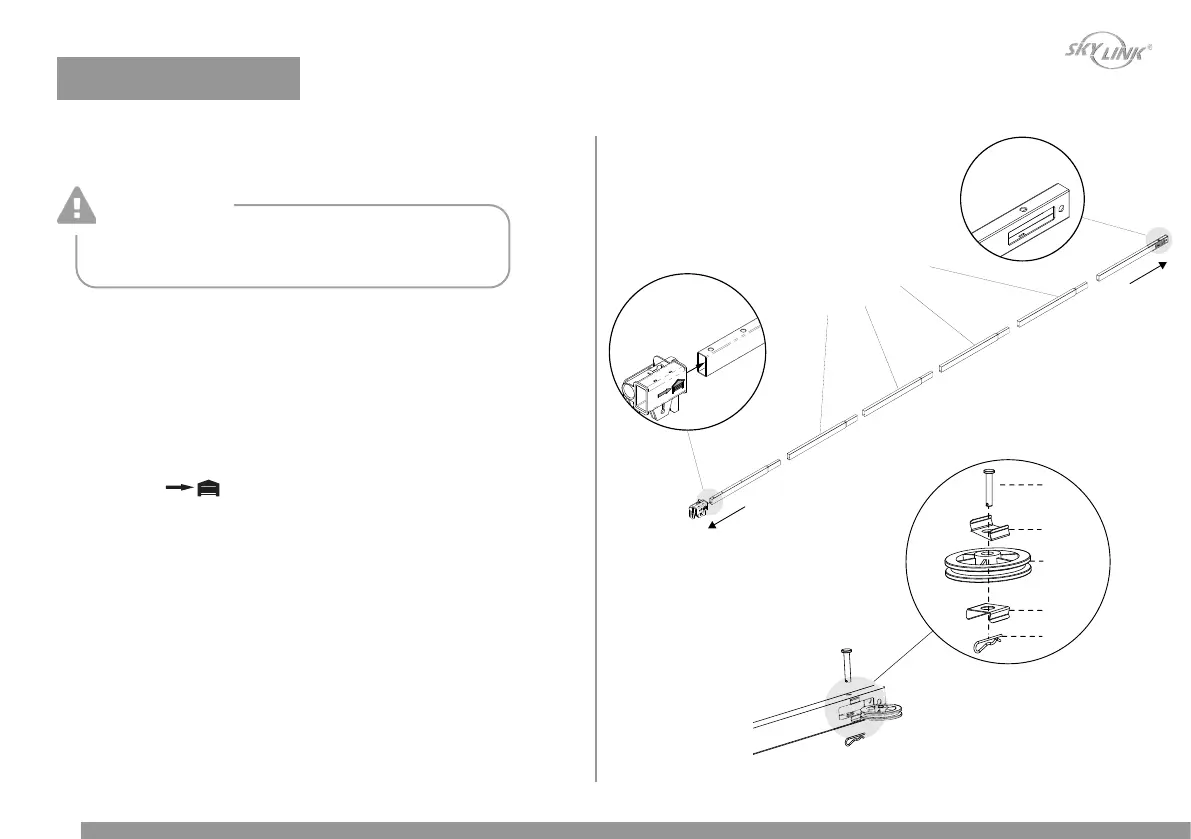
1. Align the rail sections [J1] on a flat surface as shown and slide the
tapered ends into the larger ones. Pay attention to the 2 unique rail
sections, the “Door End” and “Motor End” sections as shown.
2. Slide the Trolley Assembly [J3] from the “Motor End” as shown.
Note the [
] icon should point towards “Door End”.
3. Secure 2 clip washers [C3] into the “Door End” window as shown,
line up the holes on the clip washers and on the rail.
4. Place the idler pulley [J2] into the window as shown.
5. Insert the idler bolt [C1] from the top through the rail and pulley,
secure with the hitch pin [C2].
To prevent INJURY from pinching, keep hands and
fingers away from the joints while assembling the rail.
4 Middle
Sections
Motor End
Door End
To Motor
To Door
J3
C1
C3
C3
J2
C2
Step 1 – Assemble the rail and insert the trolley
7
ASSEMBLE THE RAIL

 Loading...