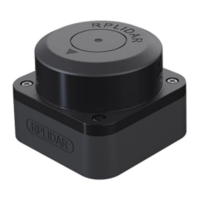
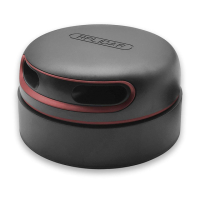
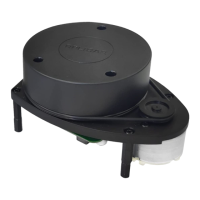
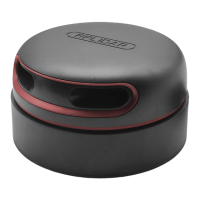
The RPLIDAR C1 is a low-cost, 360-degree laser range scanner designed for evaluating performance and initial development in various applications. It comes as part of a development kit that includes the RPLIDAR C1 unit itself, a standard USB cable, and a Micro-USB cable. This kit facilitates the observation of environmental scanning point cloud maps in RoboStudio and enables development based on the provided SDK.
Function Description:
The RPLIDAR C1 functions as a 360-degree laser range scanner, capable of collecting environmental scanning point data. It utilizes a separate 5V DC power supply for both its range scanner core and the motor system. The device is equipped with a drivable motor controller, allowing users to configure the scan frequency by adjusting the motor speed. For power-saving purposes, developers can also choose to turn off the motor. The RPLIDAR C1 communicates with a PC via a USB cable, which converts UART to USB using a CP2102 chip. This setup allows for easy connection and data transfer.
Important Technical Specifications:
The RPLIDAR C1 uses a standard XH2.54-5P male socket for its interface. The pin definitions are crucial for proper operation and development:
- Red (VCC): Power input, typically 5V DC, with an operating range of 4.8V to 5.2V. This supplies total power to the device.
- Yellow (TX): Serial port output from the scanner core, with an output voltage range of 0V to 3.5V.
- Green (RX): Serial port input to the scanner core, with an input voltage range of 0V to 3.5V.
- Black (GND): Ground connection, typically 0V.
The device's measurement resolution is sensitive to ambient temperature, highlighting the importance of operating within specified environmental conditions.
Usage Features:
- Easy Connection: The RPLIDAR C1 can be easily connected to a PC. First, connect the RPLIDAR C1 to the USB cable, then connect the USB cable to the PC via the Micro-USB cable. An indicator light on the USB cable will illuminate upon connection, though the RPLIDAR will not start scanning automatically at this point.
- Driver Installation: The USB cable requires a device driver for the CP2102 chip to function correctly. This driver is included in the SDK package or can be downloaded from Silicon Labs' official website. Installation involves selecting the appropriate driver version (x86 for 32-bit OS or x64 for 64-bit OS) from the "CP210x VCP Windows" folder. Once installed, the corresponding serial port name will appear in the PC's [Control Panel] -> [Device and Printers].
- RoboStudio Demo Application: SLAMTEC provides a Lidars plugin within RoboStudio for testing and evaluation. This GUI demo, compatible with Windows, allows users to view scan results directly and save them for further processing. For Linux and MacOS users, simpler demos are available in the SDK.
- Accessing Lidar Control Panel: In RoboStudio, click "File" -> "Lidars" to open the lidar control panel.
- Identifying RPLIDAR C1: Extend the "Serial Ports" list to find the connected RPLIDAR C1.
- Tool Buttons: Click the RPLIDAR C1 icon to reveal tool buttons. The left button adjusts motor speed, and the right button opens the tool bar in the main work area.
- Scan Data Display: Press the "Start Scan" button to display scan data. By default, the motor rotating speed is 10Hz. The serial number, version, and model of the RPLIDAR C1 are displayed in the lidar control panel.
- Zoom Functionality: Users can right-click in the main working area to zoom in or out of the scan view. The scan frequency is also displayed.
- Motor Speed Adjustment: The motor's rotating speed can be adjusted to suit different working environments or specific requirements. By pressing the motor speed adjustment button, a dialog box and dashboard appear, allowing users to enter a desired speed or drag a sliding handle. The motor will then operate at the set speed. The current actual rotating speed is shown in the upper left corner of the main work area (e.g., 10.02Hz).
- SDK Support: SLAMTEC offers RPLIDAR SDK support for both Windows and Linux platforms. The SDK source code can be embedded into other operational or embedded systems, providing flexibility for developers. The SDK documentation provides further details on the RPLIDAR protocol, application notes, and sample code for configuring scan frequency.
Maintenance Features:
- Troubleshooting (Protection Mode): If the scan core or laser power operates abnormally, the scan core will enter a protection mode. This state can be retrieved via the SDK API. To resolve this, users should send a "restart" command to reset the scan core.
- Pre-Heating for Best Performance: For optimal measurement accuracy, it is recommended to pre-heat the RPLIDAR. This involves starting the scan mode and allowing the scan motor to rotate for more than 2 minutes before taking measurements.
- Ambient Temperature Considerations: The RPLIDAR's measurement resolution is sensitive to ambient temperature. To prevent damage and ensure proper functioning, avoid using the RPLIDAR in extreme temperatures, specifically above 40°C or below -10°C.