5
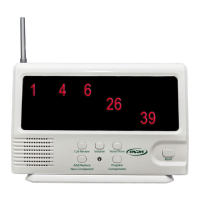
Features Explained
If your system is sent out with the components pre-programmed, please
follow the steps below:
1. Insert batteries into all components.
2. Plug in AC adapter or insert 4-C batteries into the 433-CMU.
3. For bed or chair pads, apply 30 seconds of pressure to initialize the pad(s).
4. Select ALARM or CALL on the side of the 433-CMU
• ALARM is a siren sound
• CALL is the tone selected using the VOICE/TONE button (Recommended)
5. Select the desired tone and volume on the 433-CMU
• To change tone, move switch on side to “Unlock”, press Voice/Tone till you get the desired tone or
language
• Then switch to “Lock”.
6. Test system by activating each component. Components will be labeled with the corresponding number to
the 433-CMU. Press Reset Button to stop alert/reset CMU.
If you have completed the steps above and need additional help, please feel free to contact us
and our world-class customer service team will be happy to help. Call 800-650-3637.
Pre-Programmed Instructions
1. Call Review Button - Used to review previous alerts (must use this button as the reset button to use this feature
and not erase history)
2. Volume Button - Increase or decrease the alert volume
3. Replace Components Button - Button used when replacing components to your CMU
4. Programming Light - Will light up when CMU is in programming mode
5. Program/Add Components Button - Button used when programming components to your CMU
6. Voice/Tone Button - Choose between tone alert or language option ( English, French or Spanish)
7. Reset Button - Button used to reset your CMU when alerting
8. Call/Alarm Switch - CALL is the tone selected using the VOICE/TONE button (Recommended) and ALARM is a
siren sound.
9. Silencer Port - By placing a silencer pin in this port, there will be no audible alert - only recommended if using a
pager
10. Lock/Unlock Switch - Used to lock the CMU so programming cannot be changed
11. AC Adapter Input - Connect AC adapter here to power CMU
12. Antenna - Increases the signal strength from components
13. Hook for Wall Mounting Bracket - Slide bracket o bottom of monitor. Use hooks on the back of the CMU to
hang on mounting bracket
14. Battery Compartment - Remove cover to insert 4-C batteries.
15. Base / Wall Mounting Bracket - Used as base when CMU is sitting on a table or slide bracket o bottom of
monitor to use as a wall mounting bracket