22
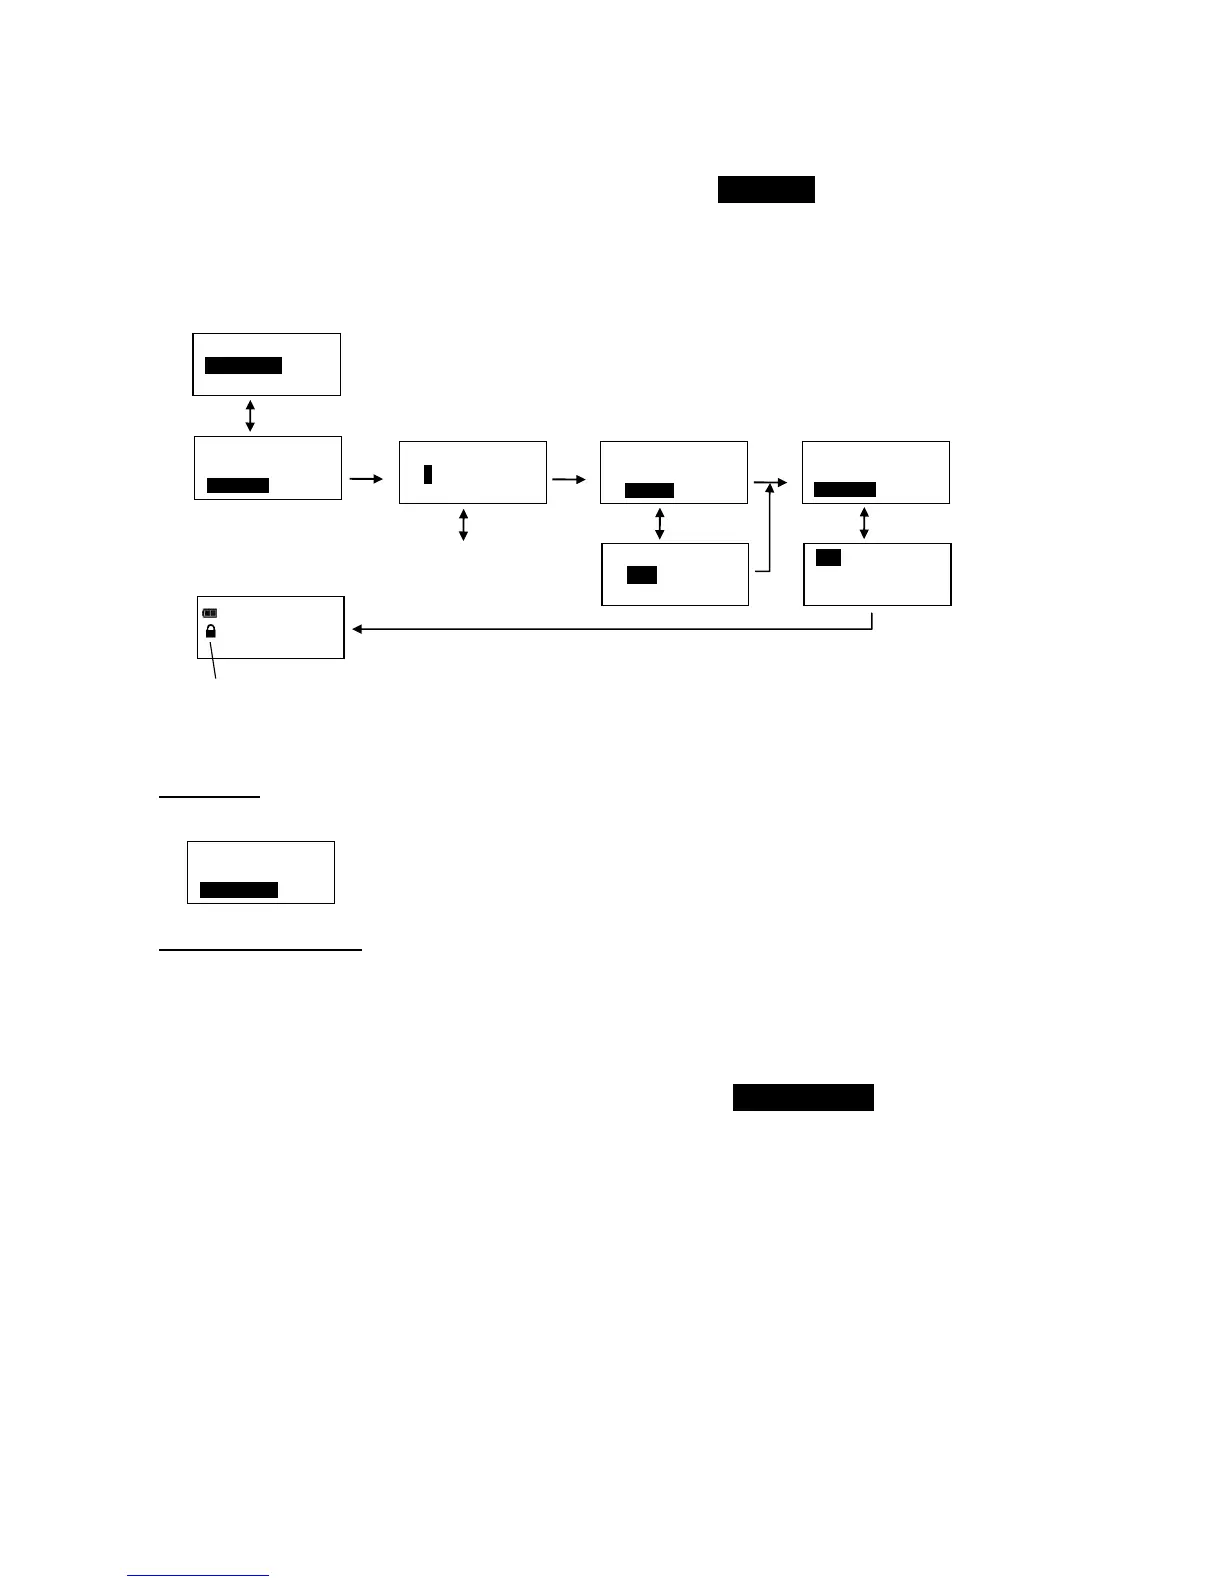
Job Mode function allows user to enable or disable wrench preset Job mode. When in Job mode,
wrench executes presets in order configured and automatically switches to next preset when batch
count reaches zero. Wrench is locked and Preset lock icon is displayed when Job mode is enabled.
Note: Password entry is required to enable Job Mode. When enabled, password entry is required to re-
enter Configure menu (refer to ControlTech™ Micro Calibration manual for default password).
1. From Configure menu, use UP/DOWN buttons to highlight JOB MODE selection then press ENTER
button.
2. Job Mode enable/disable screen is displayed.
3. Use UP/DOWN buttons to select ENABLE or DISABLE.
4. Press ENTER button to accept selection and exit to Configure menu.
Note: Text "JOB" is displayed between PSET number and batch count when enabled.
Calibration
Calibration menu is password protected. Refer to ControlTech™ Micro Calibration manual.
Setting Date and Time
Set Date/Time function allows user to set real-time-clock date and time for time stamping data
records, recording last calibration date and notifying user of an expired calibration interval.
Note: When date and time is set for first time, In-Service date is also set and is used for calculating
initial calibration interval (see "Setting Calibration Interval" in Advanced Configuration section).
1. From Configure menu, use UP/DOWN buttons to highlight SET DATE/TIME selection then press
ENTER button.
2. SET DATE screen is displayed with year highlighted.
3. Use UP/DOWN buttons to set year then press ENTER button to highlight month.
4. Use UP/DOWN buttons to set month then press ENTER button to highlight day.
5. Use UP/DOWN buttons to set day then press ENTER button.
6. SET TIME screen is displayed with hour highlighted.
7. Use UP/DOWN buttons to set hour then press ENTER button to highlight minutes.
8. Use UP/DOWN buttons to set minutes then press ENTER button to highlight seconds.
9. Use UP/DOWN buttons to set seconds then press ENTER button.
10. Clock is set and Configure menu is displayed.
Note: Year selection will scroll up from 2014. Month selection will scroll from 1 to 12. Day selection will
scroll from 1 to 31.