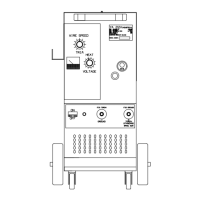
1. Turn the machine on “l” using the switch C . The warning
lamp D will light to indicate that the machine is on.
2. Press the torch trigger briefly to open the flow of compressed
air. Since the arc is not lit, air leaves the torch for only 5 sec.
3. Now adjust the pressure, shown on the pressure gauge F
to 4.7 bar or 68 psi Lift the knob to adjust. Clockwise will
increase and counterclockwise will decrease. Then lock the
knob by pressing it downward.
4. Connect the grounding clamp to the work piece. The cutting
circuit must not be deliberately placed in direct or indirect
contact with the protective wire except in the work piece.
If the work piece is deliberately grounded using the
protective conductor, the connection must be as direct as
possible and use a wire of at least the same size as the
cutting current return wire, and connected to the work piece
at the same point as the return wire using the return wire
clamp or a second grounding clamp placed in the immediate
vicinity. Every precaution must be taken to avoid stray
currents.
5. Use the knob M to adjust the cutting current from 20 to 55A
based on the work at hand. Use a 0.9mm nozzle up to 35A
and a 1.1mm nozzle for 35-55A. Be sure to use the two-point
spacer (PLASMA2504) with the 1.1mm nozzle.
6. Make sure that the ground clamp and the work piece are in
good electrical contact, especially with painted or oxidized
metal or with insulated coating; connect the clamp as close
as possible to the cutting area.
Do not connect the grounding clamp to the part of the
material that is to be removed.
7. Press the torch trigger to strike the pilot arc. If cutting does
not begin within 2 seconds, the pilot arc goes out; press the
trigger again to re-strike it.
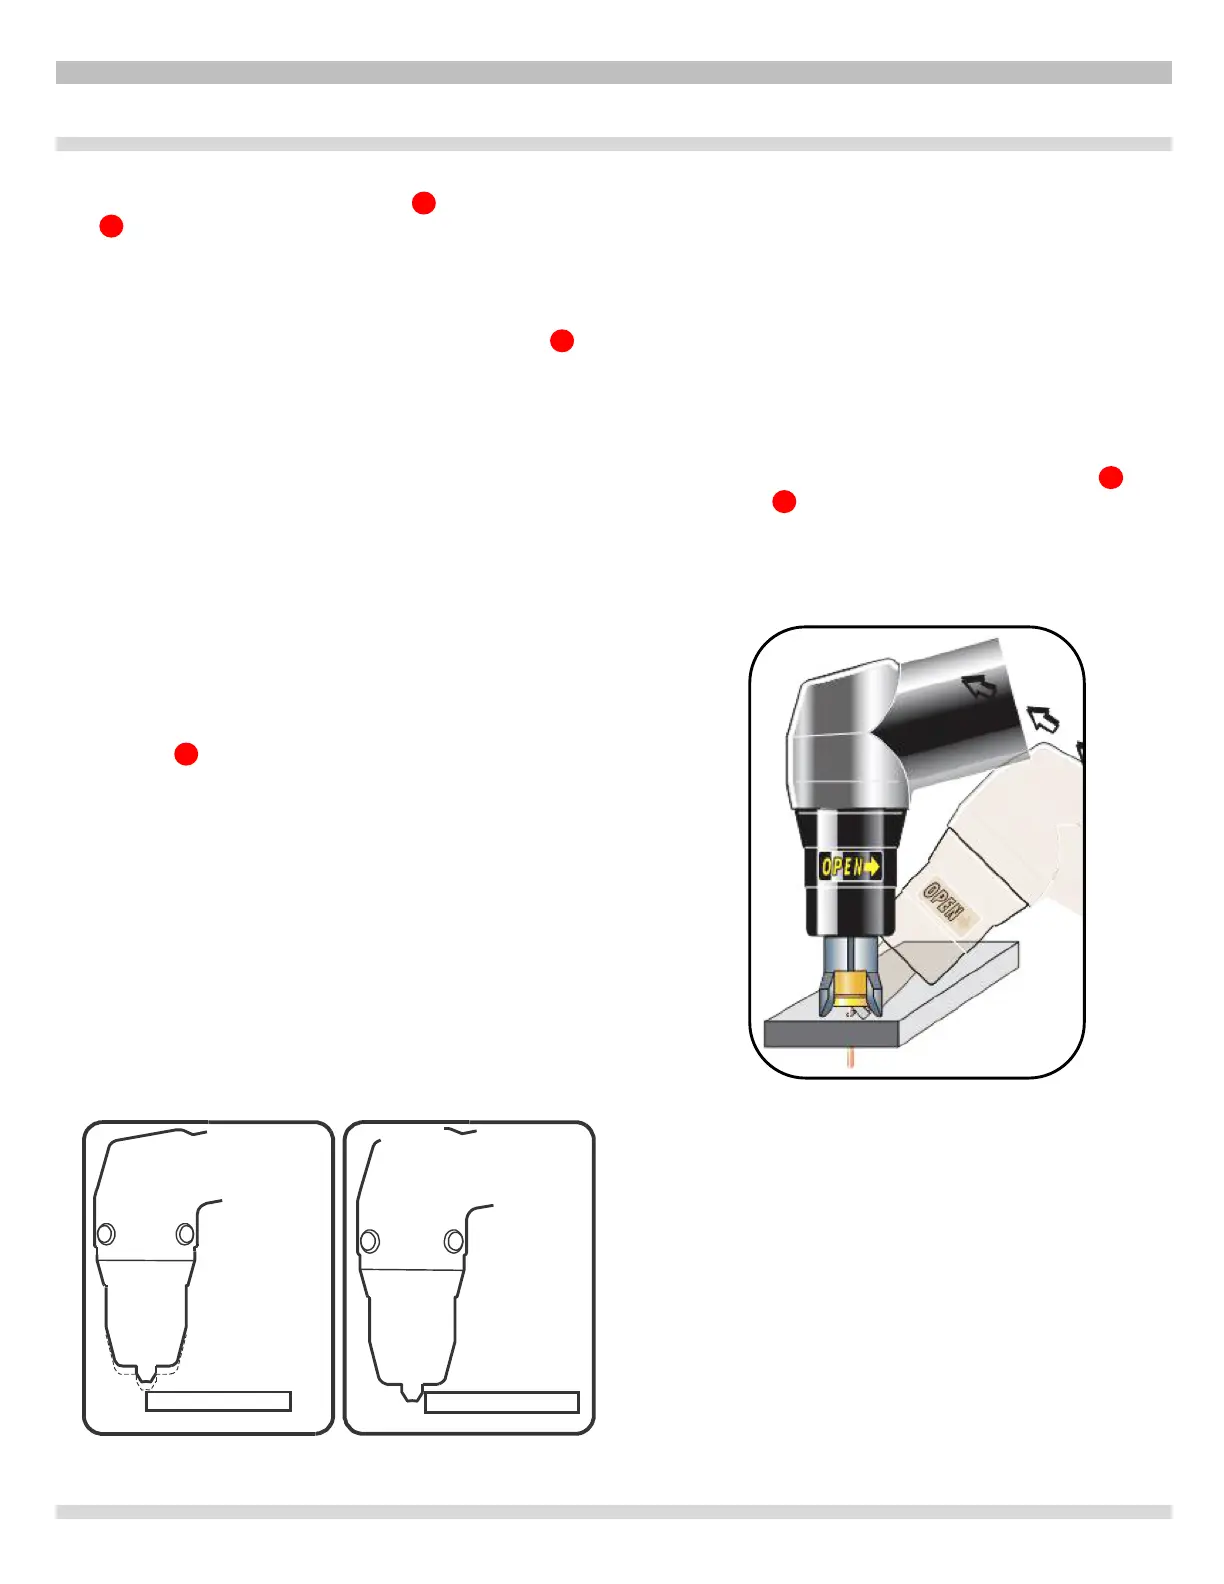
8. Begin cutting as shown in Fig. 2/A, avoid starting as
shown in Fig. 2/B
9. Hold the torch upright while cutting.
10. When you have finished cutting and released the
trigger, air will continue to leave the torch for
approximately 40 seconds to allow the torch to cool
down. It is best not to turn the machine off until
this cool- down period is complete.
• To cut perforated or grid metal, activate the "Pilot
self restart" function using the push-button P
(LED O lit). When you have finished cutting,
holding this push-button down will cause the pilot
arc to restart automatically. Use this function
only if necessary to avoid unnecessary wear
on the electrode and nozzle.
Should you need to make holes or begin cutting from
the center of the work piece, you must hold the torch
at an angle and slowly straighten it so that the nozzle
does not spray molten metal (see fig. 3). This must be
done when making holes in pieces more than 3 mm
or .118” thick. (12 gauge = .105”)
Should you need to cut several layers of metal, adjust
the cutting current to the minimum values.
Turn the machine off when the task is complete