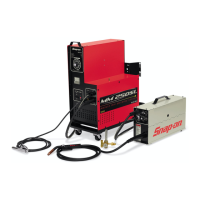
13
TIG Welding DC Basic Setup
• With High Frequency Start
• Using the On/Off Switch
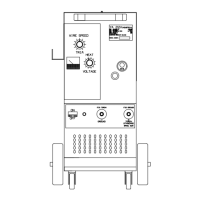
Push the procedure selector switch (Left Hand Down
Arrow). This push-button selects the welding procedure
(MMA or TIG). When selected, one of the following LEDs
lights:
B , C , or D
Push the button until the TIG DC LED lights .
Then push the Mode Key E (Right Hand Down Arrow).
When selected, one of the following LEDs lights:
F,G,H,L,M,N. Continue to push the button until the L LED
lights along with the G LED.
L - LED. TIG welding with arc started with
high frequency.
G LED. Continuous 2-stage TIG welding
(manual).
P - SELECTOR (Right Arrow)
When this button is pushed, the following LEDs light in
succession:
S - LED
Slope up. This is the time in which the current, starting from
the minimum, reaches the set current value. (0-10 sec.)
AA – Knob
Adjusts the slope up time while watching the Z display.
Z – Display
Displays the settings selected.
Set the slope up to “0” seconds.
Push the P – Selector (Right Arrow) until the T –
LED main welding current display lights.
(10-130A in MMA and 5-150A in TIG)
Turn the AA knob while watching the Z display.
Z DISPLAY
Adjust the display to the required main welding amperage.
Rule of Thumb: “1 amp per .001 of plate thickness. (.125 =
~125 amps)
** May require multiple passes.
Push the P – Selector (Right Arrow) until the W –
LED main welding current display lights.
W - LED
Slope down. This is the time in which the current reaches
the minimum and the arc shuts off. (0-10 seconds).
Turn the AA -Knob watching the Z - Display.
Set the slope down to “0” seconds.
Push the P – Selector (Right Arrow) until the X –
LED post gas display lights.
Post Gas Adjusts the time gas flows after the welding
ends. ( 0-30 seconds)
Turn the AA - Knob watching the Z - Display.
Set the post gas to “10” seconds.
Basic TIG DC Setup is Complete.
 Loading...