Machine Assembly
20 21
03
/04
04
/04
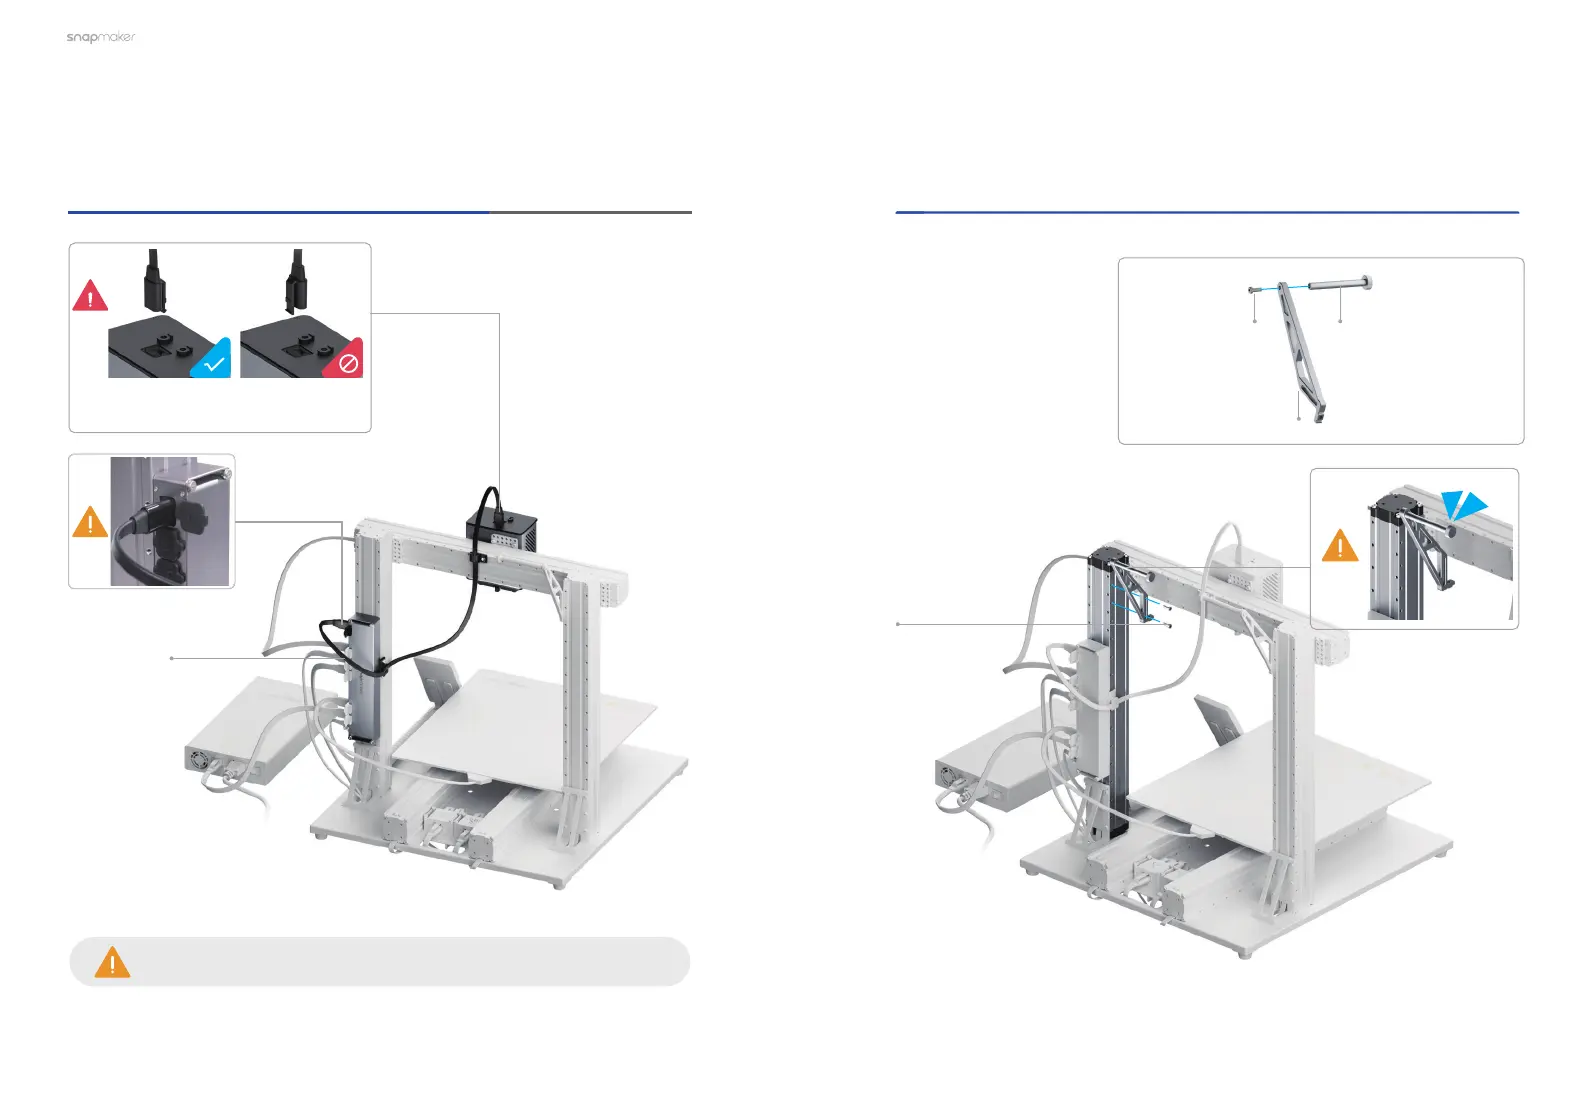
Connect the Dual Extrusion Module with the controller, and
then lock the Toolhead Cable into place.
Toolhead Cable
×1
Make sure there is enough cable length for the toolhead to move.
Attach the new Filament Holder to the other Z axis.
M4×10 Screw
×1
New Filament Holder
Tube
×1
New Filament Holder Sheet
×1
M4×10 Screw
×2
Make sure the connector is in the
right direction.