3D Printing
30 31
3.3 Calibrate the Dual Extrusion Module
: Turn on the machine > connect your machine to a Wi-Fi network > swipe
left on the Touchscreen > tap Settings > Firmware Update > Check for Updates
> Update Now > Complete.
: Download our firmware from https://support.snapmaker.com > insert the
USB flash drive into the controller > turn on the machine > swipe left on the
Touchscreen > tap Files > tap USB > tap the firmware file to update.
3.1 Firmware Update
Before use, update the firmware to version 1.15.0 or later. For Touchscreen
installed with the firmware of V1.9.0 or later, you can update via Wi-Fi or USB
flash drive. For firmware previous to V1.9.0, update only via USB flash drive.
Turn on the machine. Read the Safety Notes, and then tap Conrm, the
machine will automatically enter the Guide process.
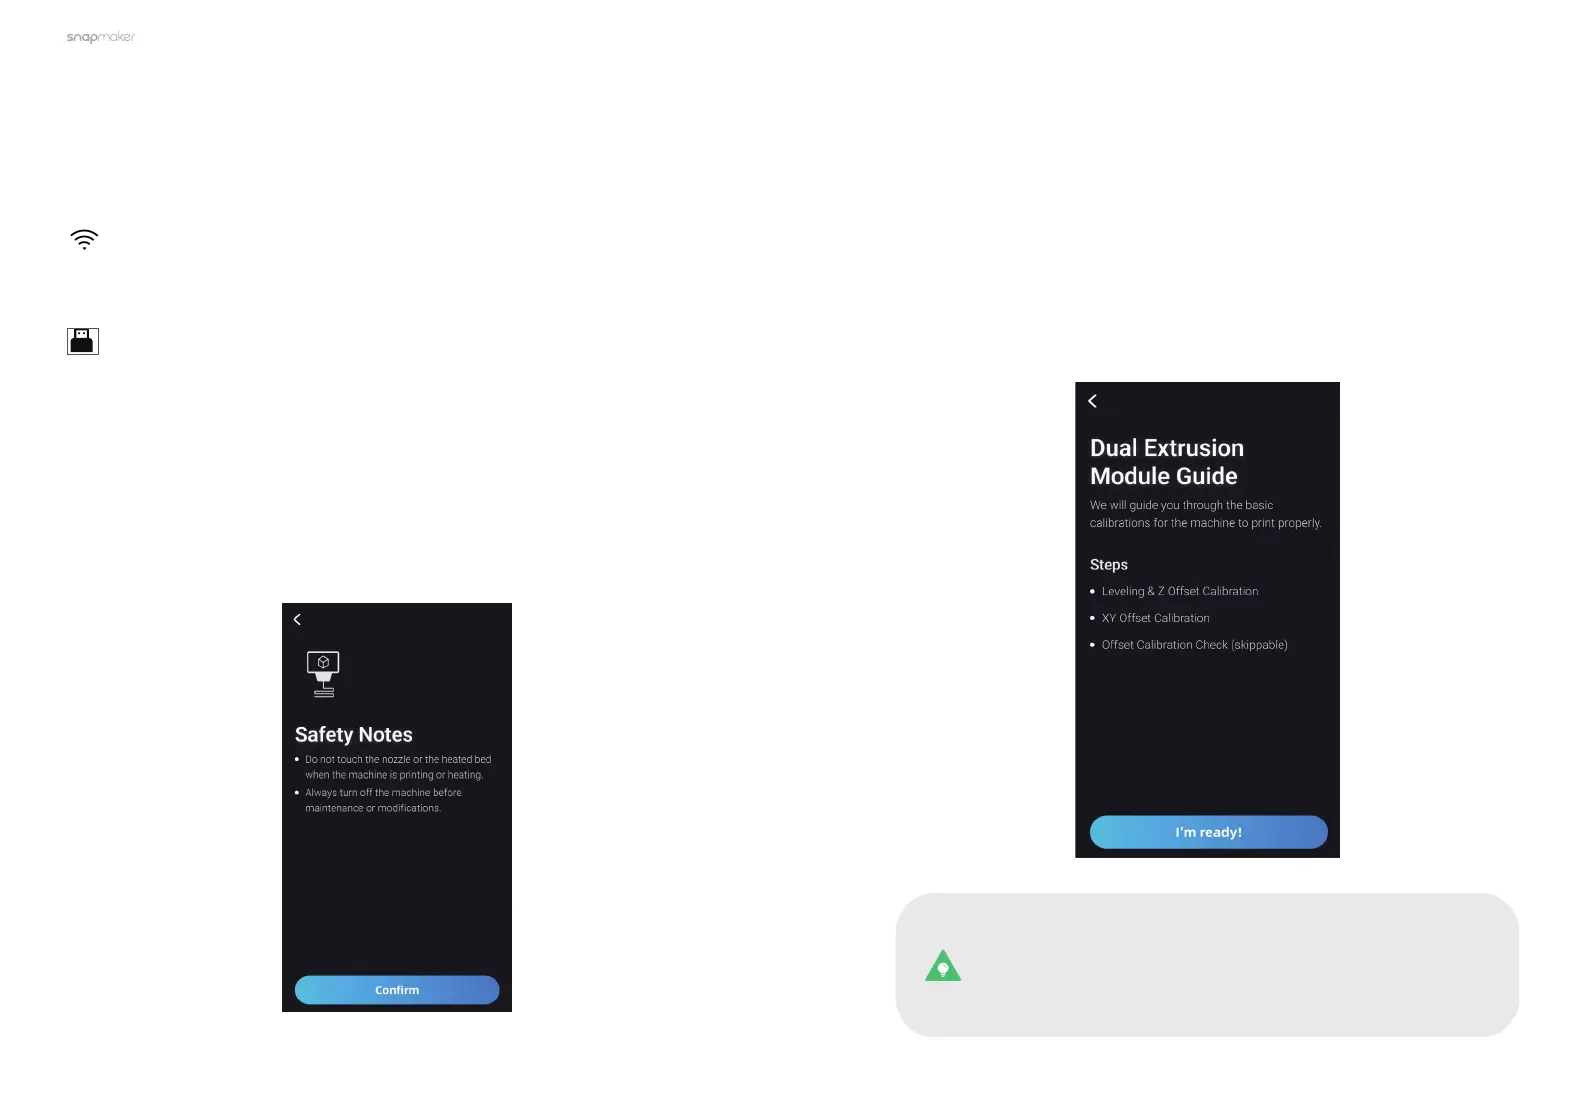
3.2 Read Safety Notes
For the first-time use of the 3D printing function, the Touchscreen will walk
you through the necessary calibration processes so that the Dual Extrusion
Module can work properly.
You will have to complete three processes following the calibration wizard:
Leveling & Z Offset Calibration, XY Offset Calibration, and Offset Calibration
Check. Before you start the calibration, we recommend that you read this
section to learn about each process.
This calibration wizard appears only the first time you use the
Dual Extrusion Module. To redo the calibrations later, swipe left
on the homepage of the Touchscreen > select Settings > Dual
Extrusion Module Guide.