31
32
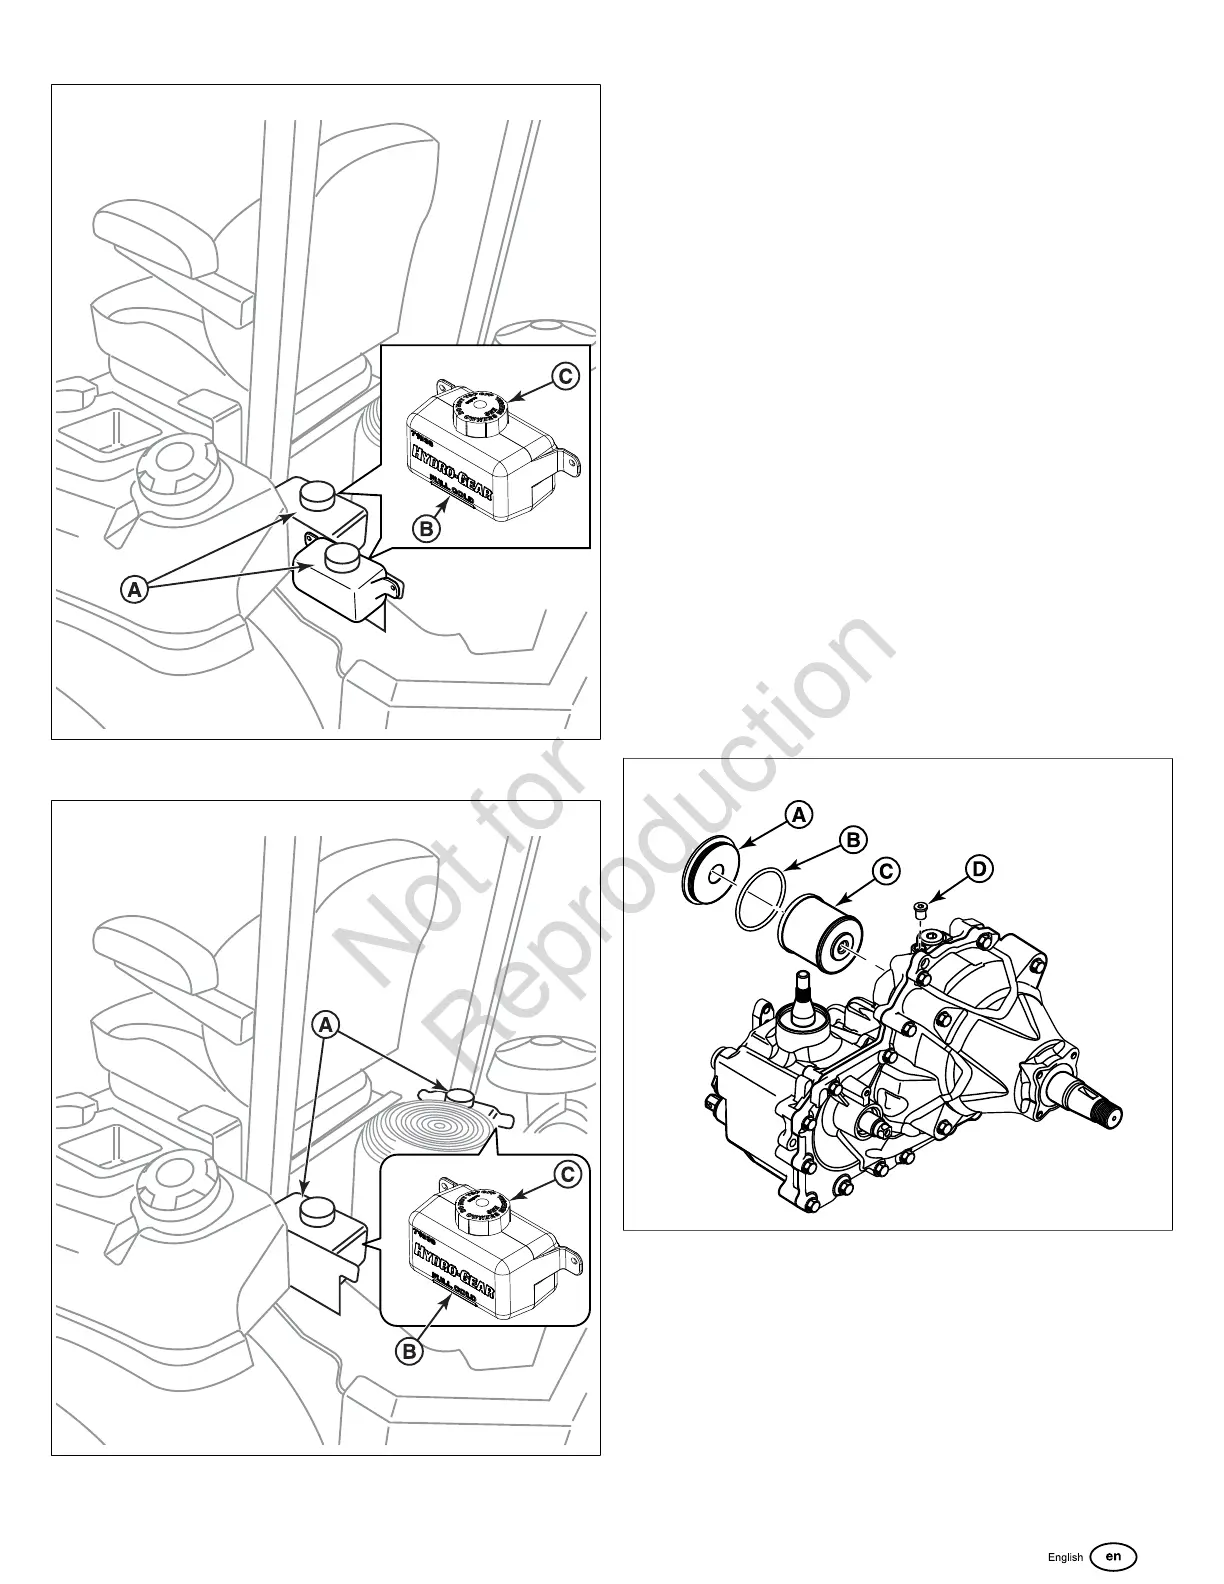
All Other Models:
33
2. Check the oil level when the unit is cold. The oil should be
up to the "FULL COLD" mark (B) on the transmission oil
tanks. If the oil is below this level, proceed to step 3.
3. Before removing the tank cap (C), make sure that the
area around the tank cap and fill neck of the tank is free
of dust, dirt, and other debris. Remove the tank caps.
4. Add oil up to the "FULL COLD" mark.
5. Re-install the tank cap.
6. After adding oil to the tanks, it may be necessary to purge
air from the hydraulic system. If the unit is not driving
properly perform the Purging the Air from the Hydraulic
System procedure.
Transmission Oil Filter Change
Change Interval: Every 400 Hours or yearly (Initial hydraulic
oil and filter change after first 100 hours of operation).
Filter Part Number: 5101987X2
Note:Removing the oil filter from the transaxle will drain the
oil tank. Have a suitable container ready to catch any spilled
oil. The manufacturer recommends that this be a dealer-only
service item.
1. Locate the hydraulic oil filter on the side of the transaxle.
2. Remove the oil filter cover (A, Figure 34) from the
transaxle to drain the oil. Remove the O-ring (B) from the
cover and discard the O-ring.
34
3. After the oil has drained from the transaxle, remove the
oil filter (C) from the transaxle housing.
4. Install a new filter and a new O-ring onto the filter cover
and install the filter cover. Torque the filter cover to
480-580 in-lbs (54.2 - 65.5 Nm).
5. Remove the top oil fill vent port (D) and fill the transaxle
with new 20W50 motor oil through the expansion tank
until the oil reaches the oil fill vent port.