45
69
12. Turn the adjustment nut (E) until the measurement is
achieved. Re-tighten the jam nut.
13. Re-install the mower deck guards and the floor pan.
14. Run the mower under no-load condition for about five (5)
minutes to break in the new belt
Long Left Hand Deck Belt Replacement
NOTICE To avoid damaging belts, do not pry over
pulleys.
1. Park the unit on a smooth level surface such as a
concrete floor. Disengage the PTO, engage the parking
brake, turn the ignition switch to OFF, and remove the
ignition key.
2. Lower the mower deck to it’s lowest cutting position and
remove the mower deck guards and floor pan to gain
access to the mower deck drive belts.
WARNING
Use extreme caution when rotating the idler arm with the
breaker bar, due to the increased tension in the spring
as the idler arm is being rotated. Injury may result if the
breaker bar is prematurely released while the spring is
under tension.
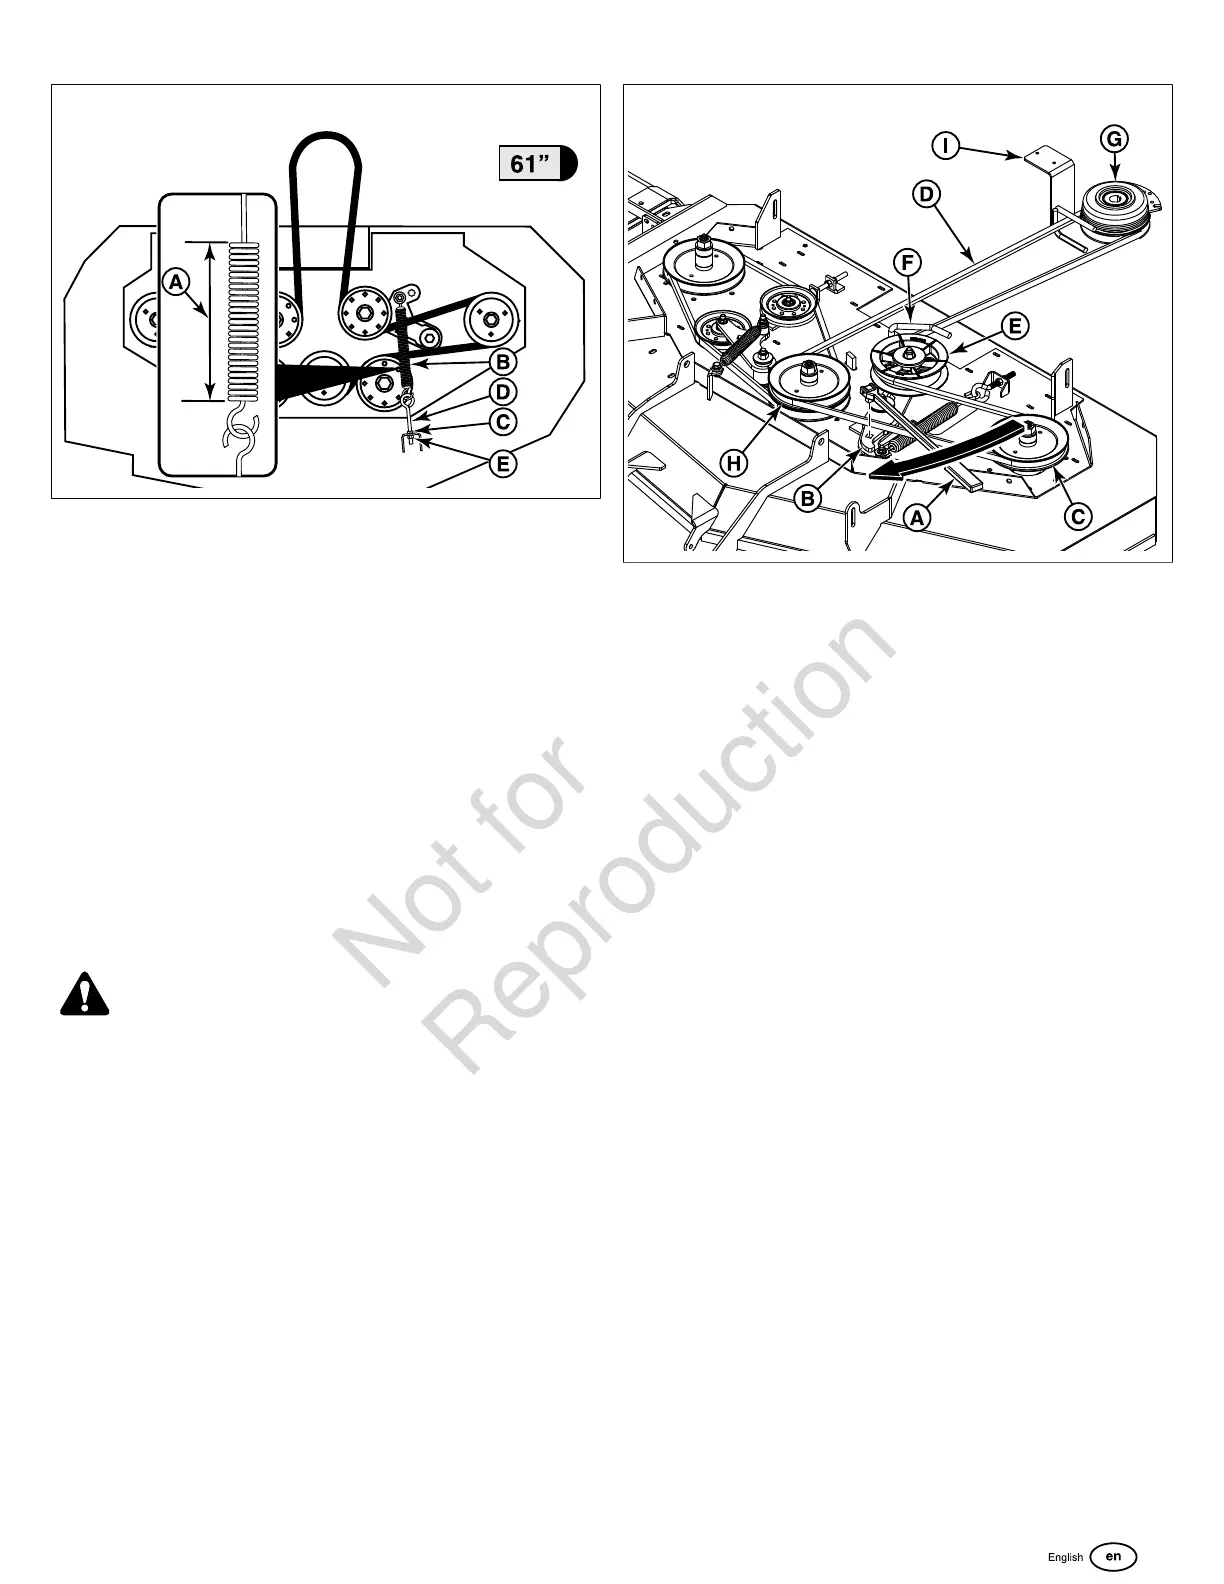
3. Using a 1/2" breaker bar (A, Figure 70) place the square
end in the opening in the PTO clutch drive idler arm (B)
and rotate the idler arm clockwise, which will relieve
tension on the belt exerted from the idler arm. Remove
the belt from the left hand side spindle pulley (C).
Carefully release the tension on the breaker bar.
70
4. Remove the long left hand belt (D) from the adjustable
idler pulley (E) and it’s belt guide (F).
5. Remove the old long left hand belt from the PTO clutch
pulley (G) and the top groove of the center spindle pulley
(H).
6. Install the new long left hand belt onto the PTO clutch
pulley and the center spindle pulley.
7. Install the long left hand belt into the belt guide on the
adjustable idler pulley.
8. Verify that the V-side of the belt runs in the pulley grooves
of the center spindle pulley and the PTO clutch pulley.
Make sure that the back side of the belt contacts the face
of the adjustable idler pulley. Make sure that the belt is
correctly routed in the belt guides (F & I).
9. Using a 1/2" breaker bar place the square end in the
opening in the PTO clutch drive idler arm and rotate the
idler arm clockwise, which will relieve tension on the belt
exerted from the idler arm. Install the long left hand belt
onto the left hand spindle pulley. Carefully release the
tension on the breaker bar.
10. Measure the coil-to-coil length (A, Figure 71) of the long
left hand belt tensioning spring (B). The measurement
should equal 10-1/4" (26 cm). If not, loosen the jam nut
(C) on the eye bolt (D) and then turn the adjustment nut
(E) until the measurement is achieved. Tighten the jam
nut.