35
USER MAINTENANCE GUIDE
ADJUSTMENT AND MAINTENANCE OF THE CHASSIS
This document can not be reproduced or released without the Sodikart authorization.MAN.GT4.EN.01
Keep go-kart in original configuration
Use spare parts of Sodikart origin
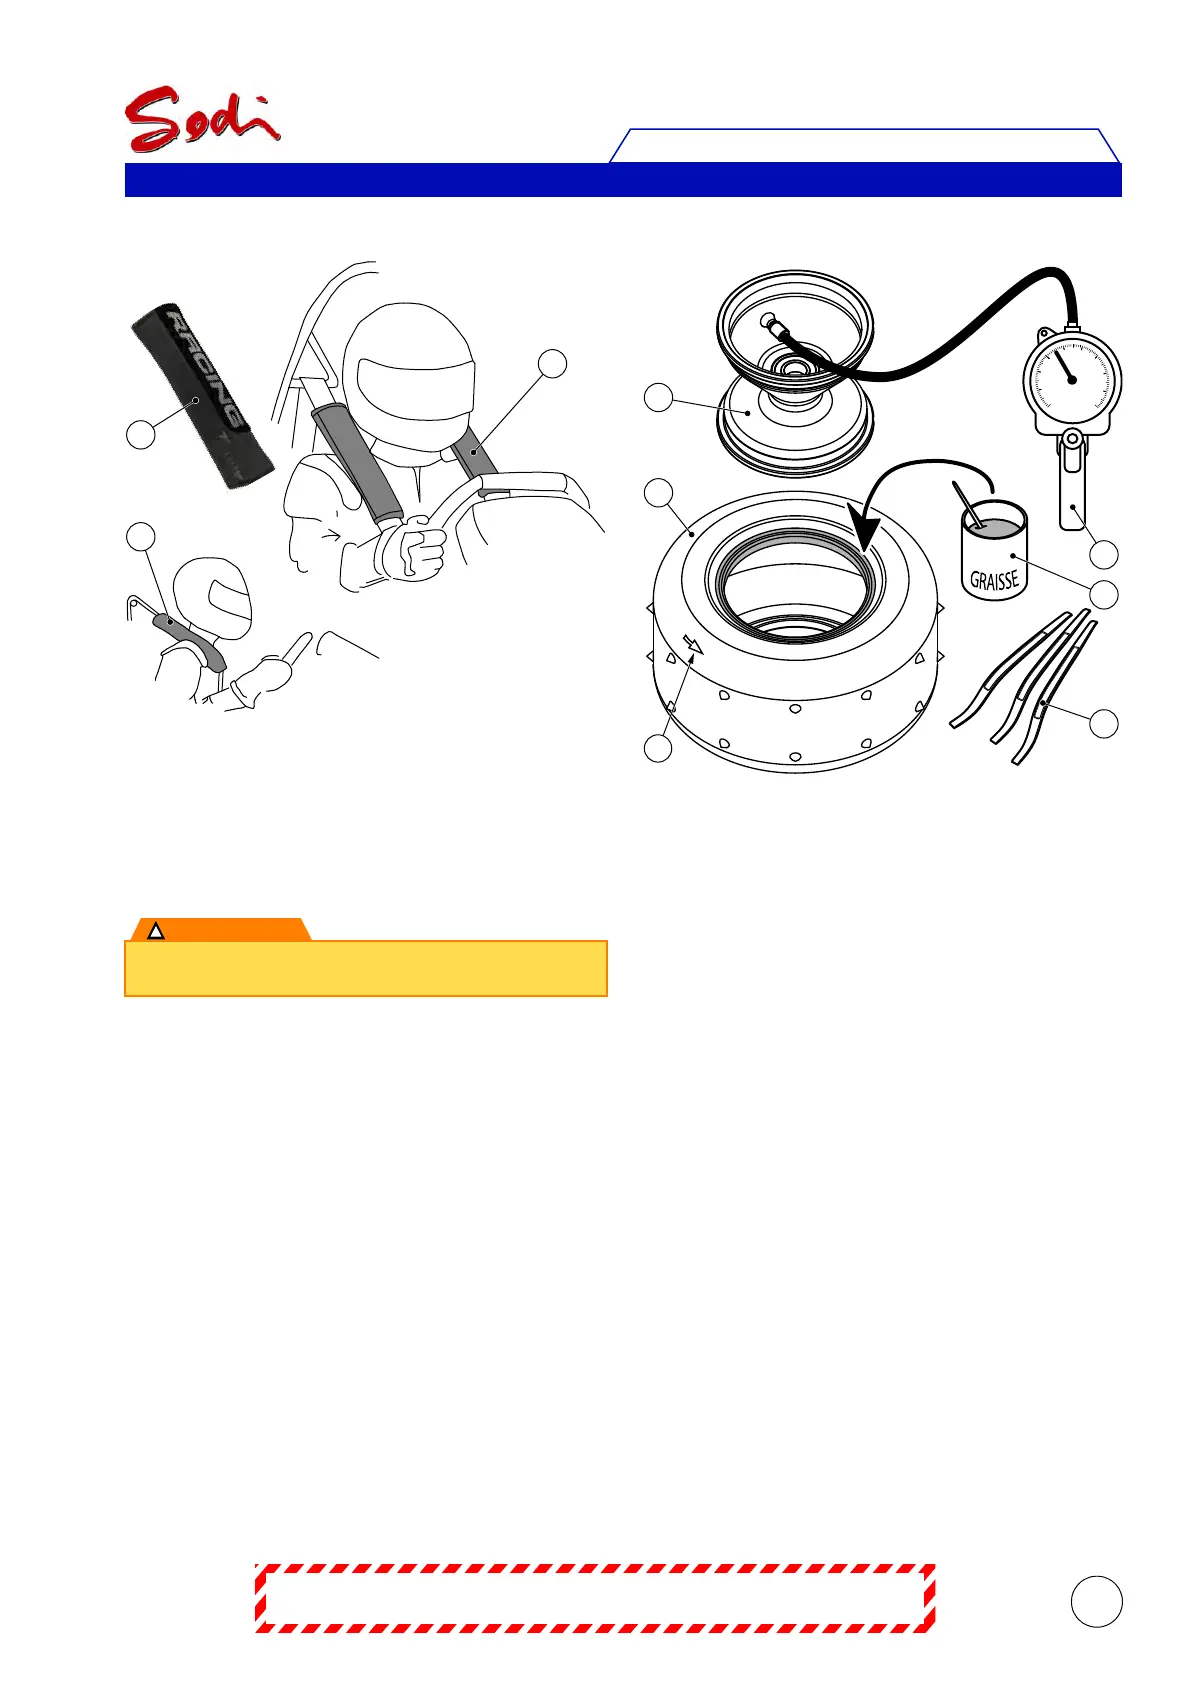
Neck protection for harness
Légende
1Sleeve
• Check that the sleeves (1) are properly installed on
the harness straps.
• Check that the sleeves are placed on either side of the
driver's neck..
To limit the risk of injury, the sleeves must always be
placed alongside the driver's neck.
4.13 - Studded tyres change
Legend
1Rim
2 Studded tyre
3 Direction of rotation
4 Inflation system
5 Grease
6 Tyre iron
• Place the go-kart on a trolley.
• Remove the front wheel or rear wheel with the proper
size wrench.
• Place the wheel on a tyre remover for strip off the
studded tyre (available in the ITAKA catalogue).
• When the tyre (2) is detached on both sides, remove it
completely using tyre irons (6) (available in the ITAKA
catalogue).
• Take the new tyre and grease the tyre in order to
make assembly and removal easier.
• Replace the tyre (2) on the valve side of the wheel rim
(1) ensuring the correct rotation direction.
• Once the tyre is correctly positioned, inflate with a
compressed-air line to a pressure of 3.5 bars so that
the walls make a good seal with the wheel rim. Then
deflate to recommended pressures.
• Reinstall the wheel on the go-kart.
• Check the tightening torque of the mounting nut.