SET-UP CHECKLIST
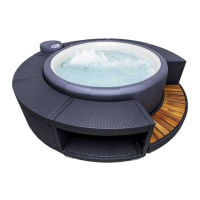
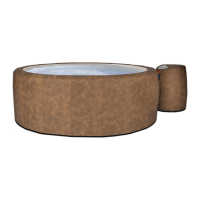
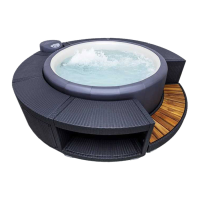
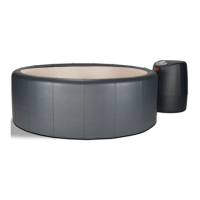
________ 2. Set the HydroMate beside the Softub on the same level surface. Align the hoses from the HydroMate
with the fittings on the tub.
________ 3. Place the clamps over the hose so that the drive nut is on the top of the hose, the head facing the direction
most easily accessible to tighten.
________ 4. Push the HydroMate towards the tub while guiding the hoses over the tub fittings. Push together until the
end of the hose is flush with the back end of the black fitting on the tub. Then connect the airline (smaller)
hose.
________ 5. Slide the hose clamps towards the tub. The hose clamp should be 2 cm from the end of the hose. Tighten the
hose clamps with a nut driver or straight slot screwdriver.
________ 6. With tub and HydroMate connected, make sure placement allows easy access to all components BEFORE
beginning to fill tub. Adjust tub and HydroMate placement, if necessary.
________ 7. Do not plug in the HydroMater until the tub has been completely filled.
________ 8. Before adding water, smooth out all wrinkles from bottom of tub by pushing liner to tub wall.
Softub 300: line up top seam of seat liner as close as possible to the edge of the seat.
________ 9. Add 4-5 cm of warm water (not over 38 C - 100.4 F) and work out remaining wrinkles on the bottom then
continue filling.
Softub 300: Push wrinkles out in front and top of seat. Hold liner in corners of the seat until water has
completely covered the seat.
________ 10. Fill remainder of Softub until water is 5 cm above the highest jet.
________ 11. Check for leaks at the hose connections as the Softub is filling. If a leak is observed, stop filling, make sure
the hoses are properly sealed and the hose clamps are tight.
________ 12. Plug the HydroMate into a standard, grounded, three prong, 110 Volt outlet.
________ 13. Place the foam hose insulation between the tub and the HydroMate . Attach the vinyl cover around the foam
and fasten with the velcro tabs.
________ 14. Treat and test the water in accordance with the Water Treatment Guide.
________ 15. The Softub is now ready to heat to the desired temperature. Replace the bi-fold lid, close the air control
and adjust the temperature to the desired setting. The water temperature will rise at about 1 to 2 per hour,
depending on the model. The Softub will run until the water reaches the set temperature. You should then
fine-tune the dial setting, with the + or - button, until the preferred temperature is reached.
It is the responsibility of the tub owner to make sure the above installation conditions are met as well as
to follow the safety and warning instructions. Softub Canada is not responsible for any damage, which
may result from water spillage, excessive humidity or structural loading. Please take all precautions
necessary to ensure years of joyful use of your Softub.
________ 1. All Softub models come with locking straps. Be sure to place the safety straps in an “X” fashion under the tub
prior to filling.
®®
®
®
®
®
°°
®
®
°°
4
 Loading...