20
PSX-NL4 Network Module - Operation Manual
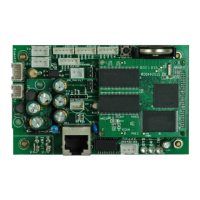
3.1.2 Network Module Data, & History and Control Sections
Below the Basic Site Information are the parameters and settings related to the PSX-NL4 board and the Web Interface
itself (See Figure 3.1 page 19).
Enclosure
Temperature
This is the temperature of the PSX-NL4 board. The temperature sensor is installed on the PSX-
NL4's PC board. The temperature may be set to be displayed in either Fahrenheit or Celsius, based
on the setting of the "Temperature" radio buttons on the bottom right of the Home page.
External
Temperature
If an external temperature sensor is connected to J18, this temperature display will display the
external sensor's temperature.
Current Sensor
Measurements
These will appear as the labels you set for the Current Sensors on the Configure page. In the ex-
ample shown, this is "HallSensor1" and "HallSensor2". These measurements are shown as a posi-
tive or negative current in Amps DC. A positive current measurement indicates current flow from
the longer red lead of the current sensor to the shorter red lead of the current sensor. If current
is being displayed in the opposite polarity than expected, swap the short and long red leads. See
section 1.3.4 for more information on the current sensor.
ADC Voltage
Measurement
This is the voltage measured by the on-board Analog-to-Digital converter (ADC) and will appear
as the label you set for the ADC input on the Configure page. In the example shown, this is "AD-
C1Reading". This measurement is shown as a positive or negative voltage in Volts DC.
Event1 Indicator This field shows the status of the Event1 input. It will appear as the label set for the Event1 input on
the configure page. In the example shown, this is "Event1". This field will show "Active" on a yellow
background or "Inactive" on a green background to indicate the status of the Event1 input.
Service Due This field will display "Yes" when the "Next Service Due" date programmed on the Configure page
has been reached and will display "No" before the due date. If the "Service Due" checkbox is enabled
on the Reporting page, the color of the "Service Due" field on the home page will change colors
based on the status. If service is due, the field will be yellow, if service is not due the field will be
green.
Control 1 and
Control 2 Status
These fields indicate the state of the two control outputs of the PSX-NL4. These control ouputs will
be labeled with the names given on the Configure page and can be manipulated with the Output
Control radio buttons in the History and Control section of the home page. The Control 1 and Con-
trol 2 fields will display "Off" with a white background or "On" with a green background.
View/Export History The PSX-NL4 saves a snapshot of data every hour, on the hour. These snapshots can be reviewed by
entering the number of events to view or export then clicking Go. There are up to 1000 hours avail-
able for review. In the page that opens, each row is a parameter and each column is snapshot of the
parameters at the time displayed in the date and time column. Click the Return button at the top to
return to the home page.
Device On/Off
Control
These two pairs of radio buttons select the state of the two Control Outputs of the PSX-NL4 board.
After changing the radio button, the "Submit" button must be clicked for the setting to take effect.
The labels entered for these outputs on the Configure page appear below the radio buttons.
Temperature This changes the display of the PSX-NL4 temperature between Celsius and Fahrenheit on the
browser display. The "Submit" button must be clicked for this setting to take effect.
3.1.3 Network Connected Devices Section
The bottom of the home page shows the devices connected to the Device connectors of the PSX-NL4 with a SPI cable.
Each device will display a photo of the device and the model number. The Device ID is a unique number given by the
PSX-NL4 to each device. The "Status" indicator shows the current status of the device. Green indicates a normal state and
yellow indicates a fault. A red indicator shows that an FAI request has been received by the device. To access the page for
a device, click either the photo of the device or the model number. See Section 3.2 of this manual for more information
on connected devices.