7.6 FCAW-S flux cored installation without gas
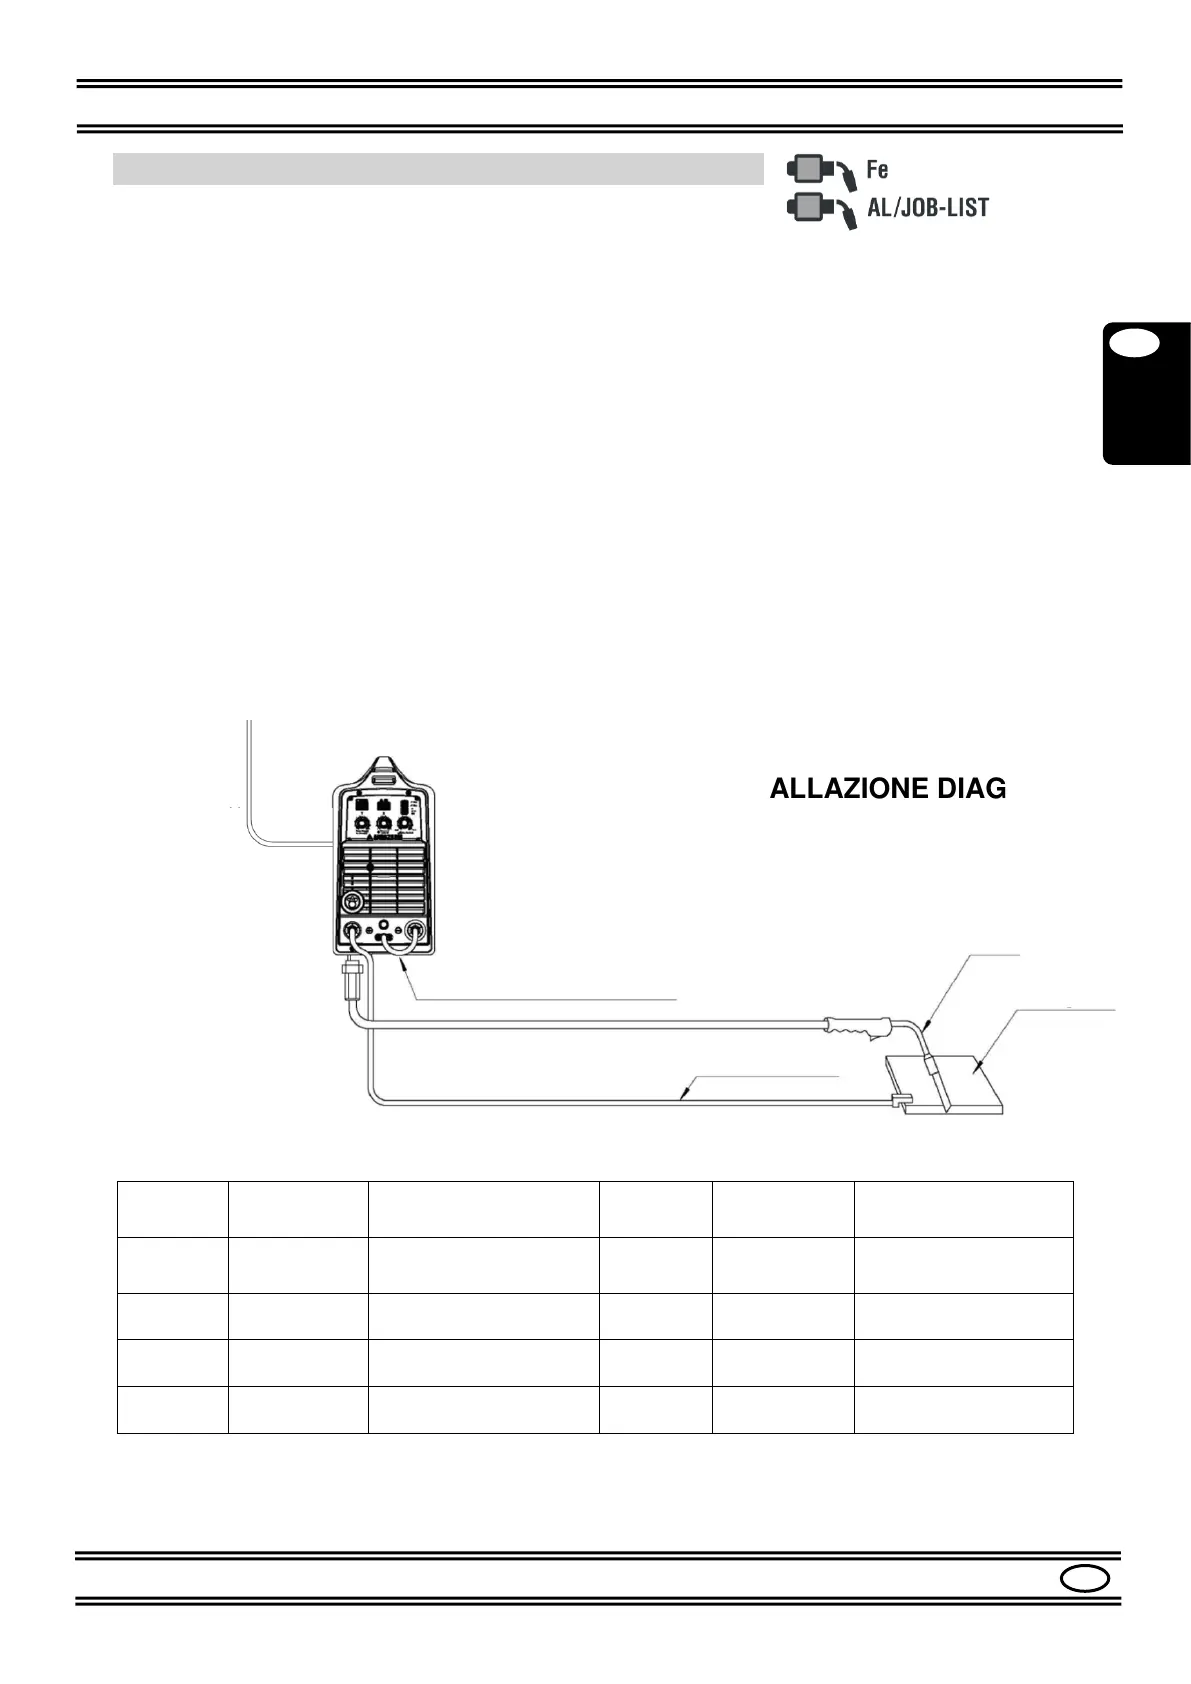
Please refer to Figures 1, 2, 3, 4.
- Make sure that the switch (9) is in the "0" position.
- Check that the selector (12) is in the "MIG GUN" position.
- Connect the MIG TORCH to the socket (6) of the machine.
- Connect the GROUND CABLE to the socket (5) (+) of the machine.
- Secure the other end of the ground cable to the piece to be welded, making sure there is
good electrical contact
- Connect the DINSE PLUG (4) to the socket (3) (-).
- Check that the drive ROLL (14) corresponds to the diameter of the wire to be used.
- Load the SPOOL of WIRE to be used in the support (15).
- Insert the wire into the wire guide tube, on the rollers and inside the torch for about 10
cm.
- Turn on the machine with the switch (9).
- Press the MODE button (18) to select the AlMg1.0 or JOB-LIST mode
- Select the 2-times, 4-times or 4-times Special cycle with the CYCLE button (17).
- Set the welding values with the knobs (19), (20), (21), see Par. 8.3.
- Adjust the other welding parameters as described in Par. 8.5 and refer to Table 4.
The machine is now ready for welding.
For the installations of Par. 7.4 to 7.6, refer to table 1.