Step 1: Mounting the Power Optimizers
For each of the power optimizers
(1)
:
1. Determine the power optimizer mounting location and use the power
optimizer mounting brackets to attach the power optimizer to the
support structure . It is recommended to mount the power optimizer
in a location protected from direct sunlight. For frame-mounted
power optimizers follow the instructions supplied with the optimizers,
or refer to https://www.solaredge.com/sites/default/files/installing_frame_
mounted_power_optimizers.pdf.
2.
If required, mark the mounting hole locations and drill the hole.
CAUTION!
Drilling vibrations may damage the power optimizer and will void the
warranty. Use a torque wrench or an electric drill with adjustable clutch that
meets the mounting torque requirements.
Do not
use impact drivers for
mounting the power optimizer.
Do not
drill through the power optimizer or through the mounting holes.
3.
Attach each power optimizer to the rack using M6 (1/4'') stainless steel bolts, nuts
and washers or other mounting hardware. Apply torque of 9-10 N*m / 6.5-7 lb*ft.
4. Verify that each power optimizer is securely attached to the module support
structure.
5. Record power optimizer serial numbers and locations, as described in
Reporting and
Monitoring Installation Data
on page 43.
Step 2: Connecting a PV module to a Power Optimizer
NOTE
Improper wiring may cause electrical faults in a PV system. To avoid electrical
faults, verify proper locking of connectors and avoid cable tension and
friction. Proper planning, materials and installation reduce the risk of electric
arcs, short-circuits and ground faults in the PV system.
NOTE
Images are for illustration purposes only. Refer to the label on the product to
identify the plus and minus input and output connectors.
(1)
Not applicable to smart modules.
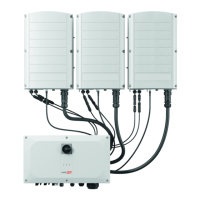
Three Phase Inverter with SetApp Configuration PN: SEXXK-XXXXIXXXX
17 Step 1: Mounting the Power Optimizers