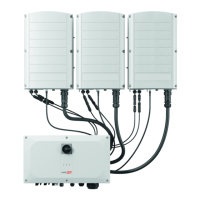
The DC Safety Unit has a manually operated switch for disconnecting the DC power of a
SolarEdge system. The DC Safety Unit is located below the inverter and is connected to
the inverter with AC and DC wires.
Designer
Designer recommends inverter and power optimizer selection per site size and enables
report generation. You can create a project in Designer and export the site design with
the string layout to the monitoring platform.
Monitoring Platform
The monitoring platform enables monitoring the technical and financial performance of
one or more SolarEdge sites. It provides past and present information on the system
performance both at the system and module levels.
SetApp
SetApp, a mobile application, that enables activating and configuring the inverter
through a smartphone.
Installation Procedures
The following procedures are used for installing and setting up a new SolarEdge site.
Some procedures, may also apply to modify an existing site.
1. Connecting Power Optimizers in Strings, page 18
2. Recording power optimizer serial numbers (optional), page 44
3. Mounting the inverter, page 27
4.
Connecting the AC and the Strings to the Inverter, page 33, or Connecting the AC
and the String to the DCSafety Unit,
5.
Activating, commissioning and configuring the system, page 40
6. Connecting the inverter to the monitoring platform, page 45
Installation Equipment List
Standard tools can be used during the installation of the SolarEdge system. The
following is a recommendation of the equipment needed for installation:
Allen torque screwdriver for 5mm screw type for the inverter enclosure screws
Allen torque screwdriver for M5/M6/M8 screw types
Standard torque flat-head screwdrivers set
Chapter 1: Introducing the SolarEdge Power Harvesting System 10
Three Phase Inverter with SetApp Configuration PN: SEXXK-XXXXIXXXX