the inverter and into the bracket. Tighten the screws with a torque of 4.0 N*m /
2.9 lb.*ft.
7.
Use a screw to secure the bracket that secures DC Safety Unit to the wall.
8. Verify that the inverter is firmly attached to the mounting surface.
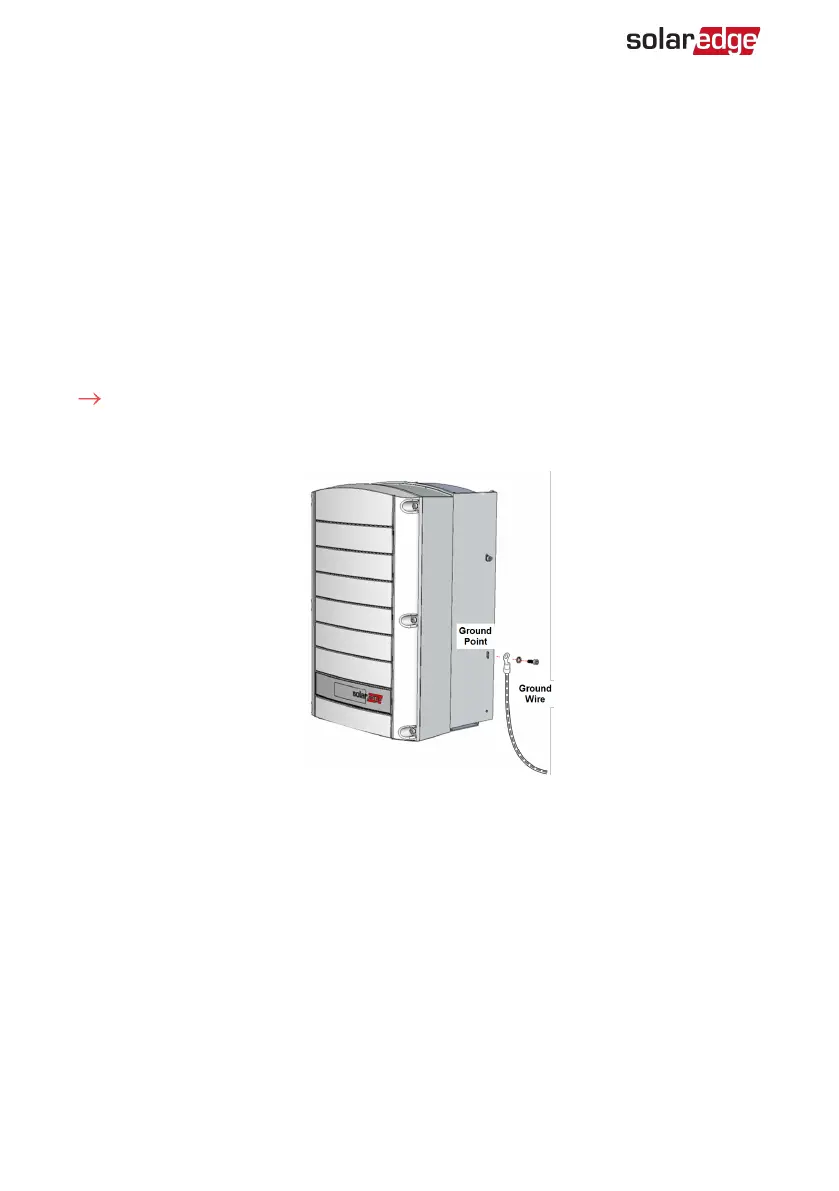
Grounding the Inverter
In some locations, local regulations requires grounding the chassis of the inverter. If
the Inverter is installed indoors, a ground wire should be connected to a building
electrical ground point. I f the inverter is installed outdoors, connect the inverter chassis
with a ground wire to a properly grounded point.
To connect the inverter to a Ground point:
1. Connect the lug of a Ground Wire to the Ground Point on either the right or left hand side
of the inverter chassis.
Figure 14: Grounding the Inverter
2. Connect the lug on the other side of the Ground Wire to the building electrical
ground point or properly grounded point.
Three Phase Inverter with SetApp Configuration PN: SEXXK-XXXXIXXXX
31 Mounting the Inverter