EasyManuals Logo

SolarEdge SE Series User Manual

SolarEdge SE Series
79 pages
To Next Page IconTo Next Page
To Previous Page IconTo Previous Page
Page #38 background imageLoading...
Page #38 background image
4.
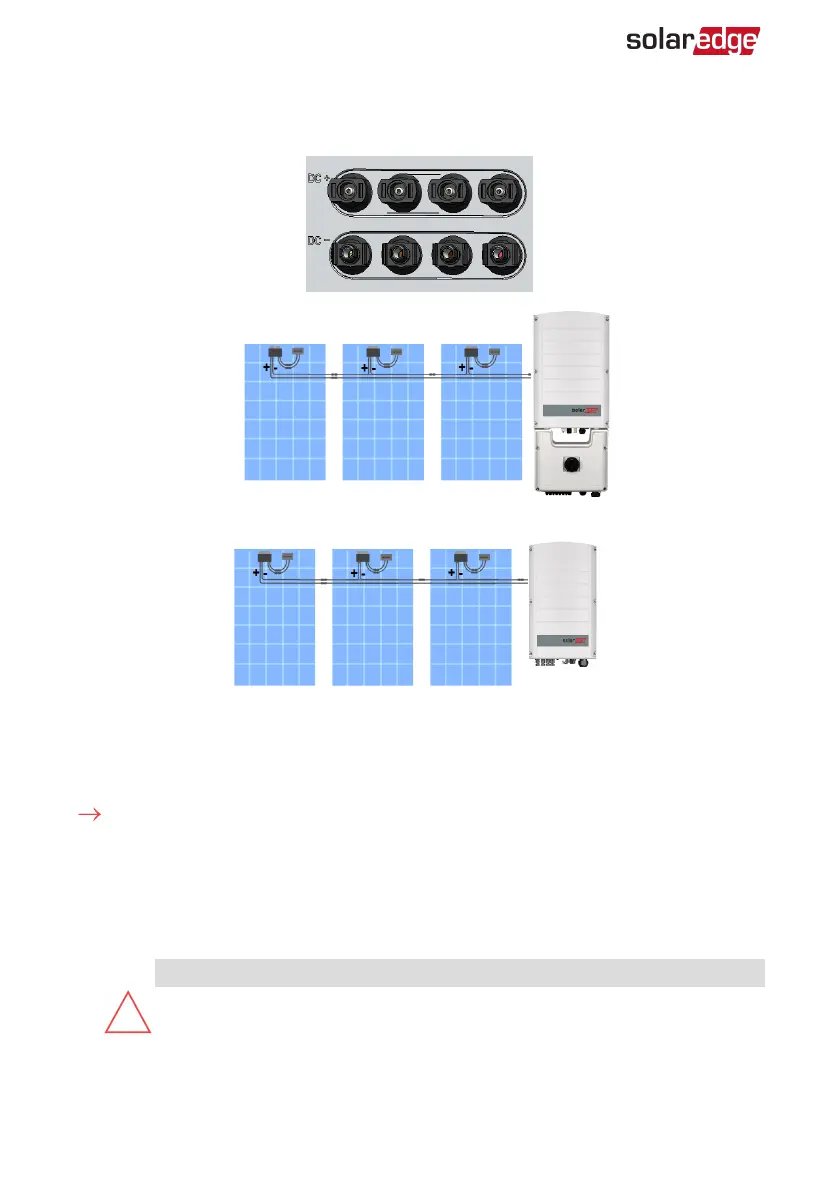
Connect the MC4 cable connectors coming from each PV string to the DC+ and DC-
connectors at the bottom of the inverter or DC Safety Unit.
Figure 18: Inverter/DC Safety Unit DC MC4 connectors
Connecting PV Strings to the DC Safety Unit with Glands
To connect PV strings to the DC Safety Unit:
1.
Turn OFF the AC circuit breaker
2.
Turn OFF the DC switch of the DC Safety Unit
3.
Turn OFF the ON/OFF/P switch of the inverter
4.
Loosen the four Allen screws and remove the cover of the DC Safety Unit .
CAUTION!
When removing the cover, make sure not to damage internal components.
SolarEdge will not be held responsible for any components damaged as a
result of incautious cover removal.
Three Phase Inverter with SetApp Configuration PN: SEXXK-XXXXIXXXX
37 Connecting the PV Strings to the Inverter

Table of Contents

Questions and Answers:

Question and Answer IconNeed help?

Do you have a question about the SolarEdge SE Series and is the answer not in the manual?

SolarEdge SE Series Specifications

General IconGeneral
EfficiencyUp to 99%
Protection RatingIP65
CommunicationEthernet, Wi-Fi (optional), RS485
DimensionsVaries by model
WeightVaries by model
Rated AC PowerVaries by model
Max. DC PowerVaries by model
ModelSE Series (e.g., SE3000H, SE5000H)
AC Output PowerVaries by model
MPPT RangeVaries by model
Operating Temperature-25°C to 60°C
Warranty12 years standard, extendable to 20 or 25 years

Related product manuals