3. Position the mounting bracket against the wall/pole and mark the drilling hole
locations (refer to
Mechanical Specifications
on page 84 for inverter and mounting
bracket dimensions):
Ensure that the flat edge of the bracket is at the bottom, as in
Figure 10
.
Use at least two bracket holes. Additional holes can be used to fix the
bracket. Determine which and how many holes to use according to
mounting surface type and material.
4. Drill the holes and mount the bracket. Verify that the bracket is firmly attached to
the mounting surface.
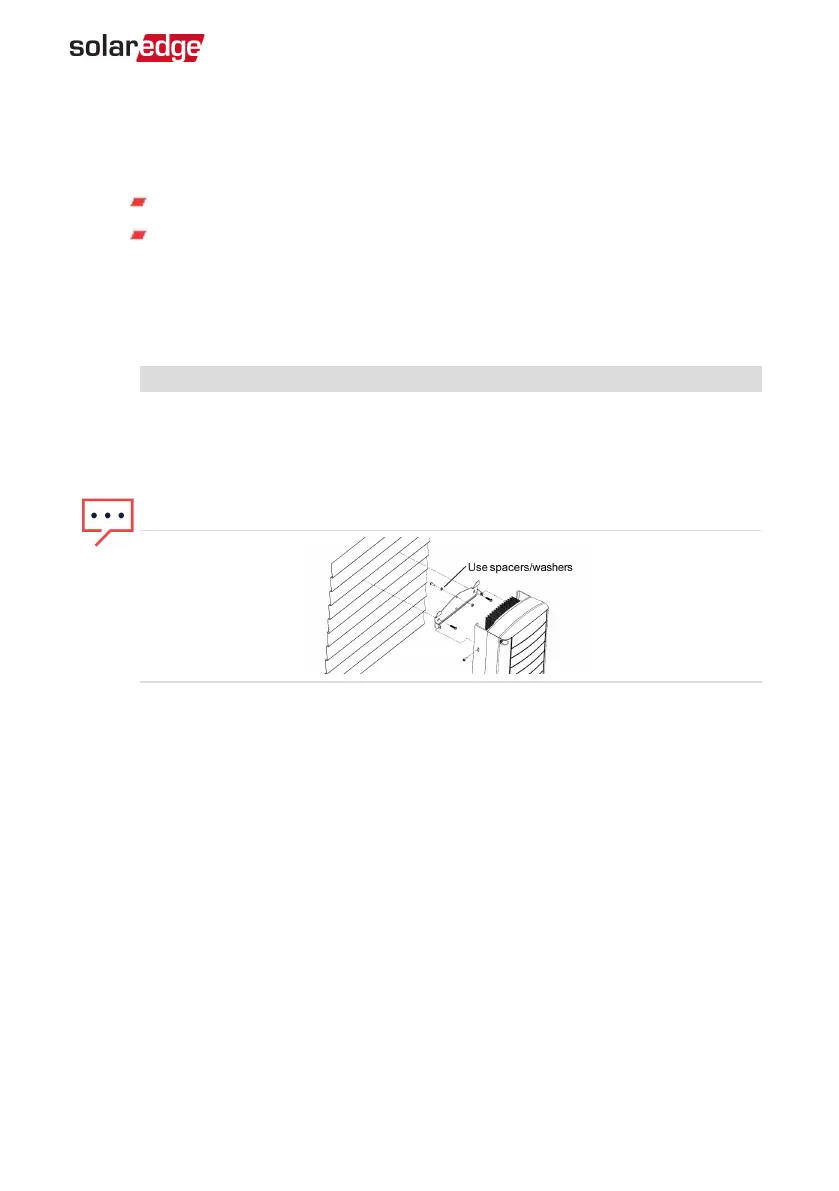
NOTE
When mounting an inverter on an uneven surface, you may use spacers/
washers behind the top mounting hole of the bracket. Depending on the
angle, use the appropriate size and number of spacers so that the bracket is
perpendicular to the ground. Recommended: a stainless steel 3/4" long screw,
with a 1/4" socket button head , two jam nuts and three washers.
5. Hang the inverter on the bracket (see
Figure 10
): Lift the inverter from the sides, or
hold it at the top and bottom of the inverter to lift the unit into place. Do not lift
holding the Connection UnitDC Safety Unit as it may be damaged.
6.
Align the two indentations in the inverter enclosure with the two triangular
mounting tabs of the bracket, and lower the inverter until it rests on the bracket
evenly.
Chapter 3: Installing the Inverter 29
Three Phase System Installation Guide MAN-01-00057-4.1