Solaris Flare / Flare Jr. user manual version 9.1 111215
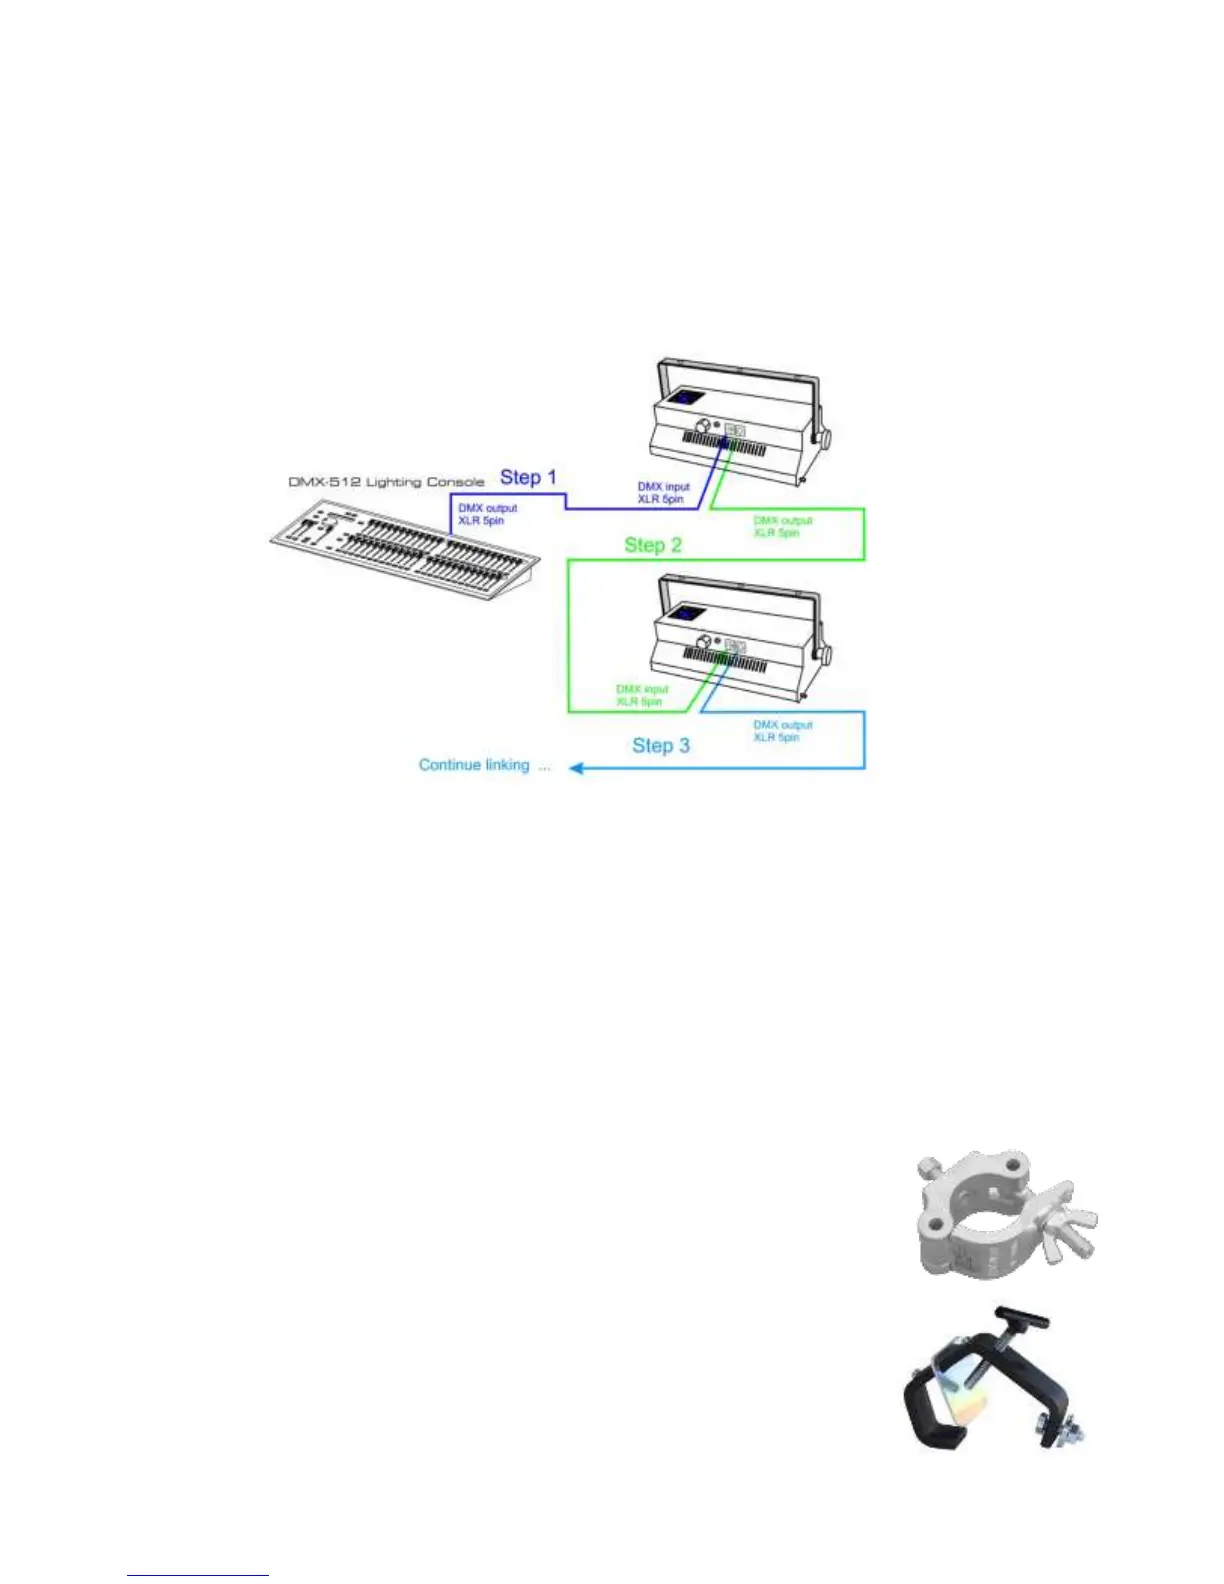
SETTING UP A DMX SERIAL DATA LINK
1) Connect the male 5-pin XLR connector of the data cable to the female 5-pin XLR output of the DMX console.
Connect the other end of the data cable (female 5-pin XLR) to the male 5-pin XLR connector located on the
Solaris Flare.
2) Connect from the fixture output as stated above to the input of the following fixture, and so forth.
3) Continue linking until the last fixture is connected in your DMX signal data chain.
FIXTURE MOUNTING
Orientation
Flare and Flare Jr. fixtures may be mounted in any position. Always make sure there is adequate room for
ventilation. Do not obstruct unit’s fan or vents.
Support Stand
Always use a professional stand rated to support weight greater than the fixture (see technical specifications).
Attach a TVMP spigot to the yoke of the Flare or Flare Jr. and mount on the stand.
Rigging – Always consult a certified rigging specialist before suspending any fixture overhead!
Use ProBurger
®
couplers or equivalent C- or O-type clamps for attaching to truss. It is
important never to obstruct the fan or vents pathway. Adjust the angle of the fixture by
loosening both knobs and tilting the fixture. After finding the desired position, retighten
both knobs.
Always use safety cables!
When selecting installation location, consider routine maintenance.
Never mount fixture where it will be exposed to moisture, high humidity,
extreme temperatures, or restricted ventilation.