5.6 Installation steps
5.6.1 Installation steps of mounting the inverter on the wall
Ø Step 1: Fix the bracket on the wall
a) Find out the bracket and M8 bolts from the accessory bag as below:
And prepare M10x80 iron expansion combination in advance. Please kindly
note that M10x80 screws are not in the accessory bag. Please prepare them in
advance.
Bracket x1
M8Bolt x2
b) Use the bracket as a template for marking the positions of drilling holes
on the wall with digital level and marker.
c) Use φ10 drill to drill holes in accordance with the mark. The depth of the
holes shall be at least 65 mm.
d) Insert the expansion screws into the holes, hang the bracket on the screw
and fix it with nut.
a)
Bracket
Nut
Expansion screw
b) c) d)
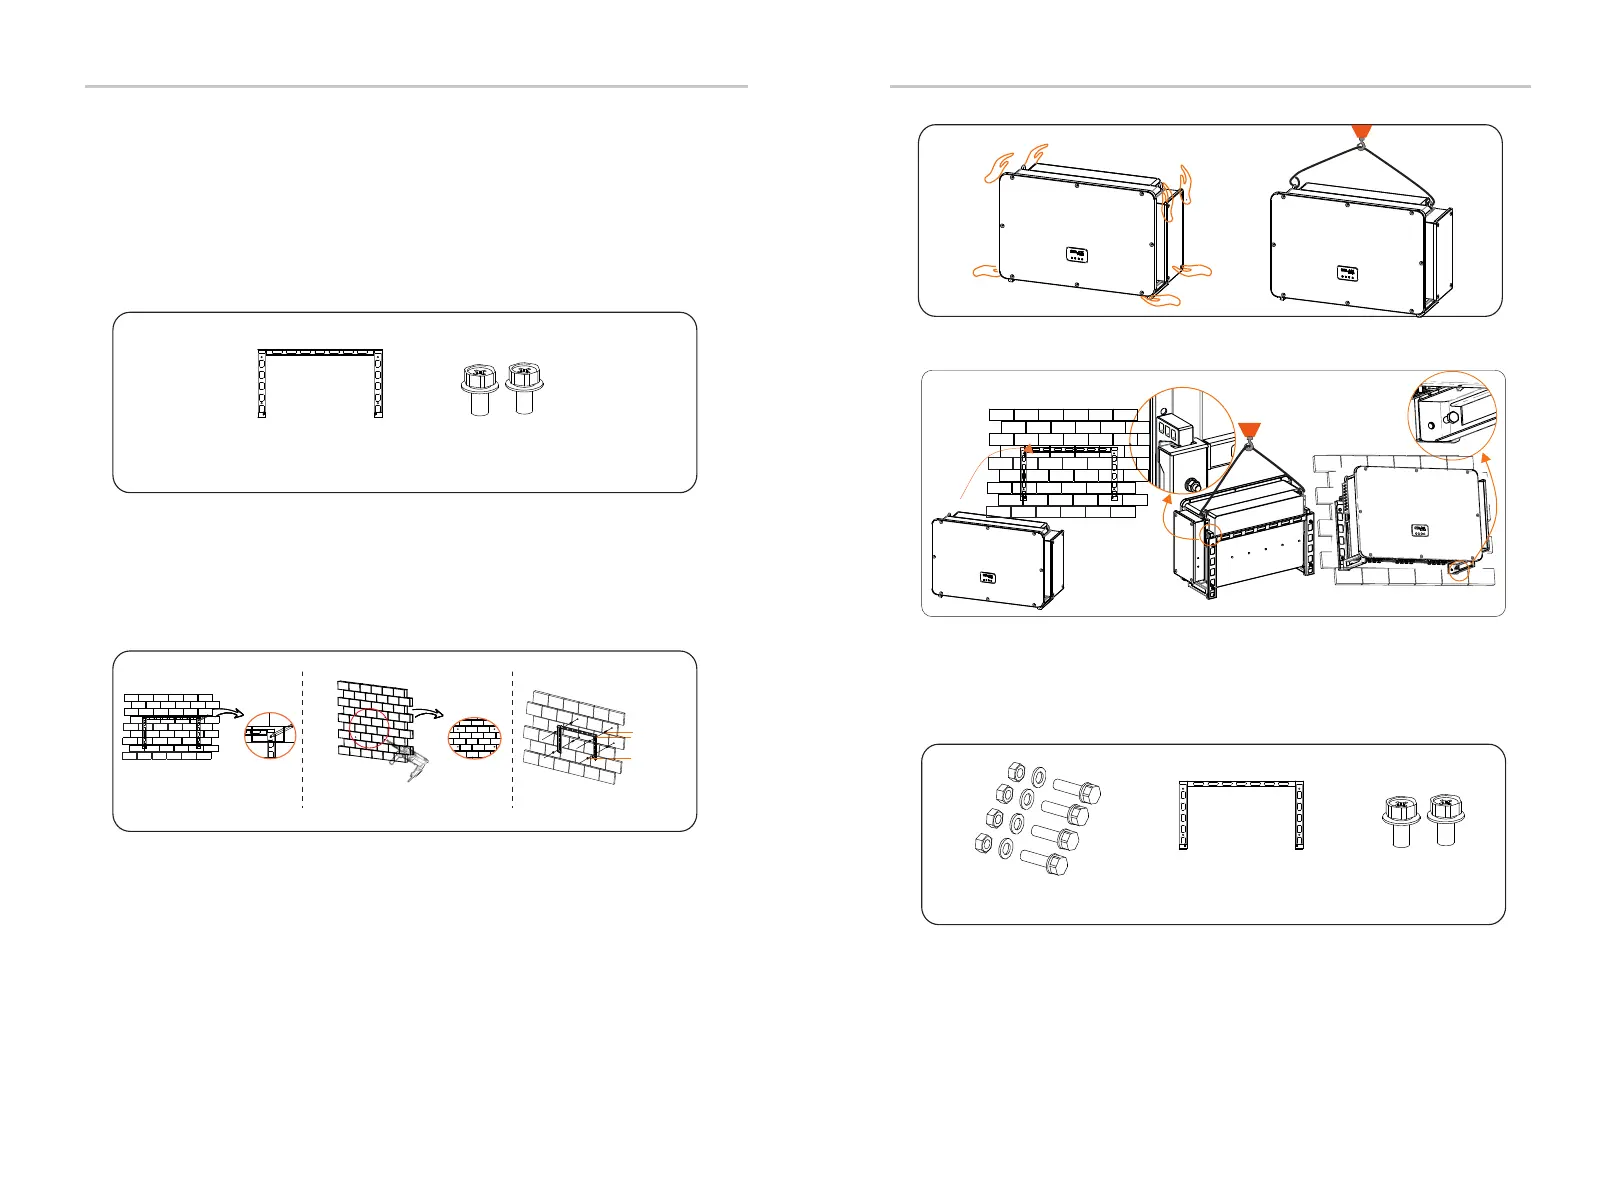
Ø Step 2: Hang the inverter on the bracket
a) Lift up the inverter. Two methods are available for your choice.
Method 1: Four installers directly hold the inverter on the two sides and lift
it up.
Method 2: Install two lifting rings on the two sides of inverter and lift it up.
a)
b) Hang the inverter on the bracket and secure it on the bracket with M8
bolts.
5.6.2 Installation steps of mounting inverter on the stand
Ø Step 1: Fix the bracket on the stand
a) Find out the four M10xL40 bolt combination, bracket and two M8
bolts from the accessory bag as below:
Bracket x1
M8Bolt x2
M10xL40 x4
b)
a)
Mechanical Installation Mechanical Installation
26
27