30
31
Electrical Connection
Electrical Connection
WARNING!
Be sure the ground wire must be
connected!
Ø Step 2: Connect the grounding cable to the inverter.
a) Connect the grounding cable to the inverter and fix it wit torque 12
N.m
6.2 PV String Connection
WARNING!
Before connecting the inverter, make sure that the open circuit
voltage of the photovoltaic string shall not exceed 1100 V
under any conditions, otherwise, the inverter will be damaged.
WARNING!
Do not ground the positive or negative pole of the PV string,
otherwise it will cause serious damage to the inverter.
WARNING!
Make sure that the positive and negative poles of the PV string
are correctly connected with the corresponding identification
of the inverter.
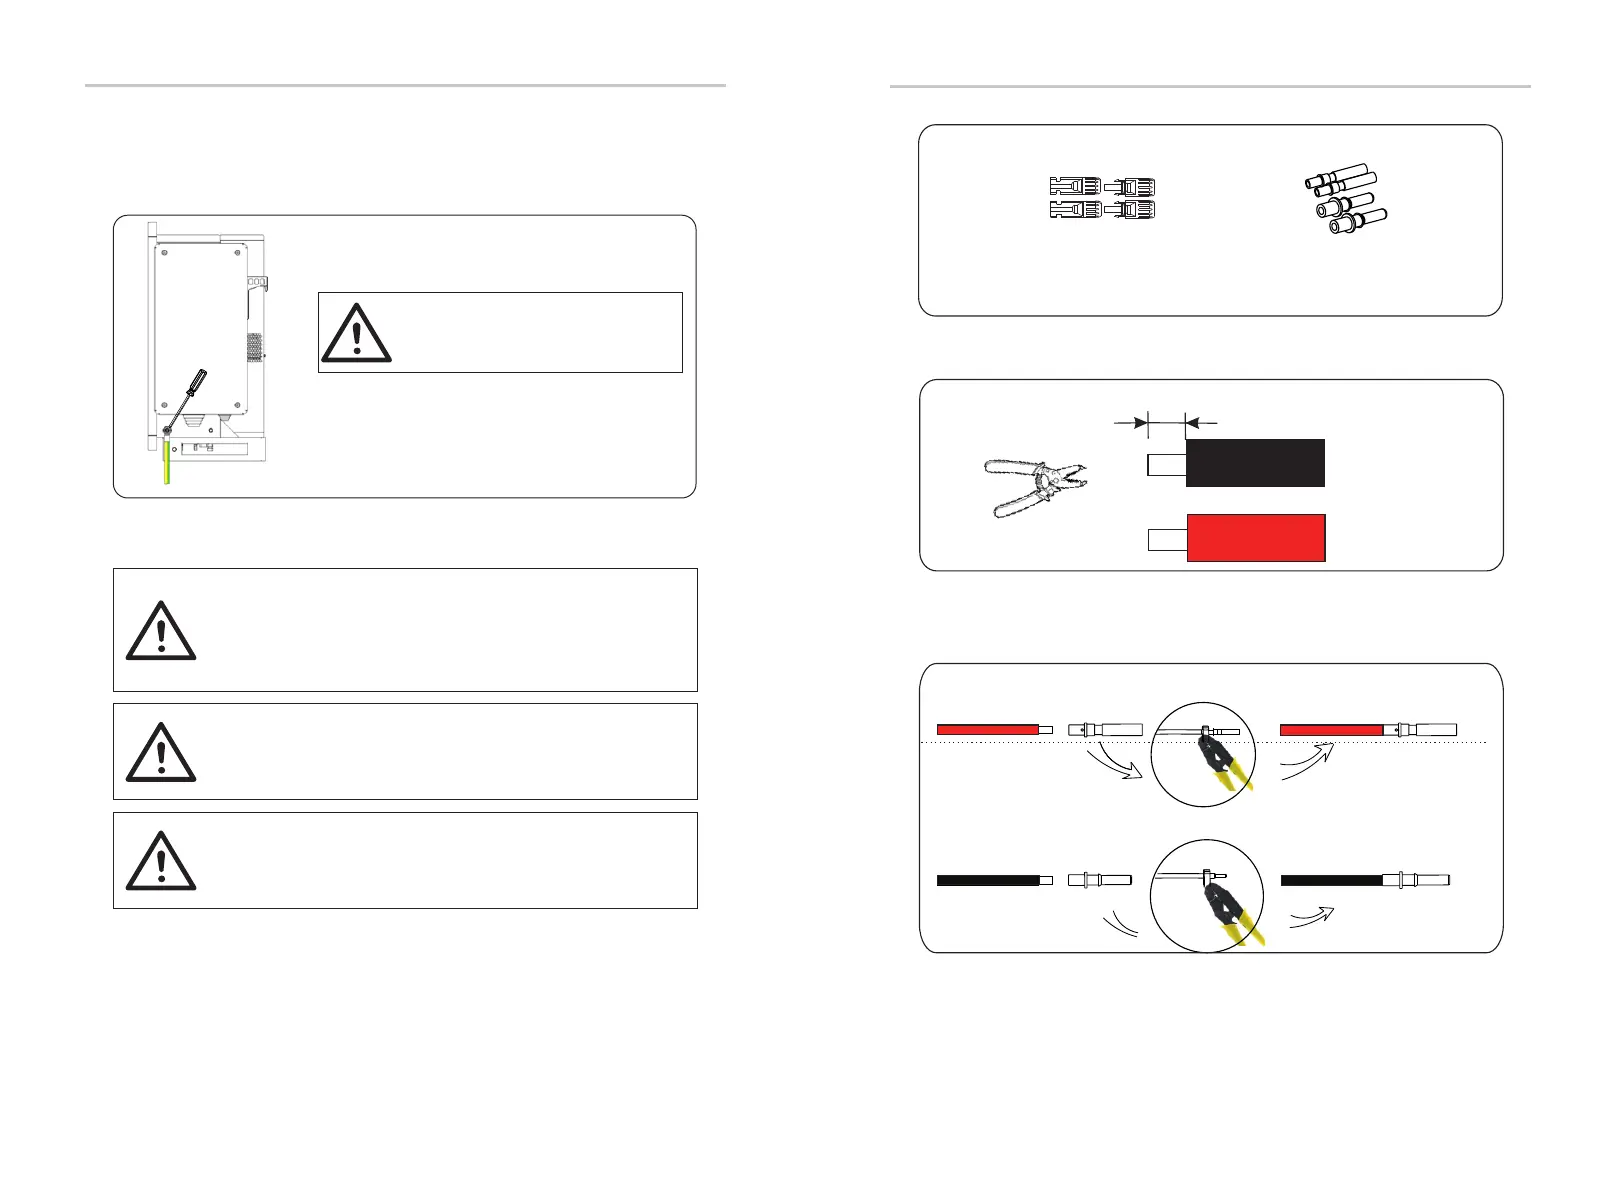
Ø Step 1: Make the PV cable
Positive DC pin contact x24
Negative DC pin contact x24
Female DC connectorx24
Male DC connectors x24
a) Find out the positive/negative x24 DC connector and x24 positive/
nagative DC pin contact from accessory bag.
b) Turn off the DC switch and prepare a 10 AWG PV cable. Use wire
stripper to strip 6 mm insulation layer of the PV cable end.
c) Tighten the stripped section and insert it into the PV pins. And use
terminals press clamp to clamp it so that the stripped section of PV cable is in
firm contact with PV pins.
d) Insert the PV cable through fastening head and plug (male and female)
and force the male or female plug to the cable. You will hear “Click” which
indicates the connection is completed. Then tighten the fastening head.
6 mm
Cable size: 10 AWG
Positive PV pin
Negative PV pin
PV cable