Electrical Connection
Electrical Connection
34 35
Note:
-It is recommended to add circuit breaker or fuse at AC side, whose
specification is more than 1.25 times of rated AC output current.
-70~240 mm² copper wire is recommended. If aluminum wire is needed,
please consult the inverter manufacturer.
-Use copper terminal for copper wire, use copper aluminum terminal for
aluminum wire, not aluminum terminal directly.
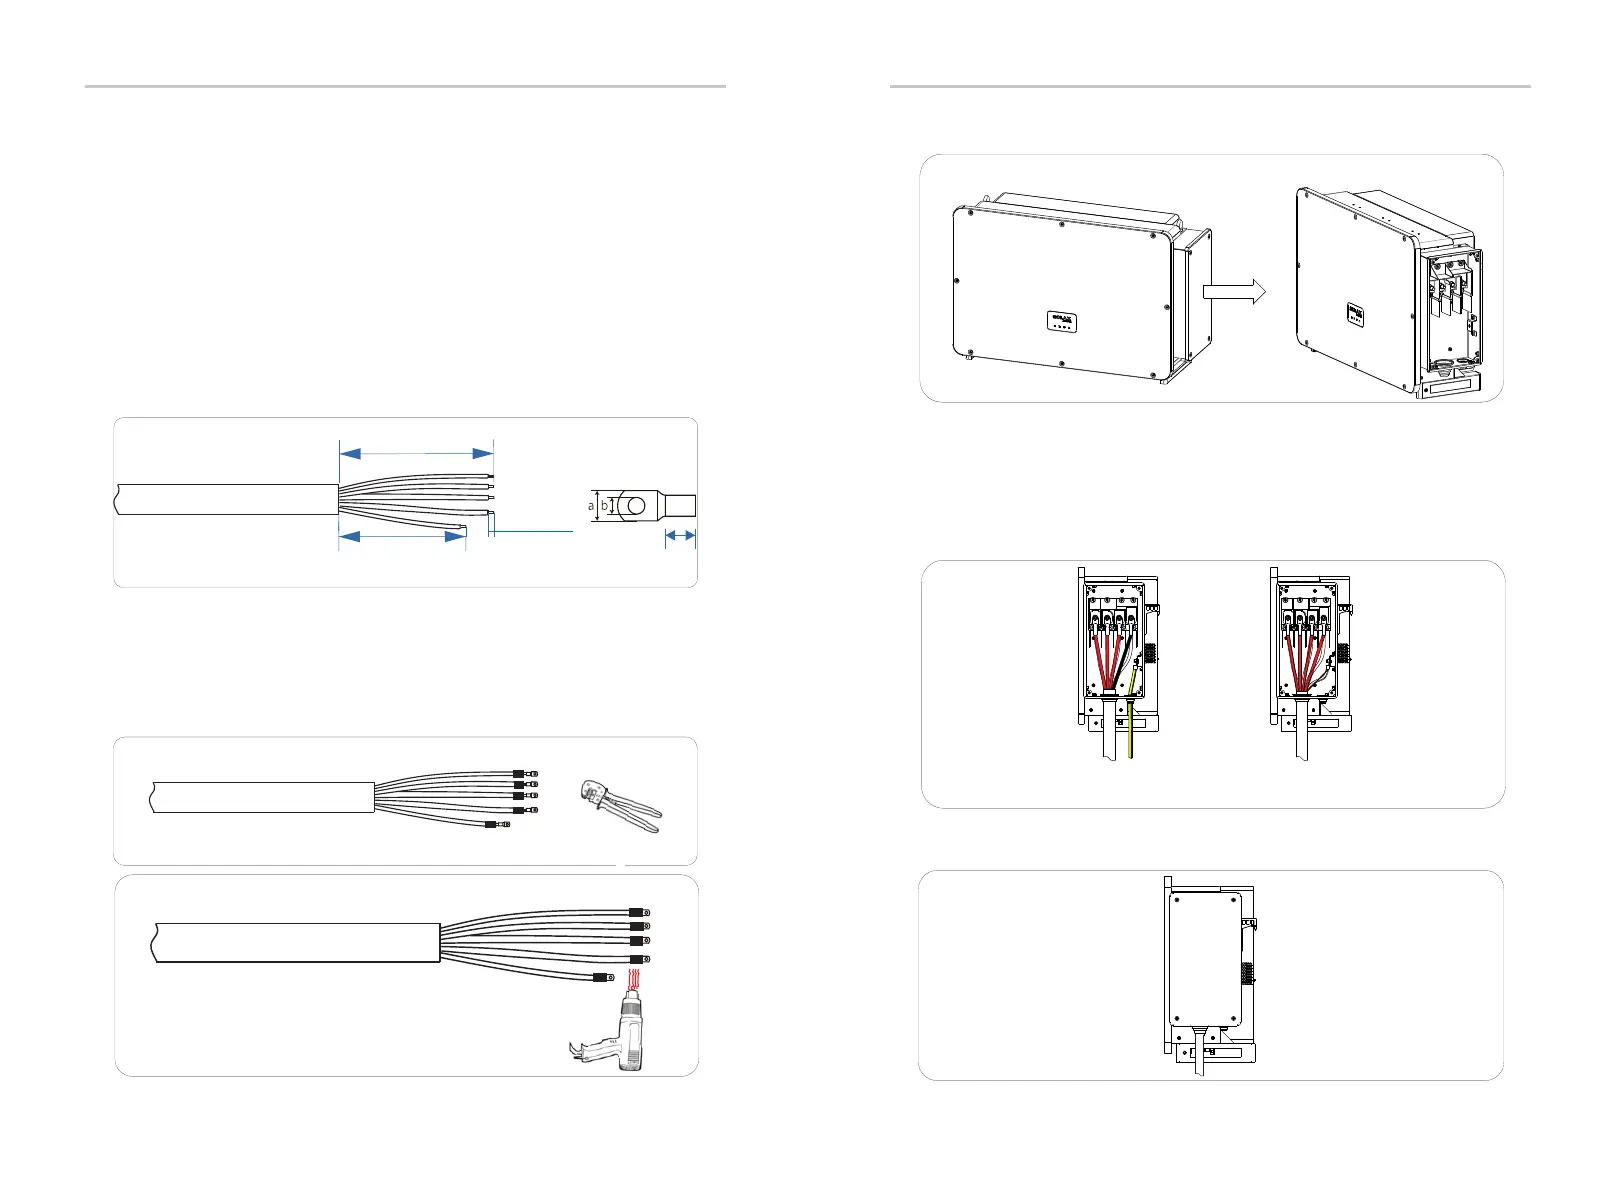
a) Select the appropriate OT terminal and black, red and yellow and
green cable with proper length by wire cutter, and use wire stripper to
strip the insulation layer of the AC cable end. The stripped insulation layer
shall be 2-3 mm longer than “D” part of OT terminal.
b) Pull the heat-shrink tubing over AC cable.
c) Insert the stripped section into OT terminal and crimp with crimping
tool and pull the heat-shrink tubing over the crimped section of OT terminal.
Then use hot air blower to shrink it so that they are in firm contact with OT
terminal.
Ø Step 1: Make the AC cable
A
D+(2~3) mm
B
A≤260 mm
B≤150 mm
a≤45 mm
12.5≤b≤15 mm
D
L1 / L2 / L3 / N
L1
L2
L3
N
PE
b)
c)
d) Open the cover of the wiring box.
Ø Step 2: Connect the AC cable to the inverter
a) Use utility knife to cut out the pagoda type protection ring in
accordance with the whole cable size, route the AC cable through the pagoda
protection ring, and connect it to the AC terminals L1, L2, L3 and N in turn, and
tighten it with torque wrench (with the torque of 25~30 N·m).
Separate PE cable
Multi-corecable
b) Re-install the cover of wiring box and tighten it with screws (with the
torque of 5~7 N·m).