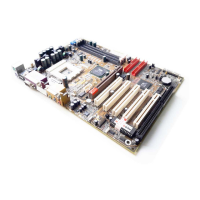
Series 75FRN2: 75FRN2, 75FRN2-L, 75FRN2-R, 75FRN2-RL
86
5-1.1 Creating An Array For Performance/Security
FastTrak 376 allows users to create striped arrays with 1 or 2 drives.
To create your disk array, you have to open the FastBuild Utility, which
should have already been built in the Promise Controller. At booting
your system, you will see the following intiating screen:
FastTrak 376(tm) BIOS Version xxxxxx
(c) 2--2-2005 Promise Technology, Inc. All rights reserved.
No Array is defined....................................
Press <Ctrl-F> to enter Fastbuild(tm) Utility or
Press <ESC> to continue booting.....
Press <Ctrl-F> to enter Fastbuild Utility NOW!
You can create two types of array with the help of FastBuild Utility.
1. An array for Performance in Striping type with 1 or 2 drives (or called
RAID 0).
2. An array for Data Security in Mirroring type with 2 drives treated as
one disk array (or called RAID 1).
5-1 Creating Your Disk Array
1. Boot your system with Controller PDC20376 enabled by Jp4 and
your hard drive(s) connected to IDE3/ATA1/ATA2. Suppose this is
the first time to create a Disk Array. The Promise BIOS on board
with FastBuild Utility built in will scan the IDE devices and display
the result as below:
WARNING :
WARNING :
To create a Security array using an existing hard drive,
backup any necessary data. Failure to follow this could result in data
loss.
FastTrak 376 (tm) BIOS Version 1.xx
(c) 2002-2005 Promise Technology, Inc. All Rights Reserved.
No array is defined...
Press <Ctrl-F> to enter FastBuild (tm) Utility or
Press <ESC> key to continue booting .........

 Loading...