12 Procedure | Labstamp User Guide | PN: 1202.D
Figure 3-14 Aligning the tail
Figure 3-13 Tail Cover
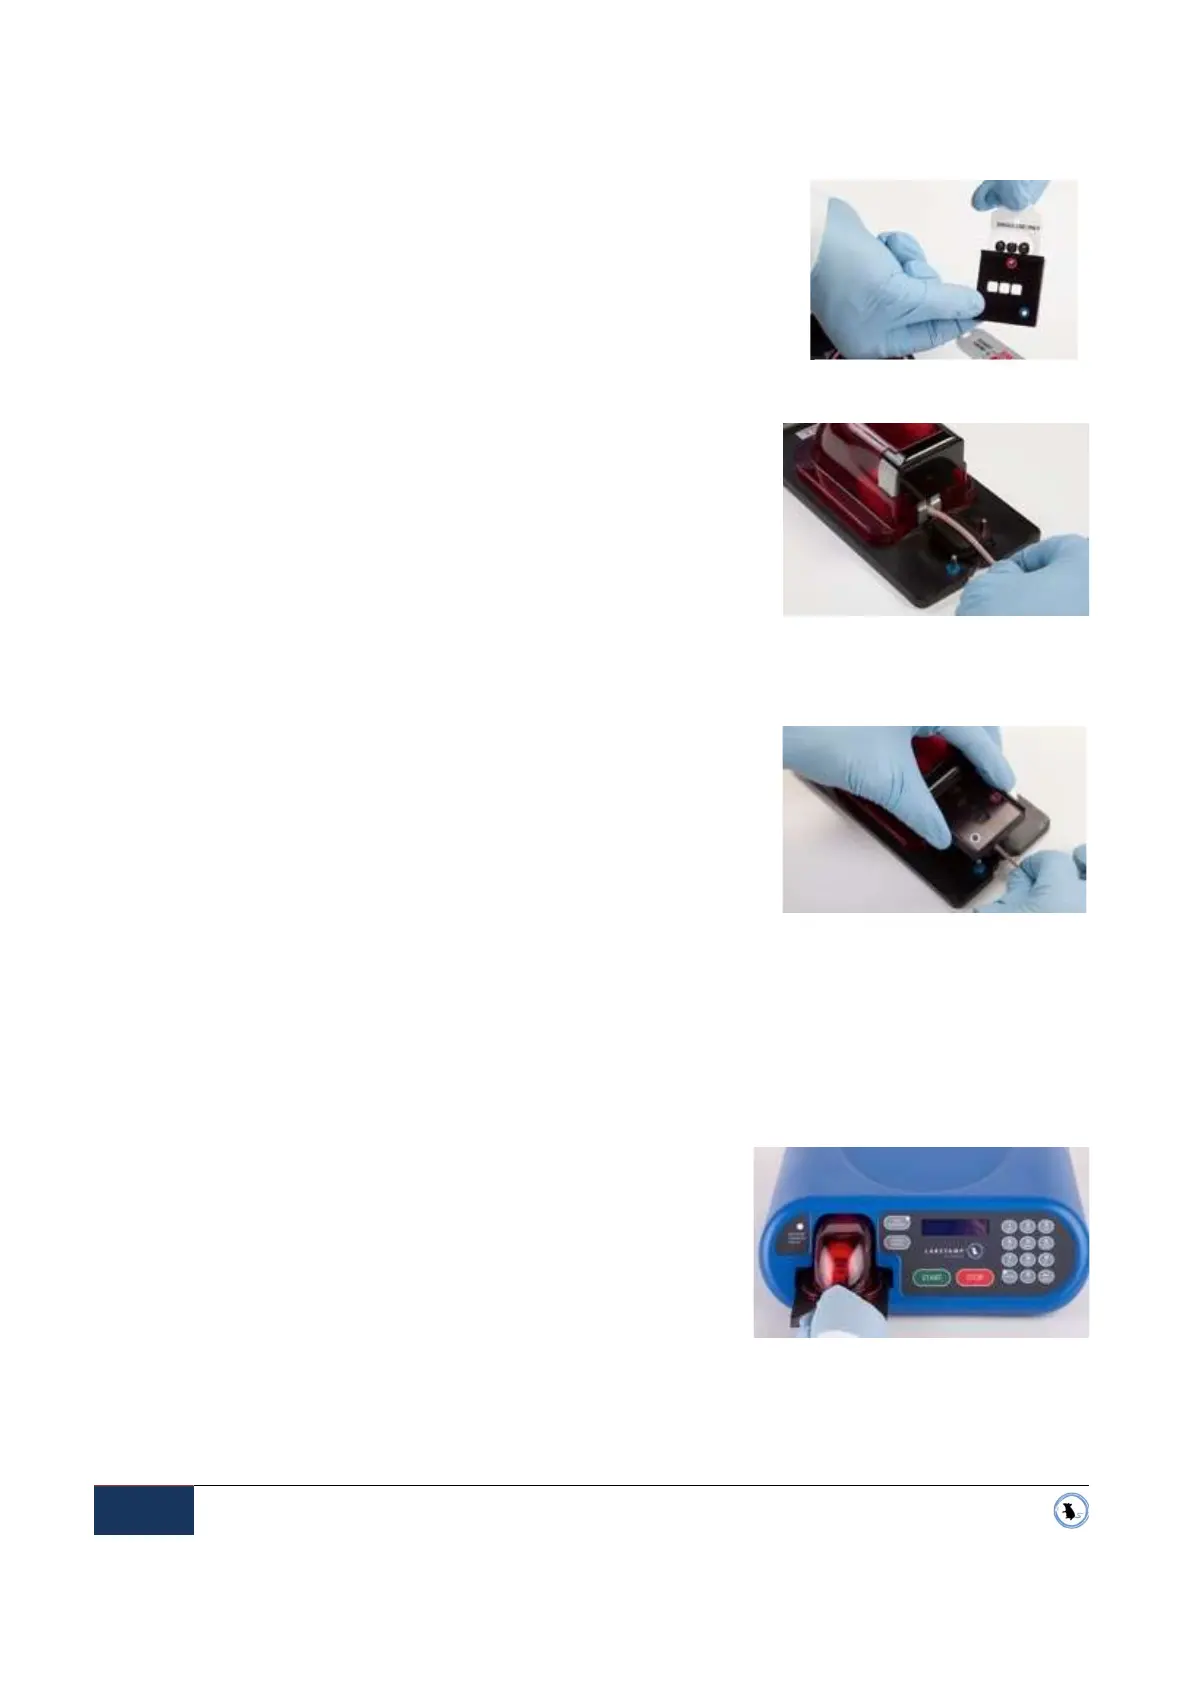
3.7.2 Insert the Ink Slide into the slotted opening on the side of the Tail Cover. Ensure that the holes
of the Ink Slide line up with the holes in the Tail Cover. The Ink
Slide is properly installed when it will not push-in any further and
the alignment holes are aligned. See Figure 3-12 Ink Slide
Insertion.
3.8. PLACING THE TAIL COVER
3.8.1 Align the tail within the v-groove of the rubber tail bed. Hold
the tail gently to keep it in place, but do not attempt to stretch
the tail nor hold it taut. See Figure 3-14 Aligning the tail.
3.8.2 Align the Tail Cover with the colour-coordinated posts of the Restraint Cartridge platform - blue
aligns with blue, and red with red. See Figure 3-13 Tail Cover
3.8.3 Carefully lower the Tail Cover, with the Ink Slide inserted,
over the tail. Be sure to release any tension that you may
have applied to the tail while attempting to hold the tail in
place.
NOTE: The Tail Cover has magnets and alignment posts to ensure
that the Tail Cover snaps into proper position.
3.9. LOADING THE RESTRAINT CARTRIDGE INTO THE APPLICATOR MACHINE
3.9.1 With the mouse and Tail Cover in place, lift the Restraint Cartridge by the handle.
3.9.2 Gently insert the Restraint Cartridge into the docking port
on the front of the Applicator Machine. See Figure 3-15
Load Restraint Cartridge.
3.9.3 In the upper left corner of the Control Panel, check the
RESTRAINT CARTRIDGE STATUS light:
3.9.3.1 The Restraint Cartridge is properly installed when the
RESTRAINT CARTRIDGE STATUS light changes from
red to green.
3.9.4 You are ready to apply a tattoo.
Figure 3-12 Ink Slide Insertion
Figure 3-15 Load Restraint Cartridge