6 Labstamp Components | Labstamp User Guide | PN: 1202.D
CONTROL PANEL
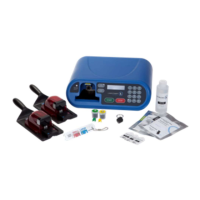
APPLICATOR MACHINE
1 Tattoo head door
2 Control Panel (see Control Panel, below)
3 Power Switch
4 Power Plug
5 USB Port (optional)
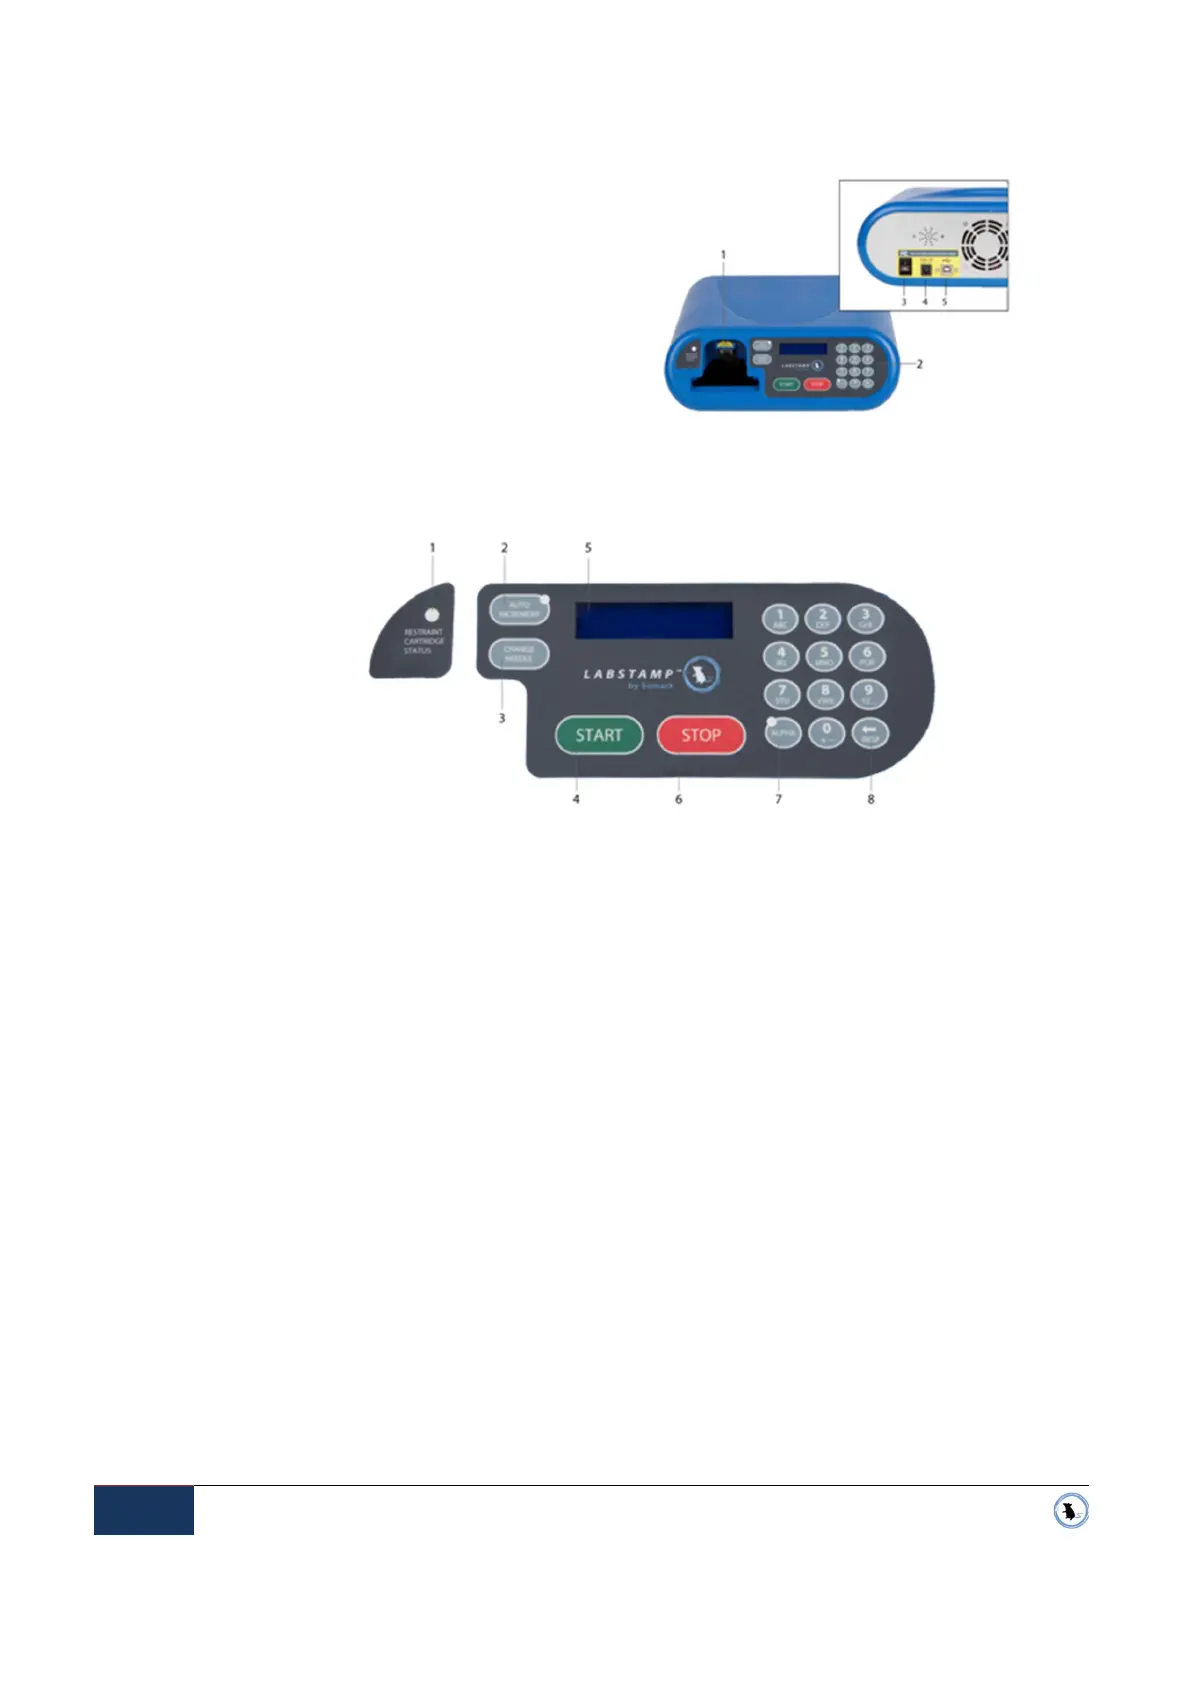
1 Restraint Cartridge Status light
Red solid light -
The Restraint Cartridge is
inserted but not fully seated in place for
tattooing.
Red flashing light -
Tattooing is in progress.
Do not remove Restraint Cartridge until
tattooing is complete and the status light has
returned to green.
Green light -
The Restraint Cartridge has been
inserted correctly. You are ready to start a
tattoo or remove the Restraint Cartridge.
Light off
-
No Restraint Cartridge has been
detected.
2 Auto increment button
Turns the Auto Increment mode ON. The
Auto Increment button light will remain on
while the machine is in this mode.
3 Change Needle button
Opens the tattoo-head door and extends the
tattoo-head and installed Needle Cartridge out
of the Applicator Machine. May also be used
to retract the tattoo-head after installing a new
Needle Cartridge.
4 Start button
Begins the tattooing process. Retracts the
tattoo-head and Needle Cartridge into the
Applicator Machine.
5 LCD display screen
Provides user instruction. See System
Messages on page 16.
6 Stop button
Aborts Applicator Machine operations.
7 Alpha key
Changes keypad to A-Z. Press once to turn on
mode for single character. Press and hold to
lock-in the alpha mode.
8 Backspace button
“Backspace.” Erases the last character
entered.
Figure 2-3 Applicator Machine
Figure 2-4 Control Panel