Page 37
3.3 Recording Pane
The Recording pane of Sonic Console controls recording directly from the Series 300 unit. The
Recording pane is accessed via the Recording button at the top right of Sonic Console, to the
right of the +DSP button
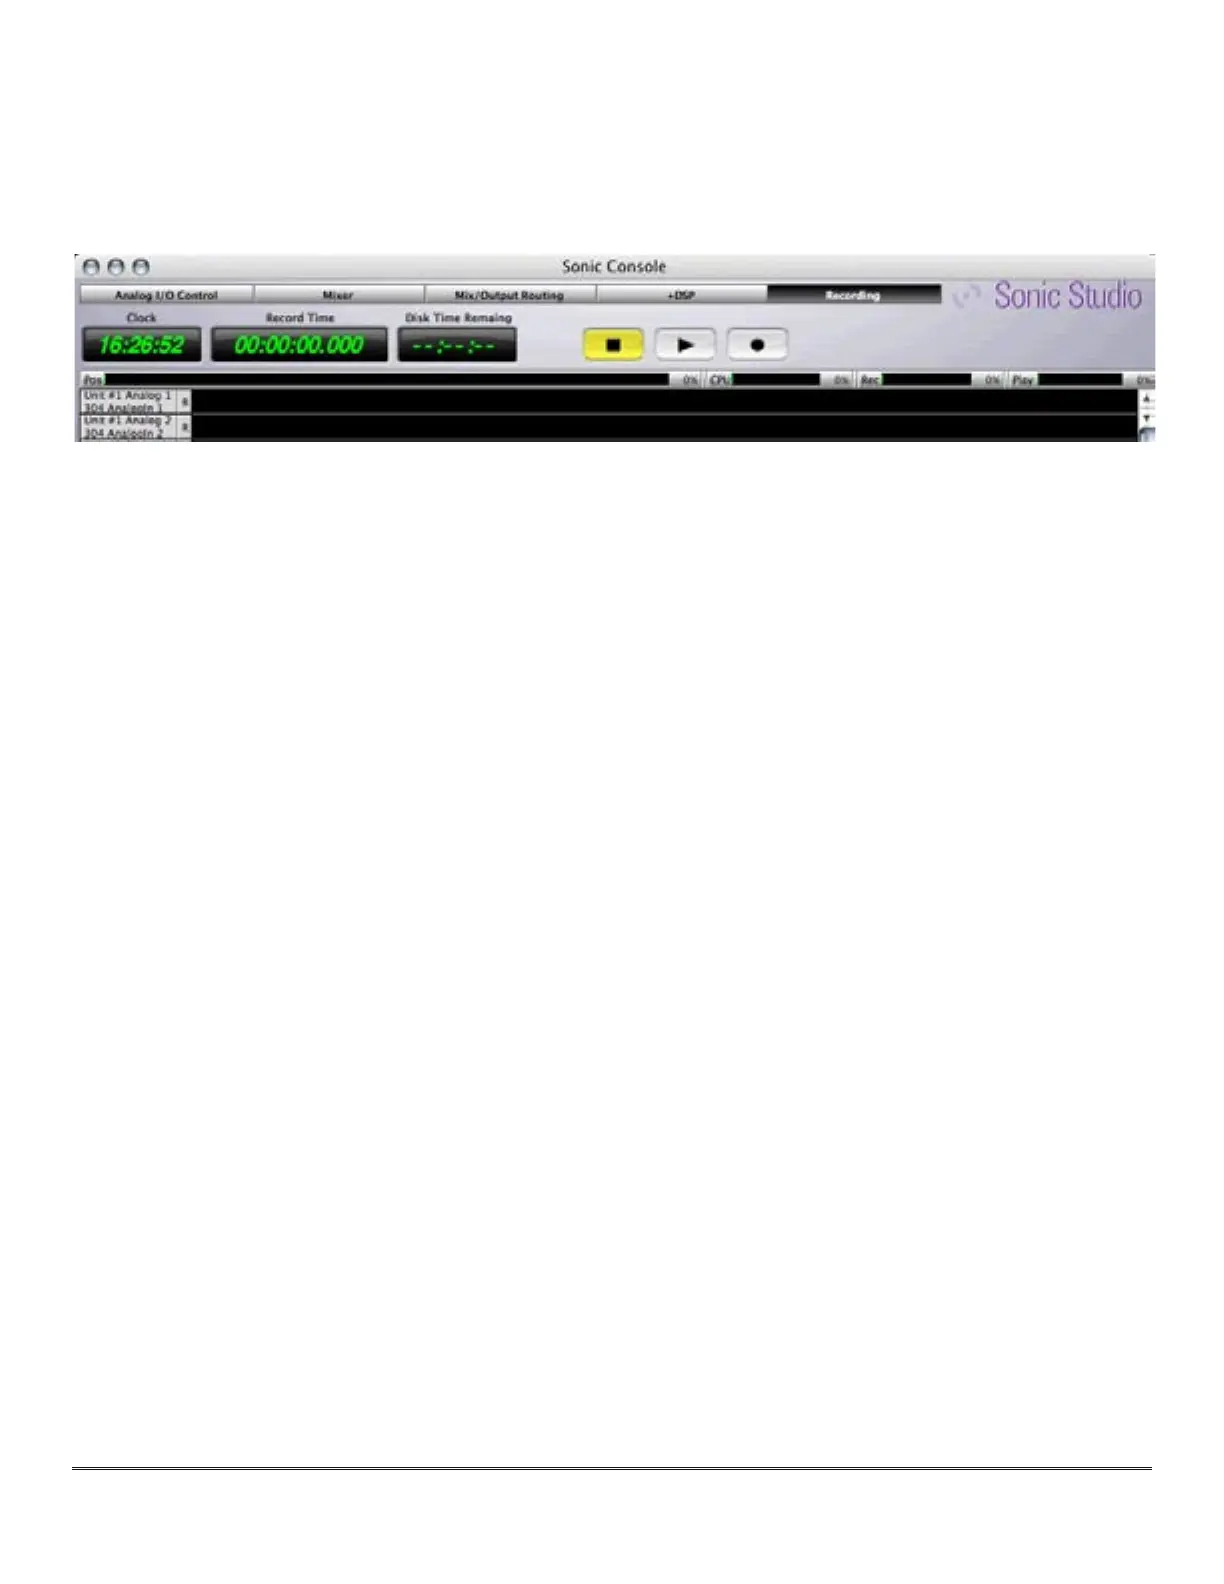
Figure 16 — The top of the Recording pane showing the controls
3.3.1 Controls & Indicators
At the top of the Record pane are, from left to right, a real–time Clock, a Record Time indicator,
a Disk Time Remain(in)g indicator, and three transport controls. The transport controls consist
of, left to right, a Stop button, a Play button, and a Record button.
Below these controls are sandwiched a narrow collection of meters showing, from left to right,
a Pos or position indicator, a CPU utilization meter, Rec(ording) activity meter and a Play(back)
activity meter.
3.3.2 Recording & Playback
To start recording, first check the Recording menu to set your Record and Playback folder
paths, and that your Recording Preferences are set. We recommend using the Broadcast WAV
or BWF format, because of it’s universal interoperability.
The Recording pane follows the convention seen elsewhere in Sonic Console where inputs
are arrayed in a column at left. At lower right, smal pairs of vertically and horizontally arranged
“magnifying glass” icons provide vertical and horizontal zooming. The vertical pair below the
scroll bar provide magnification of the waveform’s amplitude while the horizontal pair provide
time line zooming. When zoomed in either vertically or horizontally, the scroll bars become ac-
tive when necessary.
Each input has an R or Record Arm button associated with it. Option–clicking on any Record
Arm button globally arms all channels at once. Option–clicking on any armed Record Arm but-
ton globally disarms all channels simultaneously.
Once all your preferences and defaults are set, arm one or more channels and click the Record
button to start the recording process. The Record Time counter will increment while the wave-
form will be progressively be displayed for each channel in record. To stop a recording, click on
the Stop button.