Product Guide
6
5. Attach the power adapter to the PLAYBASE and plug it in, making sure to push the power cord all the way
into the PLAYBASE.
The status indicator light on top will begin to flash.
6. (OPTIONAL) If you are setting up your PLAYBASE with a SUB and/or surround speakers, put them where
you want them and plug them in.
(You’ll be prompted to add these once the PLAYBASE is set up.)
7. Open the Sonos app on a mobile device and follow the setup instructions.
If you don’t have the free Sonos app installed, download it from the application store on your device.
If you are setting up a new Sonos system, when prompted, add your Sonos products in the
following order:
a. If you have a Sonos product connected to your router, add it first.
b. Add the PLAYBASE.
c. Add any additional Sonos products you purchased.
If you are adding to an existing Sonos system:
a. First check for software updates—the PLAYBASE is compatible with Sonos software versions 4.0 and
later.
Note: Expandable PLAYBASE home theater setup
For a 3.1 home theater experience, pair a SUB with your PLAYBASE.
For a 5.0 home theatre experience, bond a pair of PLAY:1, PLAY:3 or PLAY:5
(gen2) speakers with your PLAYBASE.
For a 5.1 home theater experience, pair a SUB and a pair of PLAY:1, PLAY:3 or
PLAY:5 (gen2) speakers with your PLAYBASE.
Note: Sonos does not recommend using the Sonos app on a computer to set up
your PLAYBASE.
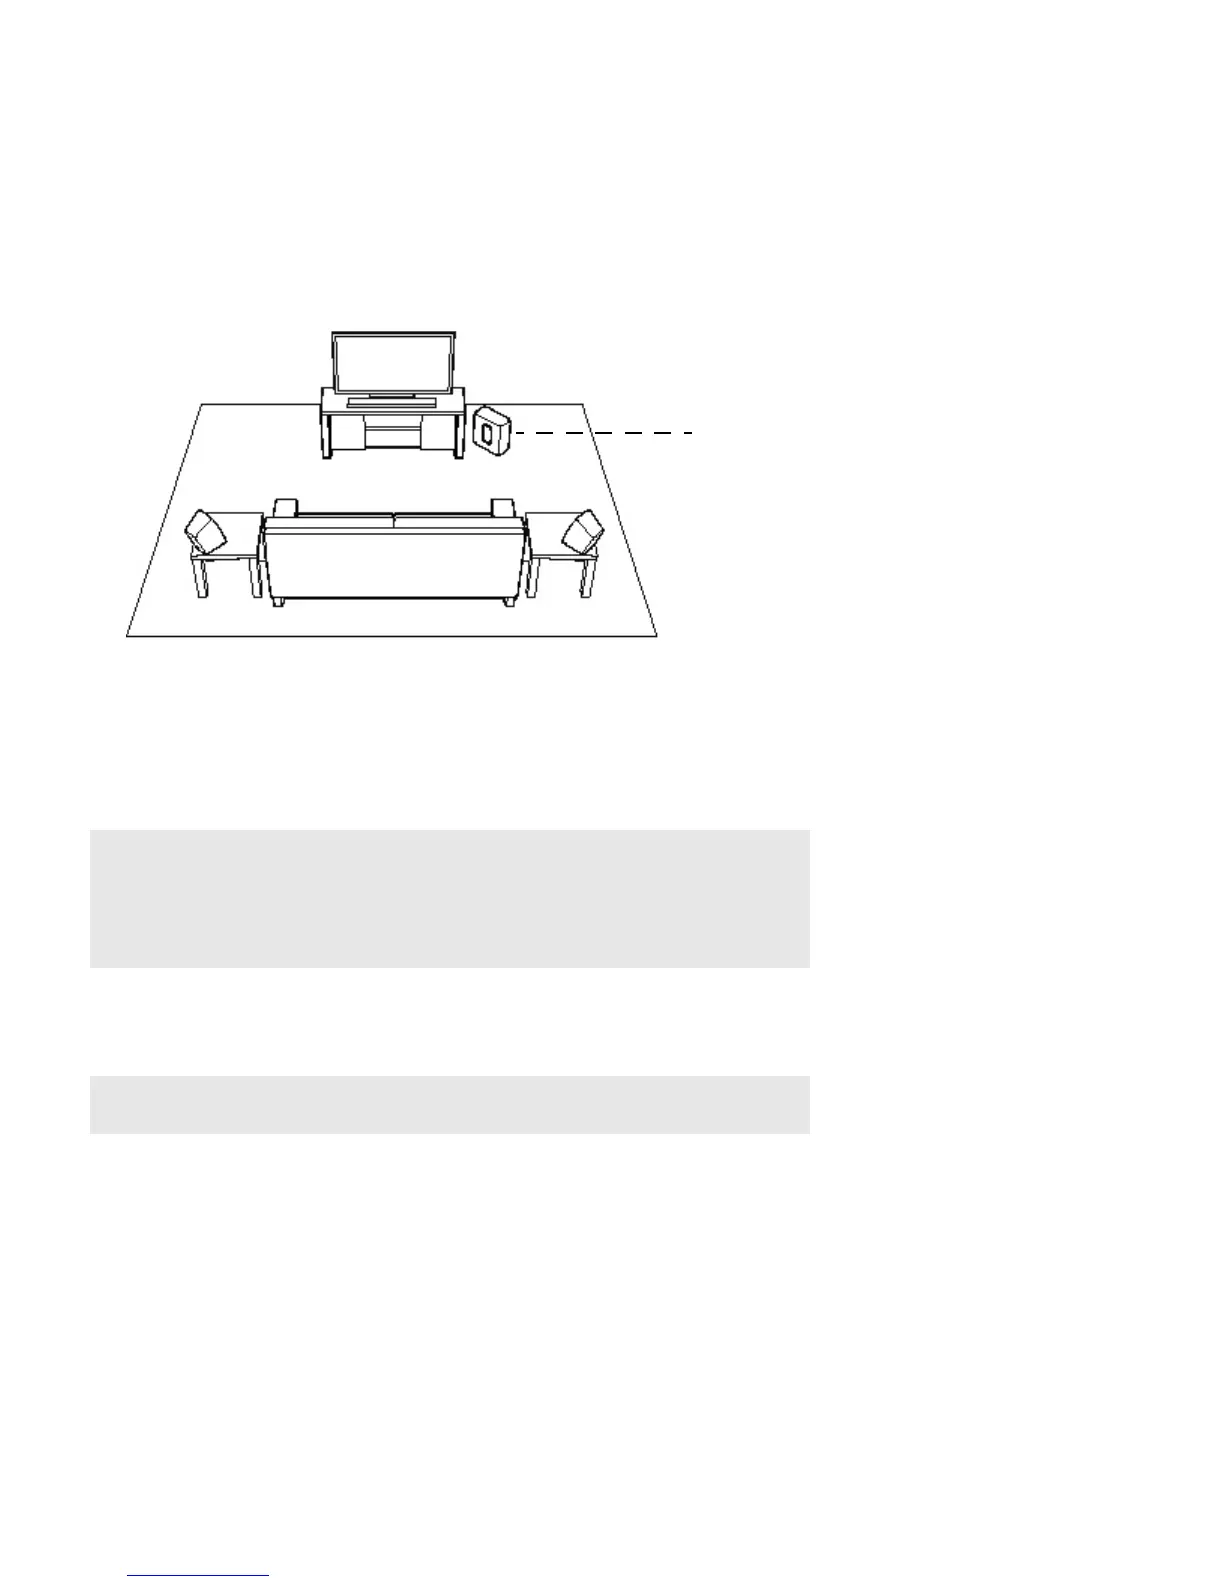
If you purchased Sonos PLAY:1, PLAY:3 or PLAY:5 (gen2)
surround speakers, place the speakers to the left and right of
your main viewing position, level with or behind the main
viewing position. They can be placed either horizontally or
vertically, but make sure both speakers have the same
If you purchased a Sonos SUB, place the SUB
wherever it best fits your room—standing up
or lying flat. You can place it in a corner,
against the wall, behind, under, or next to any
piece of furniture on any kind of floor surface.