38
Instruction for Use | HCA 56x and 8x8
General notes:
The spacing for welding the M3 threaded bolts must be 5 cm. Before welding, the lacquer has
to be removed from the welding points. It must be ensured that the bolts are welded onto a
water-bearing area or a flute.
Only use M3 bolts with a maximum length of 8 mm or there is a risk that the device will be
damaged.
Welding to aluminium radiators is not permitted.
If the radiator has an even number of sections the heat cost allocator should be installed
between the middle sections.
If the radiator has an uneven number of sections the device should be installed next to the
valve-sided middle section.
Mount the back plate through the 2 oval holes, adjusted to the top edge of the holes.
7.6 Mounting of the Remote Sensor
For each version of heat cost allocator, it is possible to plug the connector of the remote sensor
into an interface inside the heat cost allocator.
The remote sensor will be automatically detected by the heat cost allocator.
Once equipped with a remote sensor, the heat cost allocator will only work for an application
with remote sensor.
Remote sensor version is available with a 2 m or 5 m cable. The cable includes a stopper-knot.
Proceed to the commissioning of the heat cost allocator on the aluminium back plate. Take care
not to stick the cable.
Respect the color code of the radiator sensor and the remote sensor:
Heat cost allocator Sontex 565 X, Sontex 566 X, Sontex 868 X and Sontex 878 X: the
radiator sensor and the remote sensor are manufactured with a yellow color.
Heat cost allocator Sontex 565, Sontex 566, Sontex 868 and Sontex 878: the radiator sensor
and the remote sensor are manufactured with a white color.
Once equipped with a remote sensor, the heat cost allocator will only work for an
application with remote sensor. If the remote sensor is disconnected from the heat
cost allocator, an error message will be displayed.
During the commissioning of the heat cost allocator on the aluminium back plate, there are 2
possibilities to turn on the heat cost allocator:
1. By an automatic commissioning during the mounting on the aluminium back plate.
See chapter 8.1 Automatic commissioning during the installation
2. By pushing the push button. See chapter 8.2 Commisoning by pressing push button
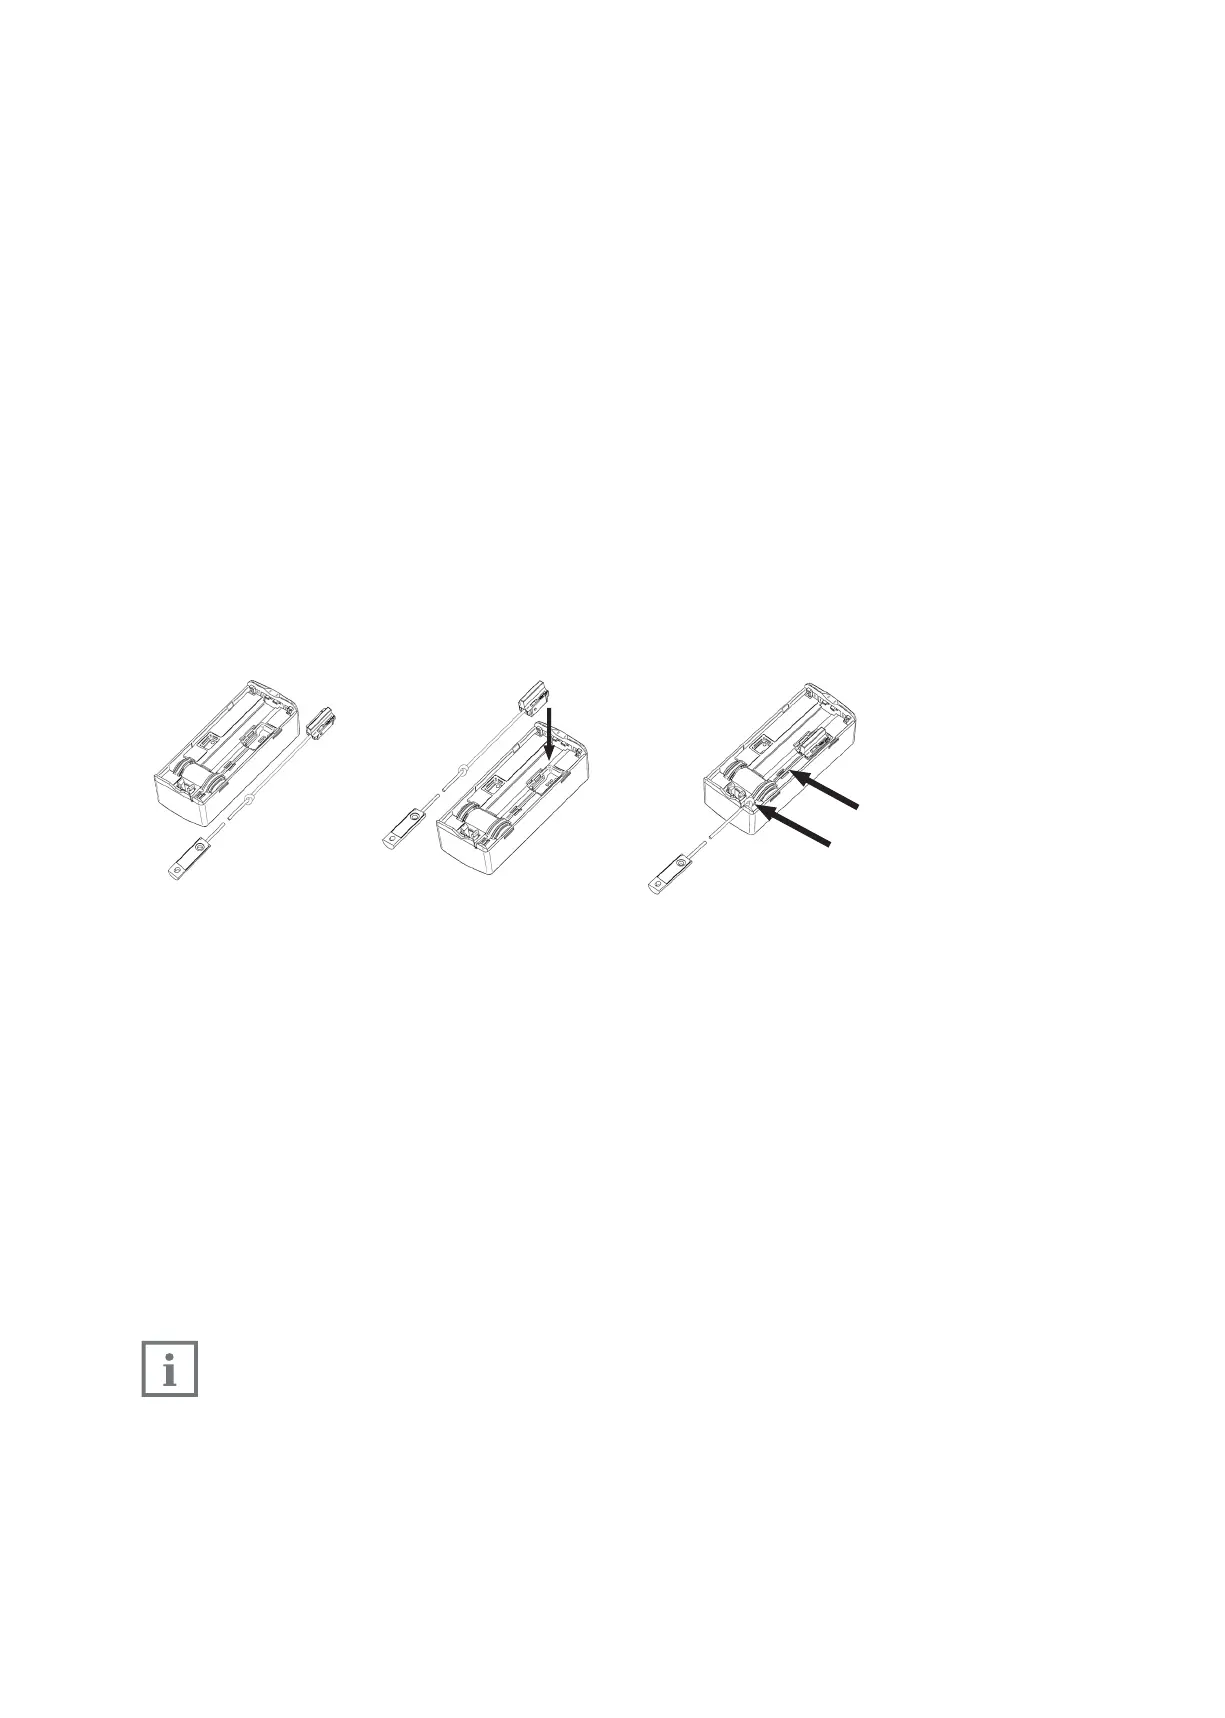
Return the heat cost allocator and plug the connector of
the remote sensor into the interface inside the heat cost
allocator.
Insert the remote sensor
cable into the groove provi-
ded up to the slot of housing.
Place the stopper-knot inside
the housing. The knot will
avoid any traction on the
connector.
 Loading...