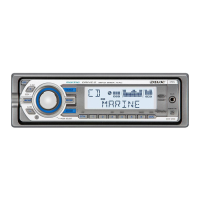
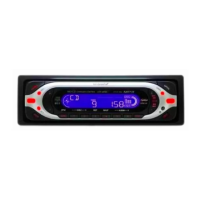
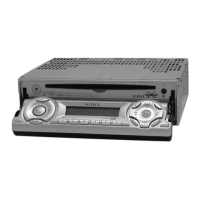
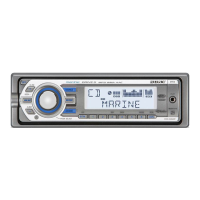
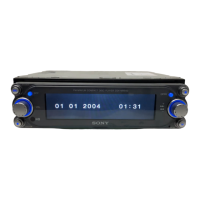
This section contains instructions on the location
of
controls and basic operations. For details, see
the respective pages.
For iPod operation, see
"iPod
(CDX-M50IP/
MR50IP)" on page 14, or for optional device
(CD/MD changer, etc.,) operation, see "Using
optional equipment" on page
17.
The corresponding buttons on the card remote
commander control the same functions as those
on the unit.
[I]
OFF
button
To
power off; stop the source.
[2] Volume
control
dial/select
button
page 15
To
adjust volume (rotate); select setup items
(press and rotate).
~
SOURCE
button
To power on; change the source (Radio/CD/
AUXlPD*1)*2.
@]
Display
window
[ID
AUX
input
jack
page 17
To connect a portable audio device.
[§]
OPEN
button
page 7
[1]
ALBM
+/-
buttons
(during
MP3IWMN
AAC
playback)
To skip albums (press); skip albums
continuously (press and hold).
lID
Receptor
for
the
card
remote
commander
[ill SEEK
-/+
buttons
CDIPD*1:
To skip tracks (press); skip tracks
continuously (press, then press again within
about
1 second and hold); reverse/fast-
forward a track (press and hold).
Radio:
To tune in stations automatically (press); find
a station manually (press and hold).
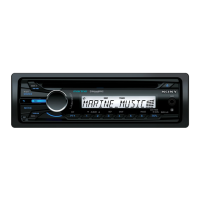
11m
MODE
button
page
11
To
select the radio band*2; select the play
mode
of
iPod*1.
Ill] BTM/CAT
button
(CDX-M50IP/M30)
page
11
To start the
BTM
function (press and hold).
AF
(Alternative
Frequencies)/TA
(Traffic
Announcement)/PTY
(Program
Type)
button
(CDX-MR50IP)
page 12
To
set
AF
and TA (press); select PTY (press
and hold) in RDS.
[12J
Frequency
select
switch
(CDX-M50IP/
M30
only)
(located on the bottom
of
the unit)
See "Frequency select switch" in the
supplied installation/connections manual.
~
Number
buttons
CDIPD*1:
®:
REP page
11
0:
SHUF page
11
®:
PAUSE
To
pause playback
of
a
CD
on this unit.
To
cancel, press again.
Radio:
To
receive stored stations (press); store
stations (press and hold).
IHl
DSPL (display)/SCRL
(scroll)
button
page
11
To
change display items (press); scroll the
display item (press and hold).
[1§]
RESET
button
page 6
[WI
~
(eject)
button
page 7
To
eject the disc.
I11J
Disc
slot
page 7
To
insert the disc.
continue
to
next
page
---+
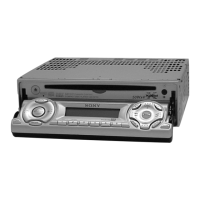
This section contains instructions on the location
of
controls and basic operations. For details, see
the respective pages.
For iPod operation, see
"iPod
(CDX-M50IP/
MR50IP)" on page 14, or for optional device
(CD/MD changer, etc.,) operation, see "Using
optional equipment" on page
17.
The corresponding buttons on the card remote
commander control the same functions as those
on the unit.
[I]
OFF
button
To
power off; stop the source.
[2] Volume
control
dial/select
button
page 15
To
adjust volume (rotate); select setup items
(press and rotate).
~
SOURCE
button
To power on; change the source (Radio/CD/
AUXlPD*1)*2.
@]
Display
window
[ID
AUX
input
jack
page 17
To connect a portable audio device.
[§]
OPEN
button
page 7
[1]
ALBM
+/-
buttons
(during
MP3IWMN
AAC
playback)
To skip albums (press); skip albums
continuously (press and hold).
lID
Receptor
for
the
card
remote
commander
[ill SEEK
-/+
buttons
CDIPD*1:
To skip tracks (press); skip tracks
continuously (press, then press again within
about
1 second and hold); reverse/fast-
forward a track (press and hold).
Radio:
To tune in stations automatically (press); find
a station manually (press and hold).
11m
MODE
button
page
11
To
select the radio band*2; select the play
mode
of
iPod*1.
Ill] BTM/CAT
button
(CDX-M50IP/M30)
page
11
To start the
BTM
function (press and hold).
AF
(Alternative
Frequencies)/TA
(Traffic
Announcement)/PTY
(Program
Type)
button
(CDX-MR50IP)
page 12
To
set
AF
and TA (press); select PTY (press
and hold) in RDS.
[12J
Frequency
select
switch
(CDX-M50IP/
M30
only)
(located on the bottom
of
the unit)
See "Frequency select switch" in the
supplied installation/connections manual.
~
Number
buttons
CDIPD*1:
®:
REP page
11
0:
SHUF page
11
®:
PAUSE
To
pause playback
of
a
CD
on this unit.
To
cancel, press again.
Radio:
To
receive stored stations (press); store
stations (press and hold).
IHl
DSPL (display)/SCRL
(scroll)
button
page
11
To
change display items (press); scroll the
display item (press and hold).
[1§]
RESET
button
page 6
[WI
~
(eject)
button
page 7
To
eject the disc.
I11J
Disc
slot
page 7
To
insert the disc.
continue
to
next
page
---+