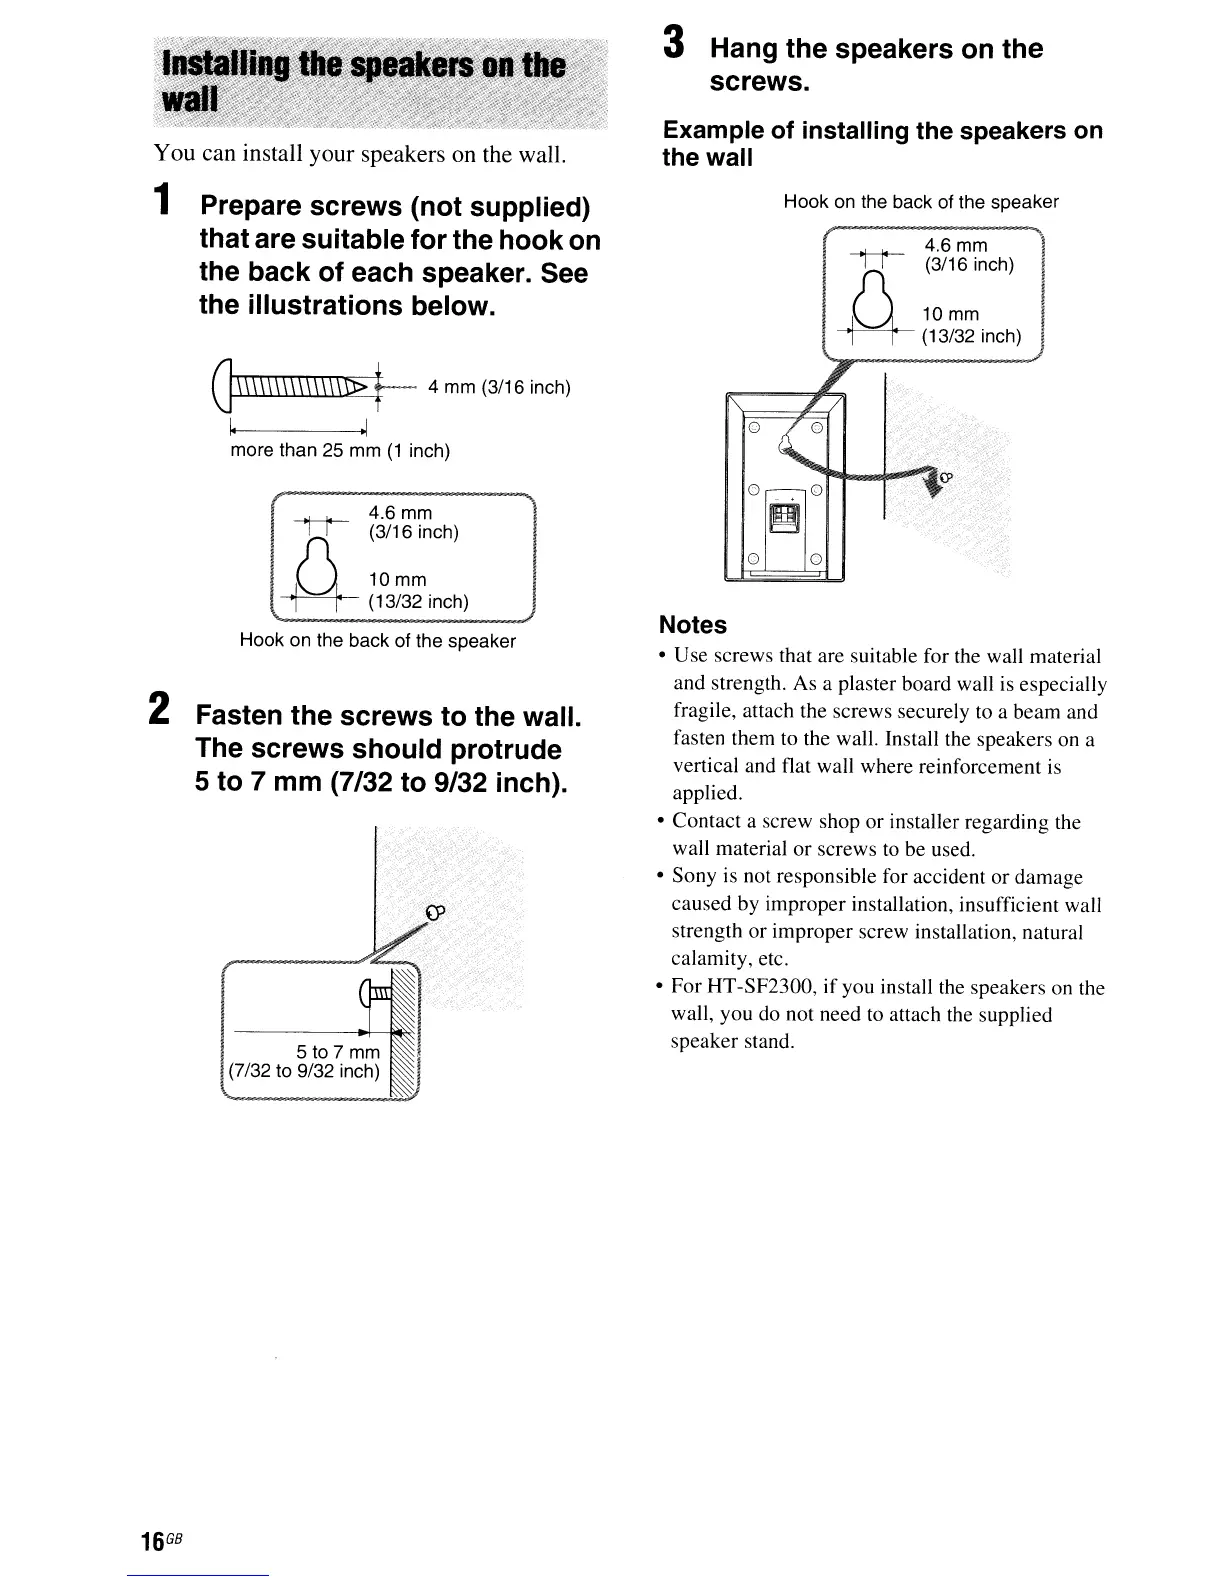
You can install your speakers on the wall.
1 Prepare screws (not supplied)
that are suitable for the hook on
the back of each speaker. See
the illustrations below.
G\\\\\\\\\\\\\\D>
t--
4
mm
(3/16 inch)
~
~
more than 25 mm
(1
inch)
4.6
mm
}{
(3/16 inch)
U
10mm
~
(13/32 inch)
Hook on the back of the speaker
2 Fasten the screws to the wall.
The screws should protrude
5 to 7 mm (7/32 to 9/32 inch).
I 5 to 7
mm
07/32
to 9/32 inch)
16
G8
3 Hang the speakers on the
screws.
Example of installing the speakers on
the wall
Hook on the back
of
the speaker
rK
~f'~~Ch)
1,11
U
10mm
~
(13/32 inch)
Q
o 0
Notes
• Use screws that are suitable for the wall material
and strength. As a plaster board wall is especially
fragile, attach the screws securely to a beam and
fasten them to the wall. Install the speakers on a
vertical and flat wall where reinforcement is
applied.
• Contact a screw shop or installer regarding the
wall material
or
screws to be used.
• Sony is not responsible for accident or damage
caused by improper installation, insufficient wall
strength or improper screw installation, natural
calamity, etc.
• For
HT
-SF2300,
if
you install the speakers on the
wall, you do not need to attach the supplied
speaker stand.



 To Next Page