2-5
SEL1018 (E 4/10-18 OSS) (E 10-18mm F4 OSS)
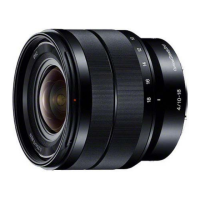
HELP04
1. Affix the to Adhesive Tapes to the Filter Screw Frame.
2. Install Ornamental Plate, aligning the cutout of the ornamental plate (back side) with the projection of the Filter Screw Frame.
Filter Screw Frame
Filter Screw FrameOrnamental Plate (back side)
Cutout Projection
Ornamental Plate
Adhesive Tapes
Adhesive Tapes
HELP05
Install the Filter Screw Frame, aligning the projection of the Filter Screw Frame (back side) with cutout of the optical block,
and then tighten three screws.
Filter Screw Frame
Optical Block
Optical Block
Filter Screw Frame (back side)
Cutout
Projection
Ver. 1.1 2016.12
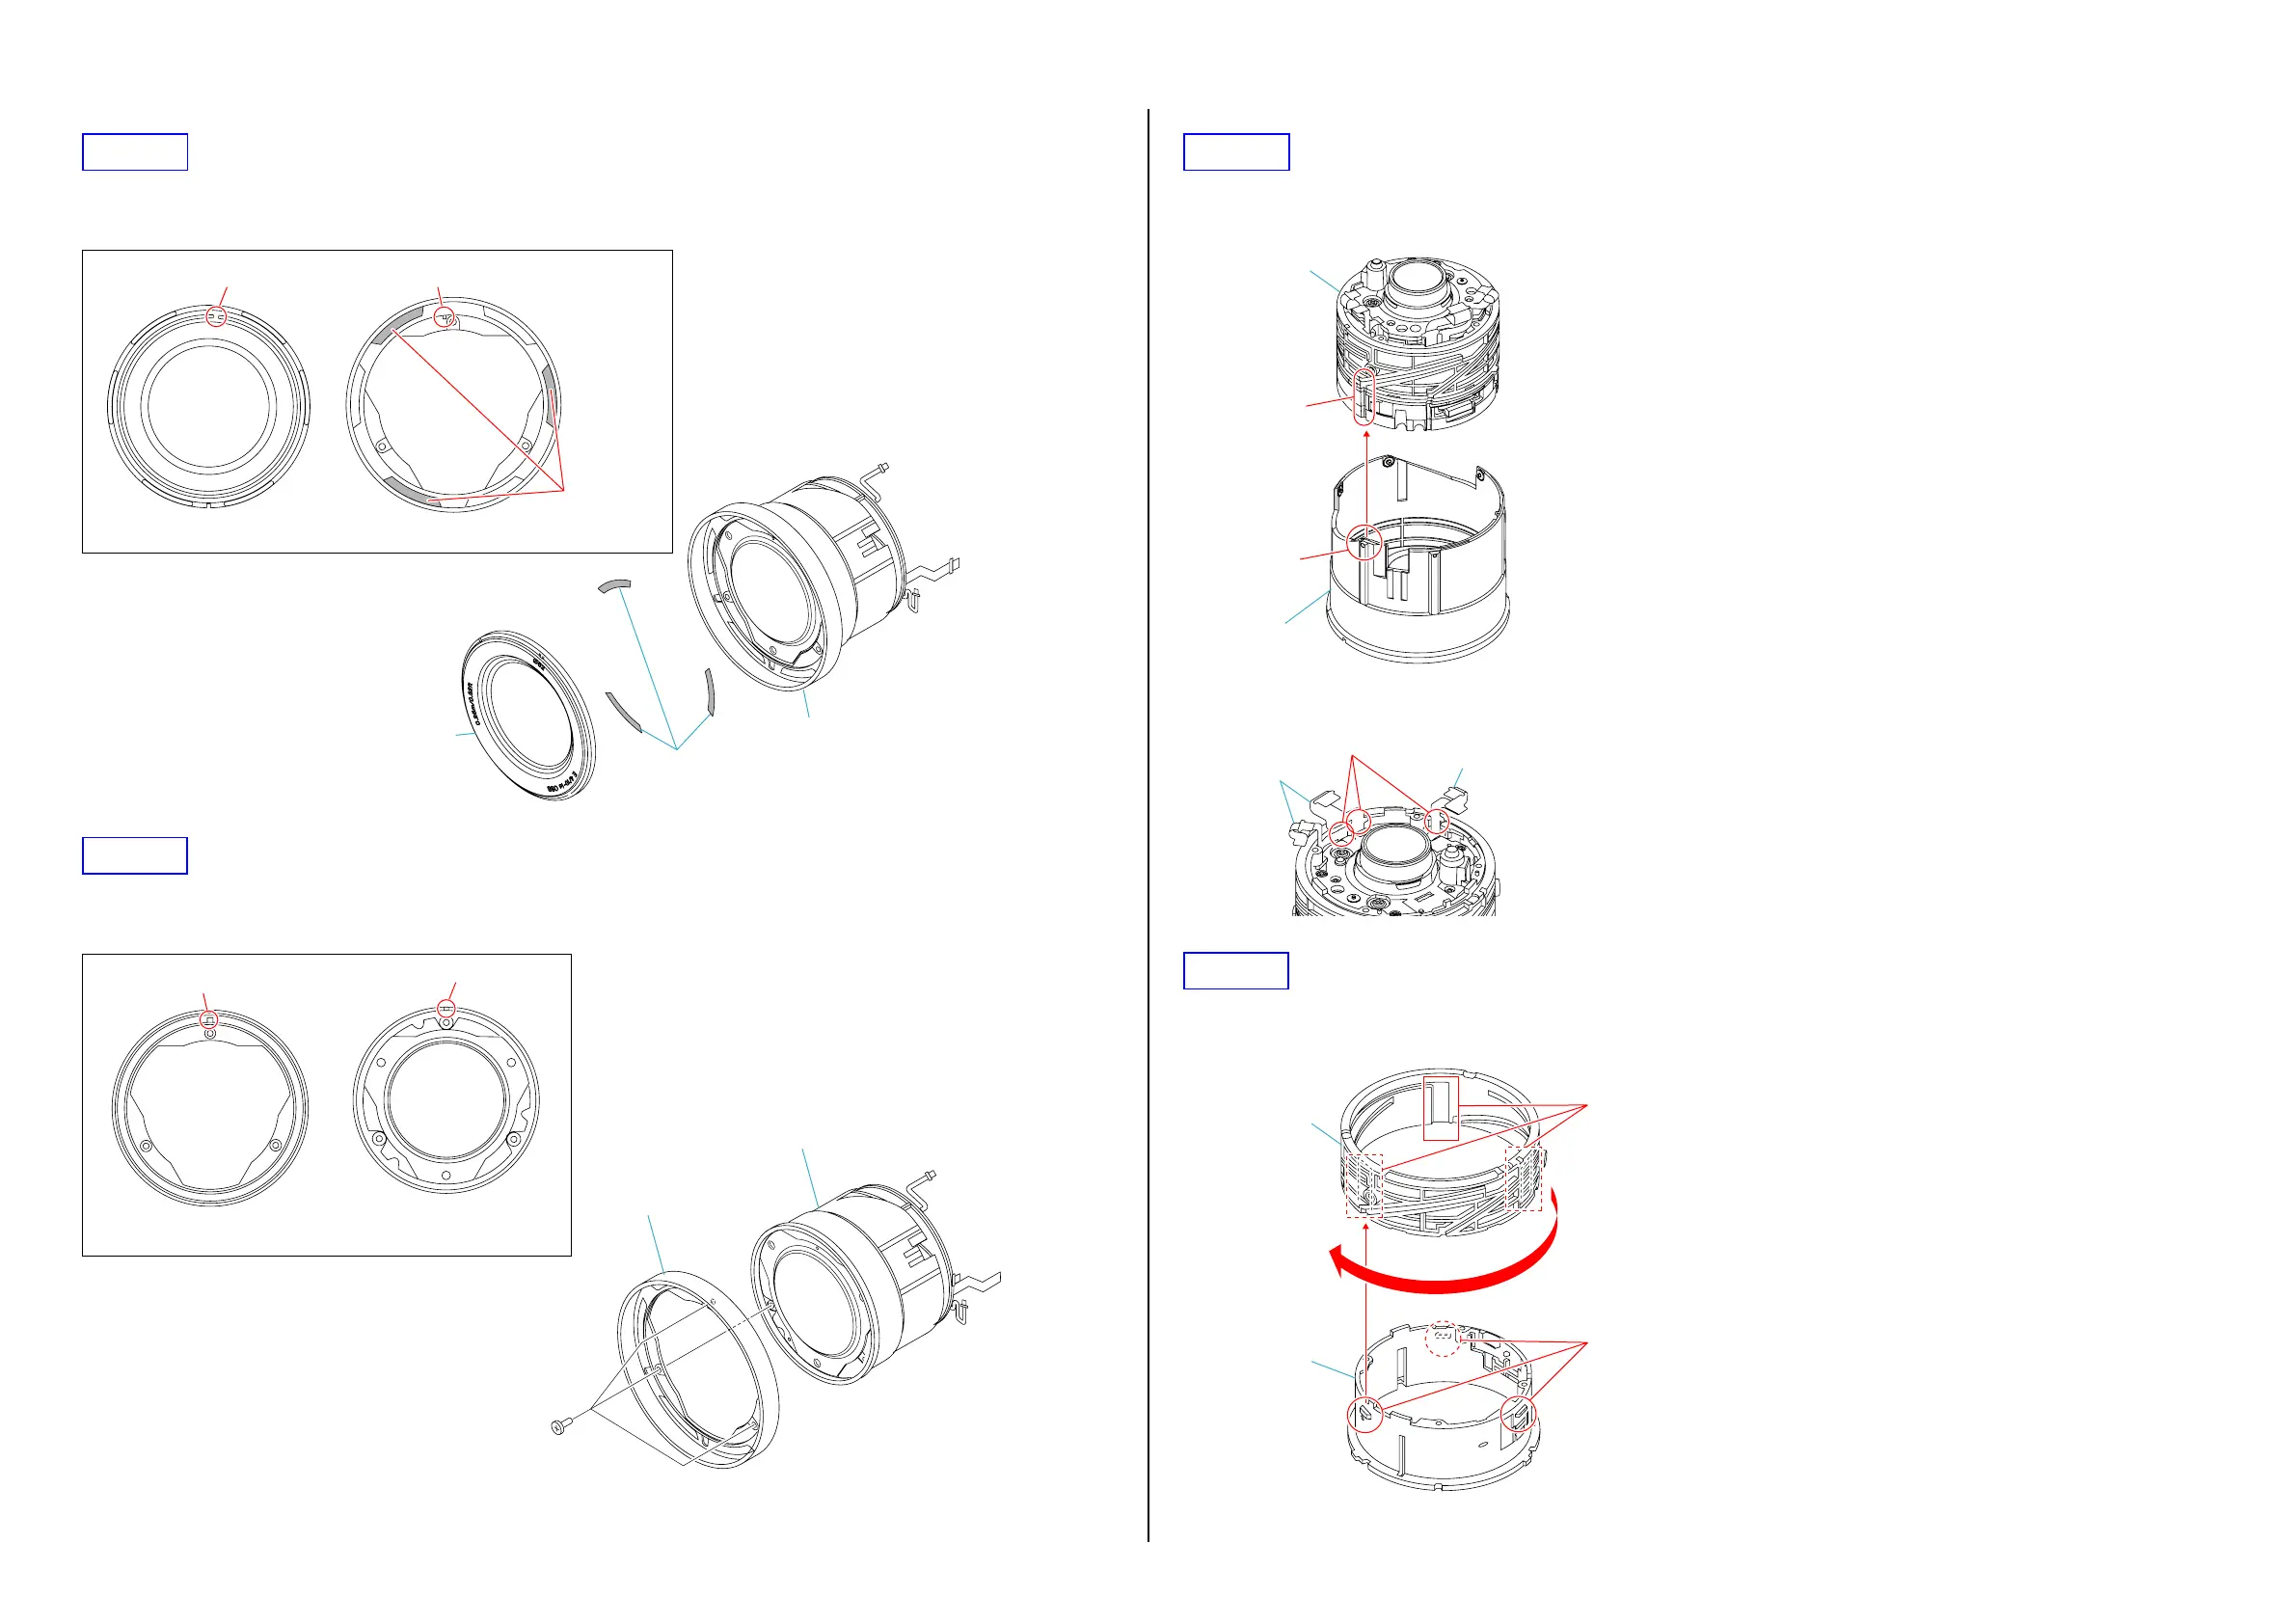
HELP06
1. Match the groove of 2 Group Service Assy to the Coma of 1 Group Assy and assemble them.
2. Rotate the 1 Group Assy to the fully counterclockwise direction.
Groove
Coma
2 Group Service Assy
1 Group Assy
3. Attach the each flexible board to each groove.
Groove
Flexible Board
Flexible Board
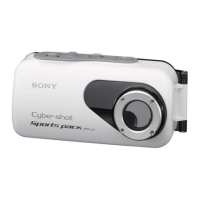
HELP07
1. Match the groove of Cam Tube to the Projection of Straight Tube and assemble them. (three places)
2. Rotate the Cam Tube to the fully clockwise direction.
Grooves
Projections
Cam Tube
Straight Tube