10
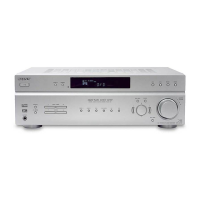
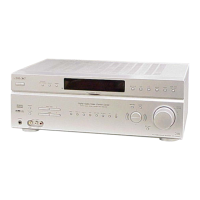
STR-K885
DSP Data Line
Check
Start Pass Pass
Auto Cal Mic
Check
END
SECTION 2
TEST MODE
SOUND FIELD CLEAR MODE
The preset sound field is cleared when this mode is activated. Use
this mode before returning the product to clients upon completion
of repair.
Procedure:
1. While depressing the 2CH button, press the power ?/1
button to turn on the main power.
2. The message “S.F. CLR.” appears and initialization is
performed. (3 second)
SOFTWARE VERSION DISPLAY MODE
The software version is displayed.
Procedure:
1. While depressing the AUTO CAL and the DISPLAY buttons
simultaneously, press the power ?/1 button to turn on the
main power.
2. The model name, destination and the software version are
displayed. (8 second)
KEY CHECK MODE
Button check
Procedure:
1. While depressing the AUTO CAL and the 2CH buttons
simultaneously, press the power ?/1 button to turn on the
main power.
“REST 13” appears.
2. Every pressing of any button other than ?/1 counts down
the buttons. The buttons which are already counted once are
not counted again.
3. When all buttons are pressed “REST 00” appears.
FLUORESCENT INDICATOR TUBE TEST MODE
All fluorescent segments are tested. When this test is activated, all
segments turn on at the same time, then each segment turns on one
after another.
Procedure:
1. While depressing the TUNING MODE and the DISPLAY
buttons simultaneously, press the power ?/1 button to turn
on the main power.
2. All segments turn on.
3. Turn the INPUT SELECTOR dial.
4. Turn the INPUT SELECTOR dial once again.
5. Turn the INPUT SELECTOR dial once again. All segments
turn off.
6. Every turning of the INPUT SELECTOR dial turns on each
segment one after another in the same order.
SWAP ALL MODE
The signal will be swapped to all channels so that all speakers will
have sound output.
Procedure:
1. While depressing the AUTO CAL and the A.F.D. buttons
simultaneously, press the power ?/1 button to turn on the
main power.
2. “SWP. ALL” appears. (No change while displayed.)
SHIPMENT MODE
All preset contents are reset to the default setting.
Procedure:
1. While depressing the AUTO CAL and the MUSIC buttons
simultaneously, press the power ?/1 button to turn on the
main power.
2. “CLEARED” appears and switch off the set.
PROTECTOR
If an error occurs, the “Protector Display” will flash for a while and
the power is turned OFF.
Procedure:
1. While depressing the TUNING MODE and the A.F.D.
buttons simultaneously, press the power ?/1 button to turn
on the main power.
2. “PROT. EVER” appears (3 seconds) and the display returns
to the “Protector Display” and the power remains ON.
AM CHANNEL STEP 9 kHz/10 kHz
SELECTION MODE
Either the 9 kHz step or 10 kHz step can be selected for the AM
channel step.
Procedure:
1. Set the FUNCTION to AM. Turn off the main power.
2. While depressing the TUNING MODE button, press the
power ?/1 button to turn on the main power.
3. Either the message “9 k STEP” or “10 kSTEP” appears. Select
the desired step.
VACS CONTROL
The VACS feature of the amplifier is turned off purposely.
Procedure:
1. While depressing the MEMORY/ENTER and the 2CH
buttons simultaneously, press the power ?/1 button to turn
on the main power.
2. “VACS OFF” appears. (8 second)
DCAC FACTORY TEST MODE
DCAC Factory Test mode have two stages:
1. DCAC DSP Data Line Checking
2. DCAC board Checking
MEMORY
L C R
SL
S
SR
SB SBRSBL
SW
LFE
SP A
SP B
CAT
NEO:6 SAT D.RANGE
RDS ST
MONO
DTS-ES 96 / 24
HDMI COAX
D EX
;
OPT
;
PL II x
;
PL
dB
k Hz
mft.
MHz
L R
S
LFE
SP B
NEO:6 D.RANGE MONOCOAX
k
m
MHz
RDS
x -ESEX
HDMI SAT
MEMORY
CAT
-ESOPTEXSPA
LFE
dB
Hz
ft.
ST
MONOSAT
96/24
NEO:6HDMISPB COAX D.RANGE
COPKllx