8
(EN)
9
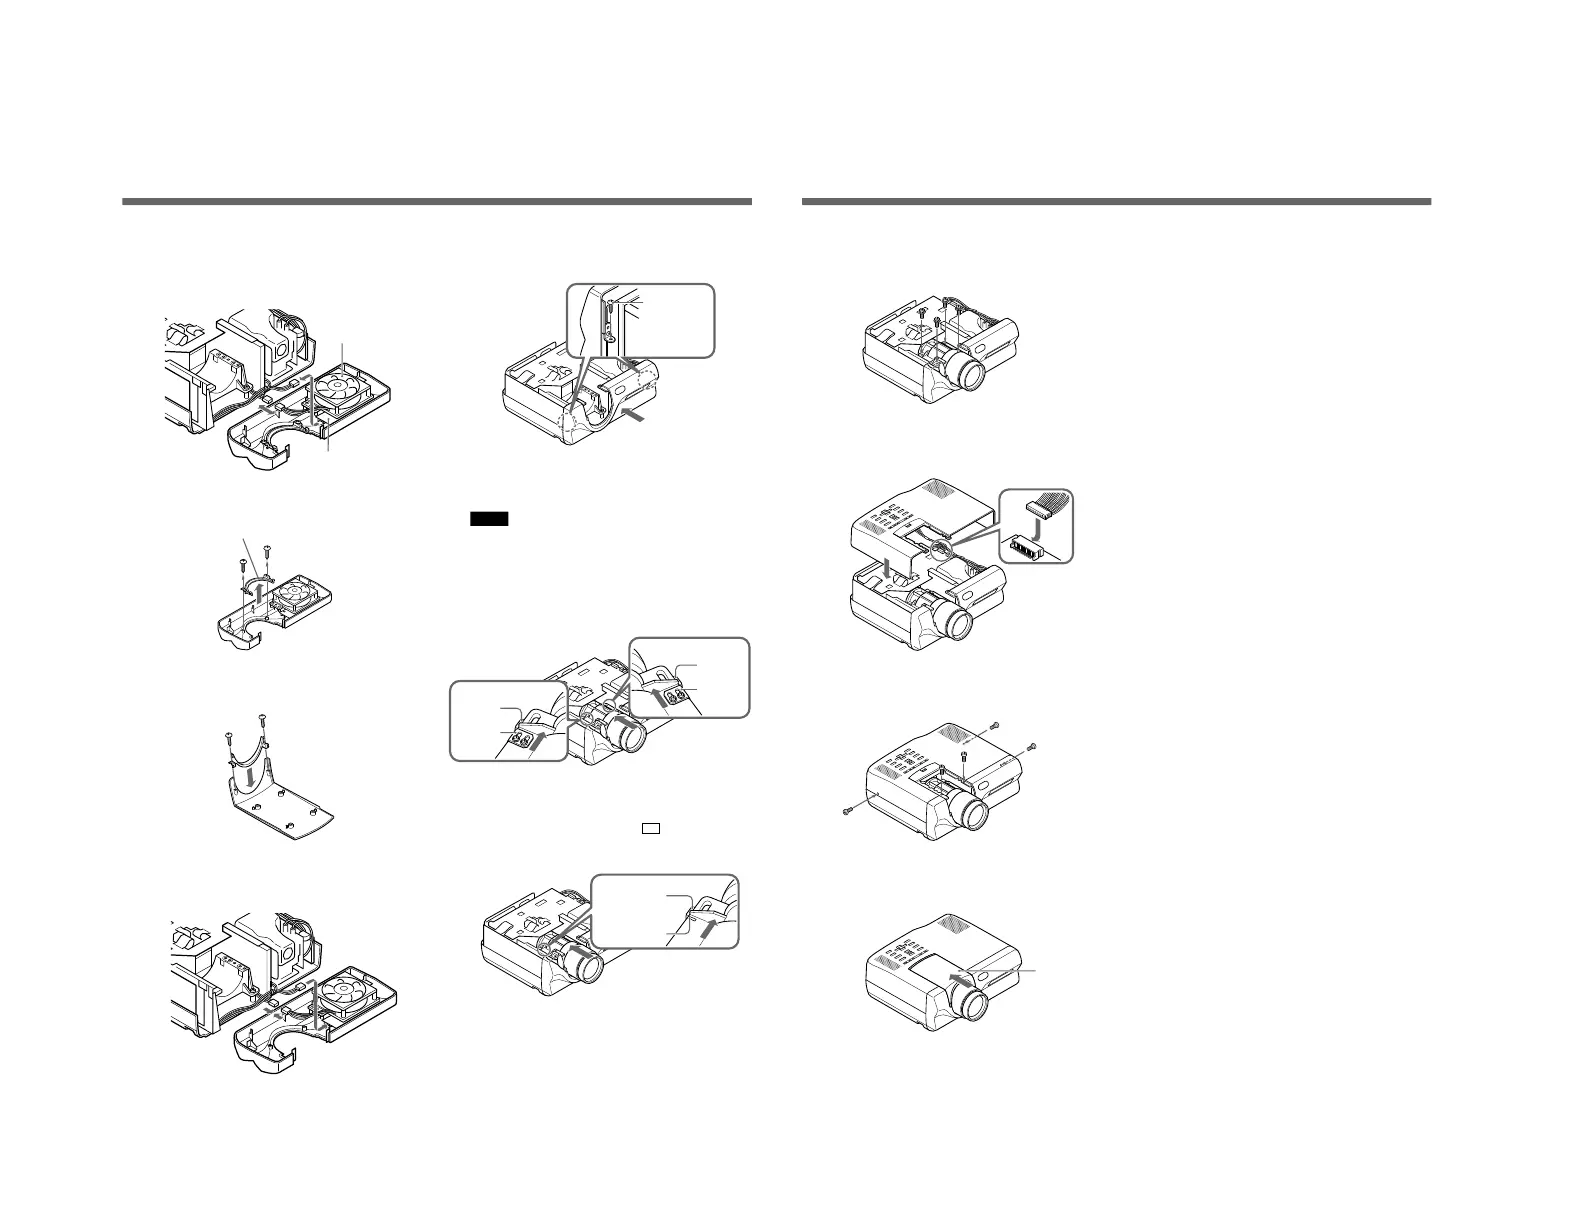
Disconnect the two connectors on the back of the
front panel, one for cooling fan and the other for
remote control detector, and then remove the front
panel.
10
Remove the two tapping screws (3×8) from the
front panel. Remove the lens bottom cover.
11
Install the lens bottom cover on the lens hood
(removed in Step 2) with the two screws.
12
Connect the connector for remote control detector
and the connector for cooling fan.
Changing the Lens Position for Rear Projection (Optical Axis Angle: 0 degree)
13
Install the front panel and lock with the two screws
(M3×8, with washers).
14
Install the lens with the lens stopper and the
projector stopper met at their edges.
Notes
• When you install the standard lens, make sure
that lens stoppers and projector stoppers are met
on both sides.
• For ease in identification when you install the
lens, make sure that the label on the lens is facing
up.
When the lens does not have a stopper
Align the painted white mark (
) on the lens
with the edge of the stopper in the projector.
Lens bottom cover
Screw
Stoppers
(Projector)
Stopper
(Projector)
Cooling fan
Remote control
detector
Stopper
(Projector)
Painted white
mark (Lens)
Stopper
(Lens)
Stoppers
(Lens)
9
(EN)
15
Lock the lens by tightening the four screws
(M4×12, with washers).
16
Connect the 12-pin connector to the PC board C
(disconnected in Step 4).
17
Install the hood and lock with the five screws
(M3×8).
18
Install the lens hood by sliding it from front to
back until it snaps into position.
Lens hood
 Loading...