WH-1000XM4
38
Sony CONFIDENTIAL
For Authorized Servicer
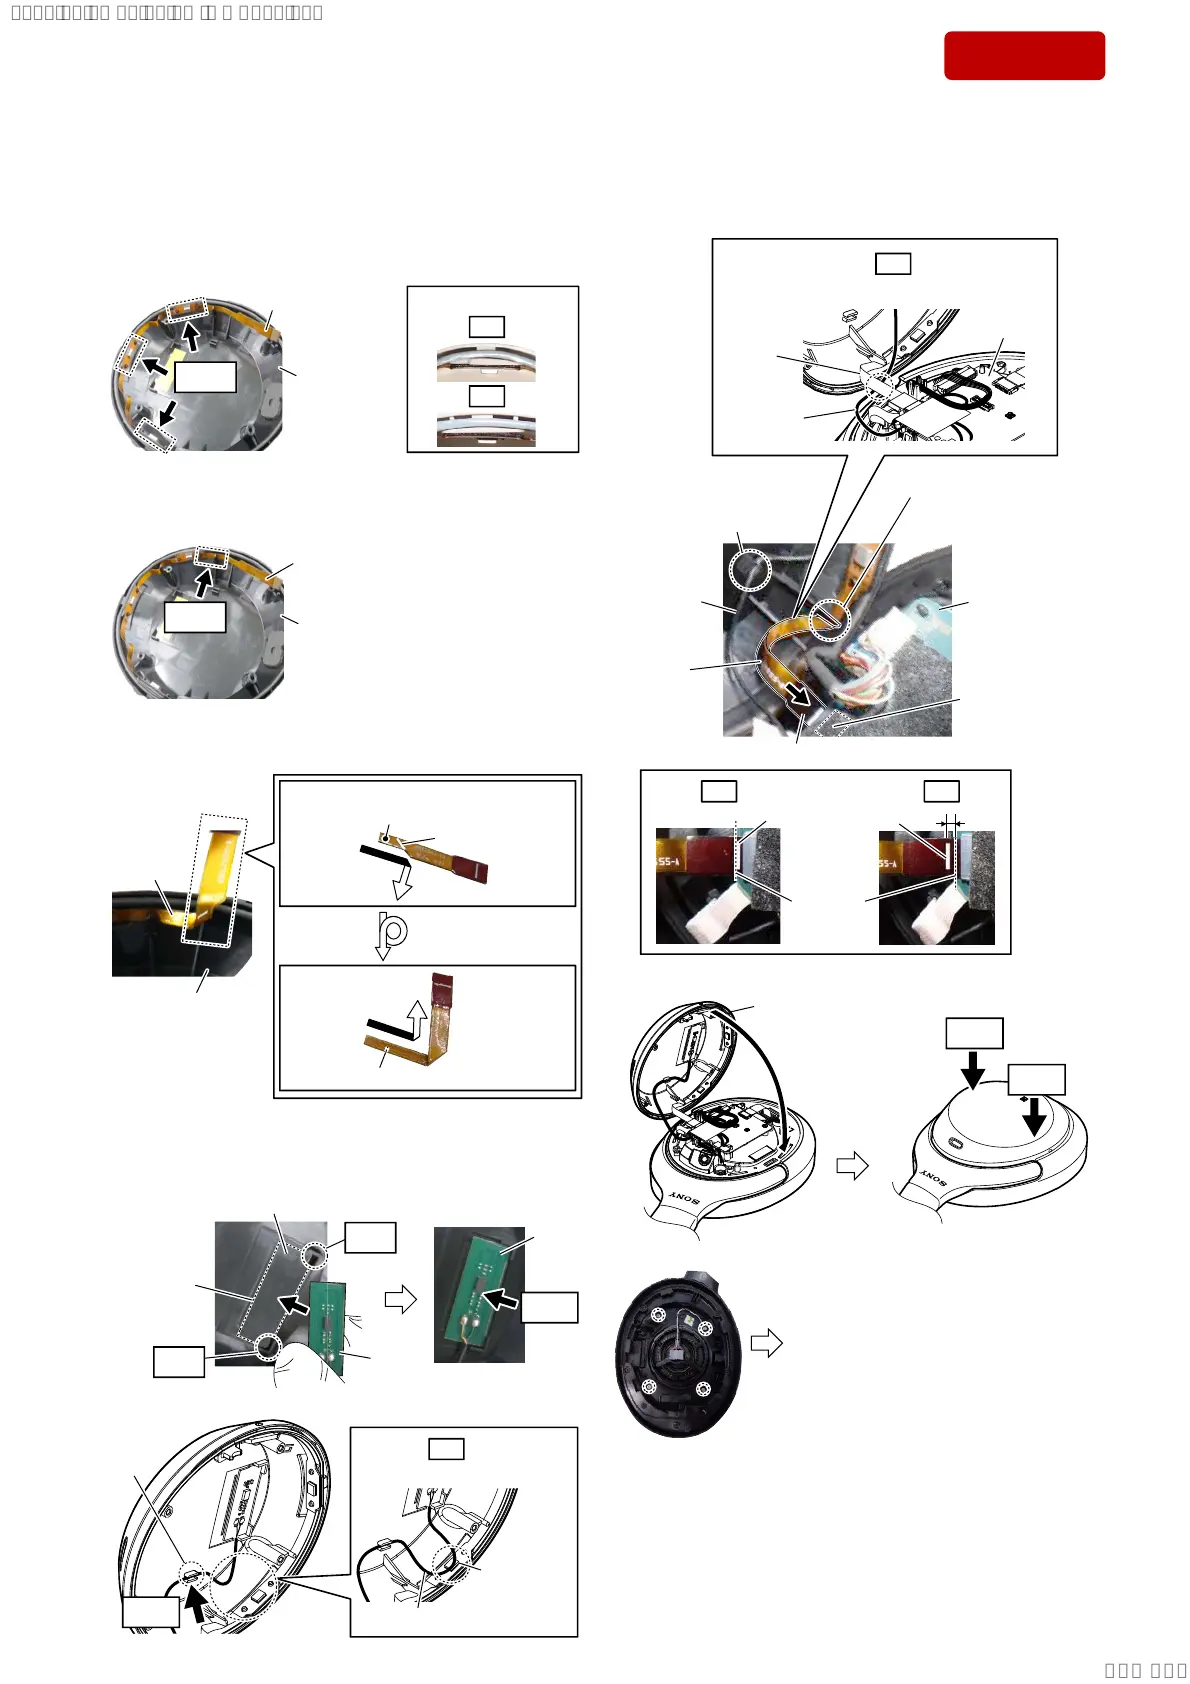
2-15. HOW TO INSTALL THE ORNAMENT L ASSY (L-ch)
ornament
L assy
adhesive side
white line
Bend.
The opposite side is the adhesive side.
MAIN L board
The opposite side is the terminal side.
connector
3 Check that the DMIC module is surely bent.
Note 3:
When the DMIC module is not bent, bend it firmly along with
the white line printed on the DMIC module.
7 Close the ornament L assy and press it from above.
6 Insert the DMIC module securely into the connector
on the MAIN L board.
8 Install four screws P2 (L = 8.0 mm) (silver).
– Opposite side (Adhesive side) –
– Front side –
Check.
DMIC
module
DMIC
module
Press.
Press.
Turn over.
ornament L assy
9 Install the earpad assy, perform
the opeartion check.
Note 6:
Refer to “CHECKING METHOD
AFTER INSTALLING THE
ORNAMENT L ASSY” on page 23,
for the operation checking method.
OK NG
Gap.
1 Check that the microphone part of the three places in the figure
below are not peeled off or turned up.
Note 1:
As shown figure blow in the frame, when the microphone part
is floating or is rolling up even just a little, be sure to replace
the ornament L assy to a new part.
– Top view –
OK
NG
NG
DMIC module
2 Check that the adhesive fixing part surrounded by the dotted frame
in the figure below is not peeled off or turned up.
Note 2:
When the adhesive fixing part is floating or rolling up even just
a little, be sure to replace the ornament L assy to a new part.
Check.
DMIC module
ornament L assy
4 Paste the NFC L board into the frame in accordance with the
guide of the ornament L assy, press firmly it.
NFC L
board
guide
guide
Press.
guide line
(edge of
board)
white line
white line
Note 5:
Check that the DMIC
module is not detached
from the rib.
ornament L assy
5 Press the NFC wire (UEWX2) into the rib.
Note 4:
Check that the NFC
wire (UEWX2) is not
detached from the rib.
NG
NFC L board
pasting frame
NFC L
board
rib
NFC wire (UEWX2)
microphone
part
Overlap.
NFC wire
(UEWX2)
MAIN L
board
DMIC
module
NFC wire
(UEWX2)
Cross.
When installing the ornament L assy, be sure to refer to the following procedure and install in order of
1
to
9
.
Install it while being especially careful not to peel off the DMIC module or turn up the DMIC module.
Press.
Note 7:
If the ornament L assy is replaced with a new one, peel off
the adhesive NFC release paper. If the ornament L assy is not
replaced with a new one, affix a new adhesive NFC.
Ver. 1.1
SYSSET
2020/09/0901:17:45(GMT+09:00)

 Loading...