10
C.1.1
Caution
C.1.2
C.1 Wall installation
Install the controller only in dry areas and under the ambient conditions de-
scribed under 2.1 “Specifi cations”. Carry out the following steps:
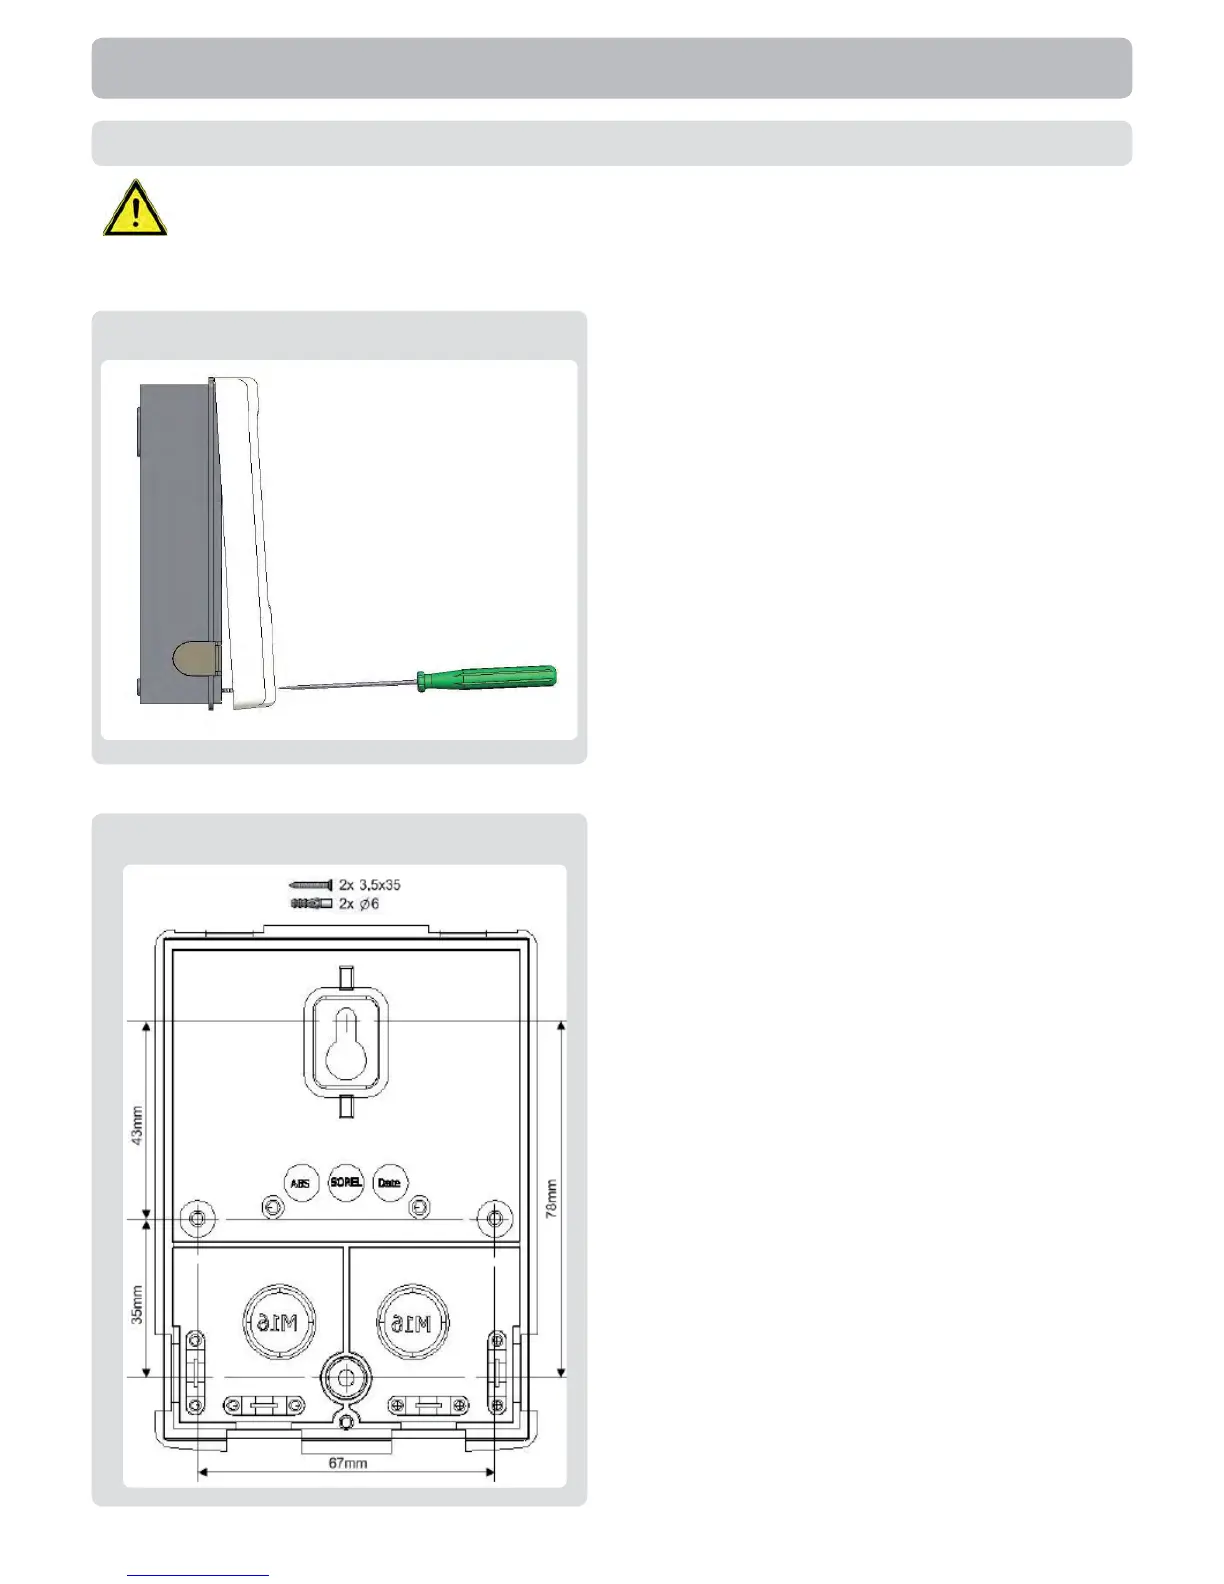
1.Unscrew cover screw completely
2.Carefully pull upper part of housing from
lower part.
3.Set upper part of housing aside, being
sure not to touch the electronics when
doing so.
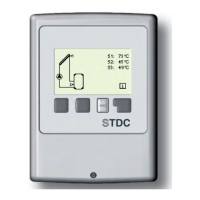
4. Hold the lower part of the housing
(C.1.2) up to the selected position and
mark the 2 mounting holes. Make sure
that the wall surface is as even as pos-
sible so that the housing does not become
distorted when it is screwed on.
5. Using a drill and size 6 bit, drill 2 holes
at the points marked on the wall and push
in the plugs. Also possible is the installa-
tion with 4 drill holes.
6. Insert the upper screw and screw it in
slightly.
7. Fit the upper part of the housing and
insert the other screws.
8. Align the housing and tighten the
screws.
Installation