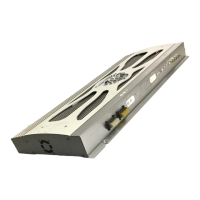
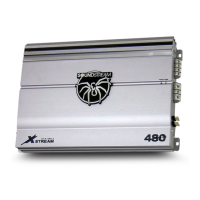
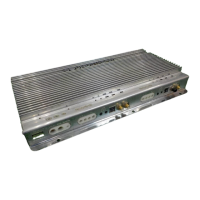
EasyManua.ls Logo

Soundstream Stealth 1200D User Manual

Soundstream Stealth 1200D
20 pages
To Next Page IconTo Next Page
Page #1 background imageLoading...
Page #1 background image
Stealth Amplifier Series
Owners Manual

Questions and Answers:

Soundstream Stealth 1200D Specifications

General IconGeneral
BrandSoundstream
ModelStealth 1200D
CategoryCar Amplifier
LanguageEnglish

Summary

Soundstream Stealth Amplifier Series

Owner's Manual

Official documentation for the Soundstream Stealth Amplifier Series.

Features

Control Functions

SPEAKERS

Connect speakers/subwoofers, check polarity. Never connect to chassis ground.

+12 Volt Power

Connect to positive battery terminal via fuse/circuit breaker. Protect with fuse.

Remote Turn On

Turns amplifier on when (+)12 volt is applied. Connect to head unit remote lead.

GND

Connect directly to vehicle frame (bare metal). Use shortest distance, consider larger cable.

RCA input jacks

For source units with RCA outputs. Minimum 200mV level required. Use twisted pair cables.

High level inputs

For speaker level wiring. Use when RCA outputs are unavailable.

REMOTE

Connect remote controller to adjust subwoofer amplifier volume from driver seat.

LEVEL Control

Matches amplifier sensitivity to source unit signal voltage. Range 200mV-5V. Not a volume control.

Low Pass Filter Control (Mono)

Selects low pass x-over frequency. Adjustable from 40Hz to 220Hz.

Subsonic Filter Control

Filters unwanted low frequency from 10Hz (OFF) to 50Hz. Increases woofer power handling.

Bass Boost Frequency and Level Control (Mono and 2-ch)

Boosts wanted frequency and level. Frequency 30Hz-90Hz, Level 0dB-12dB.

Phase Control

Adjusts speaker output phase from 0 to 180 degrees for system phase matching.

X-over mode and frequency Control (4-ch) - Front

Controls frequencies for front channels. Options: Low Pass, Full Range, High Pass.

X-over mode and frequency Control (4-ch) - Rear

Controls frequencies for rear channels. Options: Low/BandPass, Full Range, High Pass.

Bass Boost Level switch (4-ch)

Boosts bass level by 0dB, 6dB, or 12dB. Boost frequency centered at 50Hz.

Input mode switch (4-ch)

Switches rear channels' signal path. 4CH requires all RCAs; 2CH uses front channels in parallel.

X-over mode and frequency Control (2-ch)

Controls frequencies for STL2.350 & STL2.560. Options: Low Pass, Full Range, High Pass.

Power Indicator

LED lights up when amplifier works properly.

Protection Indicator

Red LED lights up/flashes for faults. Disconnect and resolve fault.

Panel Layout (STL1.600D/STL1.1200D)

Panel Layout (STL4.320/STL4.500)

Panel Layout (STL2.350/STL2.560)

Installation Precautions

Mounting Amplifier

Step 1: Stacking and Airflow Planning

Soundstream Stealth amplifiers can be stacked. Plan installation for air circulation.

Step 2: Mounting the Bottom Amplifier

Check drawing to mount the bottom amplifier.

Step 3: Prepare Side Bars with Nuts

Prepare side bars by inserting rectangle nuts.

Step 4: Install Side Bars to Heatsink

Insert side bars into heatsink fins and fasten with screws.

Step 5: Bottom Amplifier Mounted

The bottom amplifier is now mounted.

Step 6: Stack Two Amplifiers

Stack two amplifiers, preparing side bars and ensuring a 1/4 inch gap.

Step 7: Mount Third Pair Side Bars

Mount the third pair of side bars on the top amplifier.

Step 8: Stacked Amplifiers Complete

Now you have stacked two amplifiers.

Connecting the Amplifier

Cable and Fuse Selection

Select cable and fuse according to the provided table.

Ground Cable Connection

Connect ground cable to bare metal frame. Use nut/bolt, same size as +12V cable.

Remote Terminal Connection

Connect remote terminal to head unit remote output using 16 gauge wire.

Fuse Holder Connection

Connect fuse holder within 18 inches of car battery.

Input Cable Connection

Connect all inputs with high-quality cables. Connect Remote Control if needed.

Fuse Insertion

Insert fuse(s) into the battery fuse holder(s).

Bridging Channels for Subwoofers

For 2-CH and 4-CH, bridge channels using Left '+' and Right '-' terminals for subwoofers.

Wiring Diagram (Mono Amplifier - Fig 11)

Wiring Diagram (Mono Amplifier - High Level - Fig 12)

Wiring Diagram (Mono Amplifier - Multi Woofers - Fig 13)

Wiring Diagram (4-Channel Mode - Fig 14)

Wiring Diagram (3-Channel Mode - Fig 15)

Wiring Diagram (Active X-over Mode - Fig 16)

Wiring Diagram (High Level Input Mode - Fig 17)

Wiring Diagram (2-Channel Mode - Fig 18)

Wiring Diagram (High Level Input & Bridged Mode - Fig 19)

Trouble Shooting

Amplifier will not power up

Check ground, battery power, fuses, and protection LED status.

Protection LED Comes on

Check for speaker shorts, load limits, and reset amplifier.

No output

Check RCA cables, speaker wiring, headunit output, and amplifier level settings.

Low output

Reset level control and check crossover settings.

High hiss in the speakers

Check RCA cable for shorts to ground and amplifier grounding.

Distorted sound

Set input level low, check crossover frequencies, and check for speaker lead shorts.

Amplifier gets Very hot

Check minimum load impedance and ensure adequate air circulation.

Specifications

Related product manuals