............................
~~
~
~
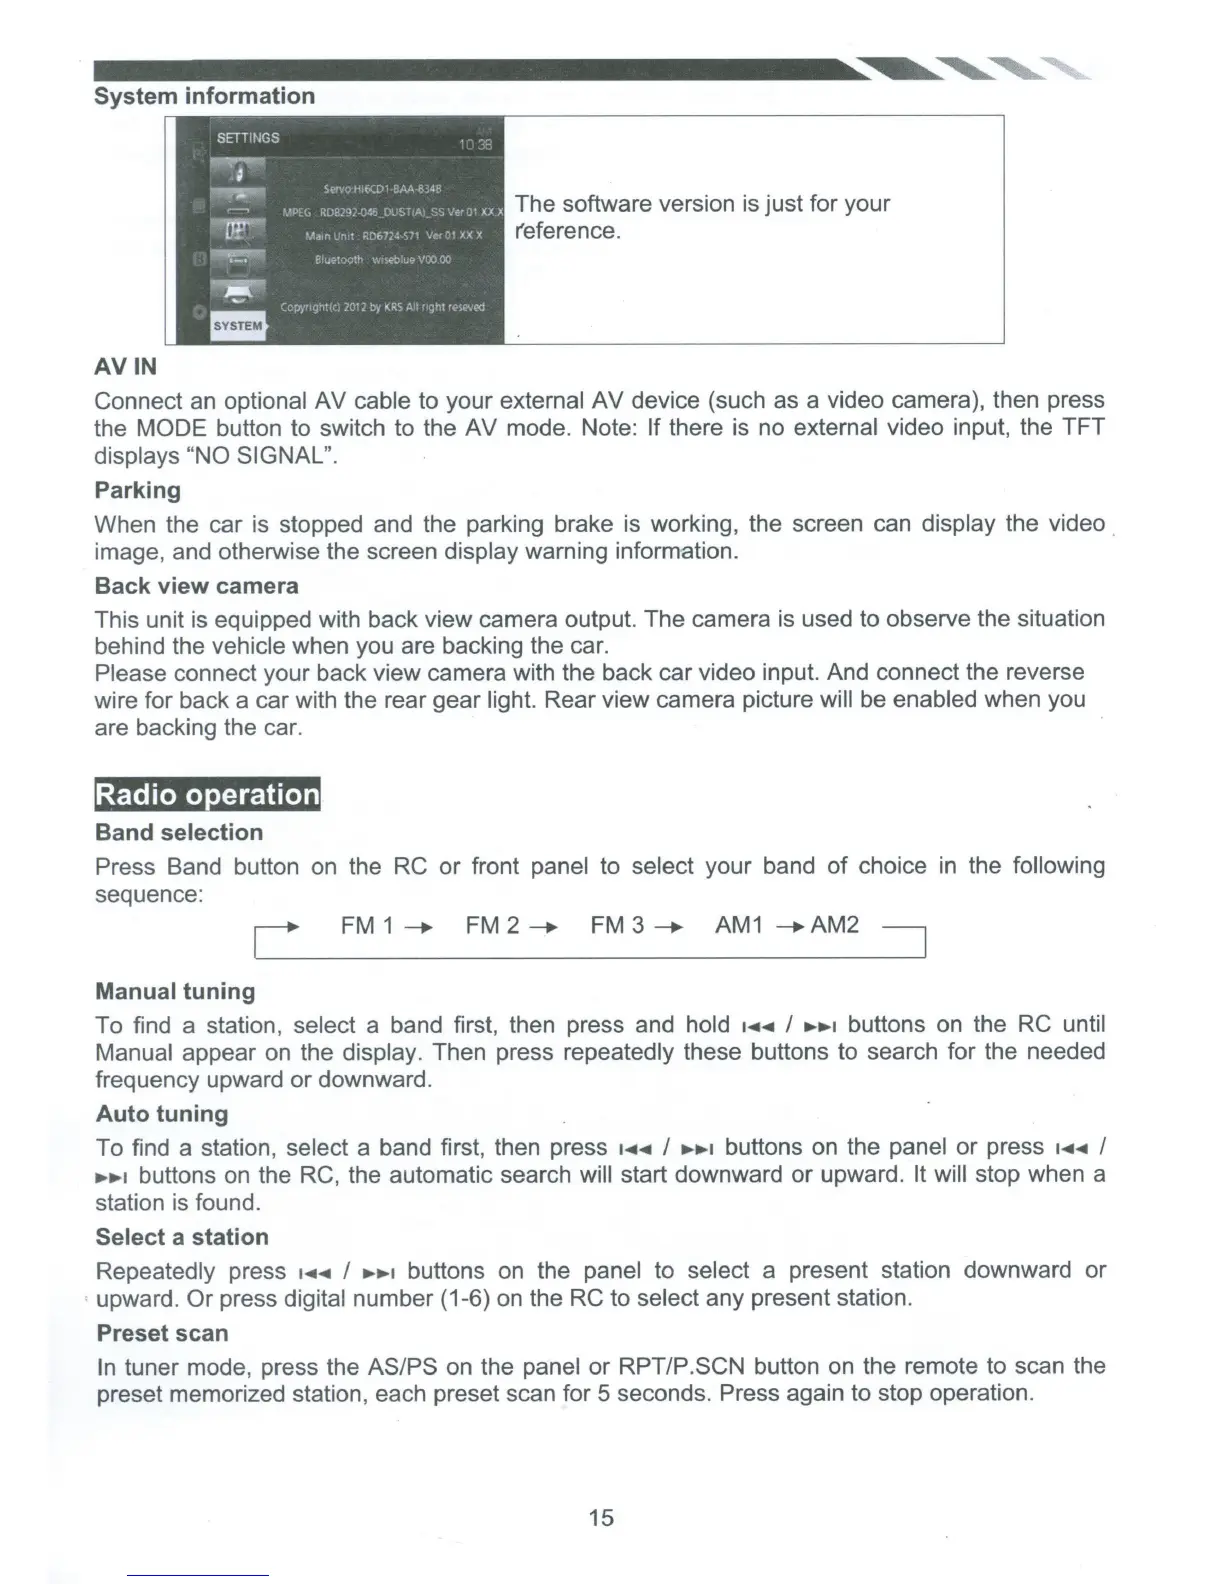
System
information
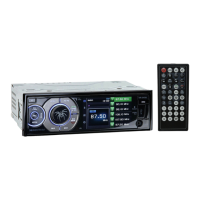
AVIN
The software version is just for your
r'eference.
Connect an optional AV cable to your external AV device (such as a video camera), then press
the MODE
button to switch to the AV mode.
Note:
If
there is no external video input, the TFT
displays
"NO SIGNAL".
Parking
When the car is stopped and the parking brake
is
working, the screen can display the video .
image, and otherwise the screen display warning information.
Back
view
camera
This unit is equipped with back view camera output. The camera is used to observe the situation
behind the vehicle when you are backing the car.
Please connect your back view camera with the back car video input. And connect the reverse
wire for back a car with the rear gear light. Rear view camera picture will
be
enabled when you
are backing the car.
'Radio operation
Band
selection
Press Band button on the
RC
or front panel to select your band
of
choice
in
the following
sequence:
FM
1
---.
FM
2---.
FM
3---.
AM1
--.AM2
Manual
tuning
To find a station, select a band first, then press and hold
·~~
I
.,..,.,
buttons on the
RC
until
Manual appear on the display. Then press repeatedly these buttons to search for the needed
frequency upward or downward.
Auto
tuning
To find a station, select a band first, then press
•~~
I
......
,
buttons on the panel
or
press
·~~
I
.,..,.,
buttons on the
RC,
the automatic search will start downward or upward. It
will stop when a
station is found.
Select
a
station
Repeatedly press
....
~
I
.,..,.,
buttons on the panel to select a present station downward or
upward.
Or
press digital number (1-6) on the RC to select any present station.
Preset scan
In
tuner mode, press the
ASIPS
on the panel or
RPTIP.SCN
button on the remote to scan the
preset memorized station, each preset scan for 5 seconds. Press again to stop operation.
15
 Loading...