07
Assembly - Step 6
6
6
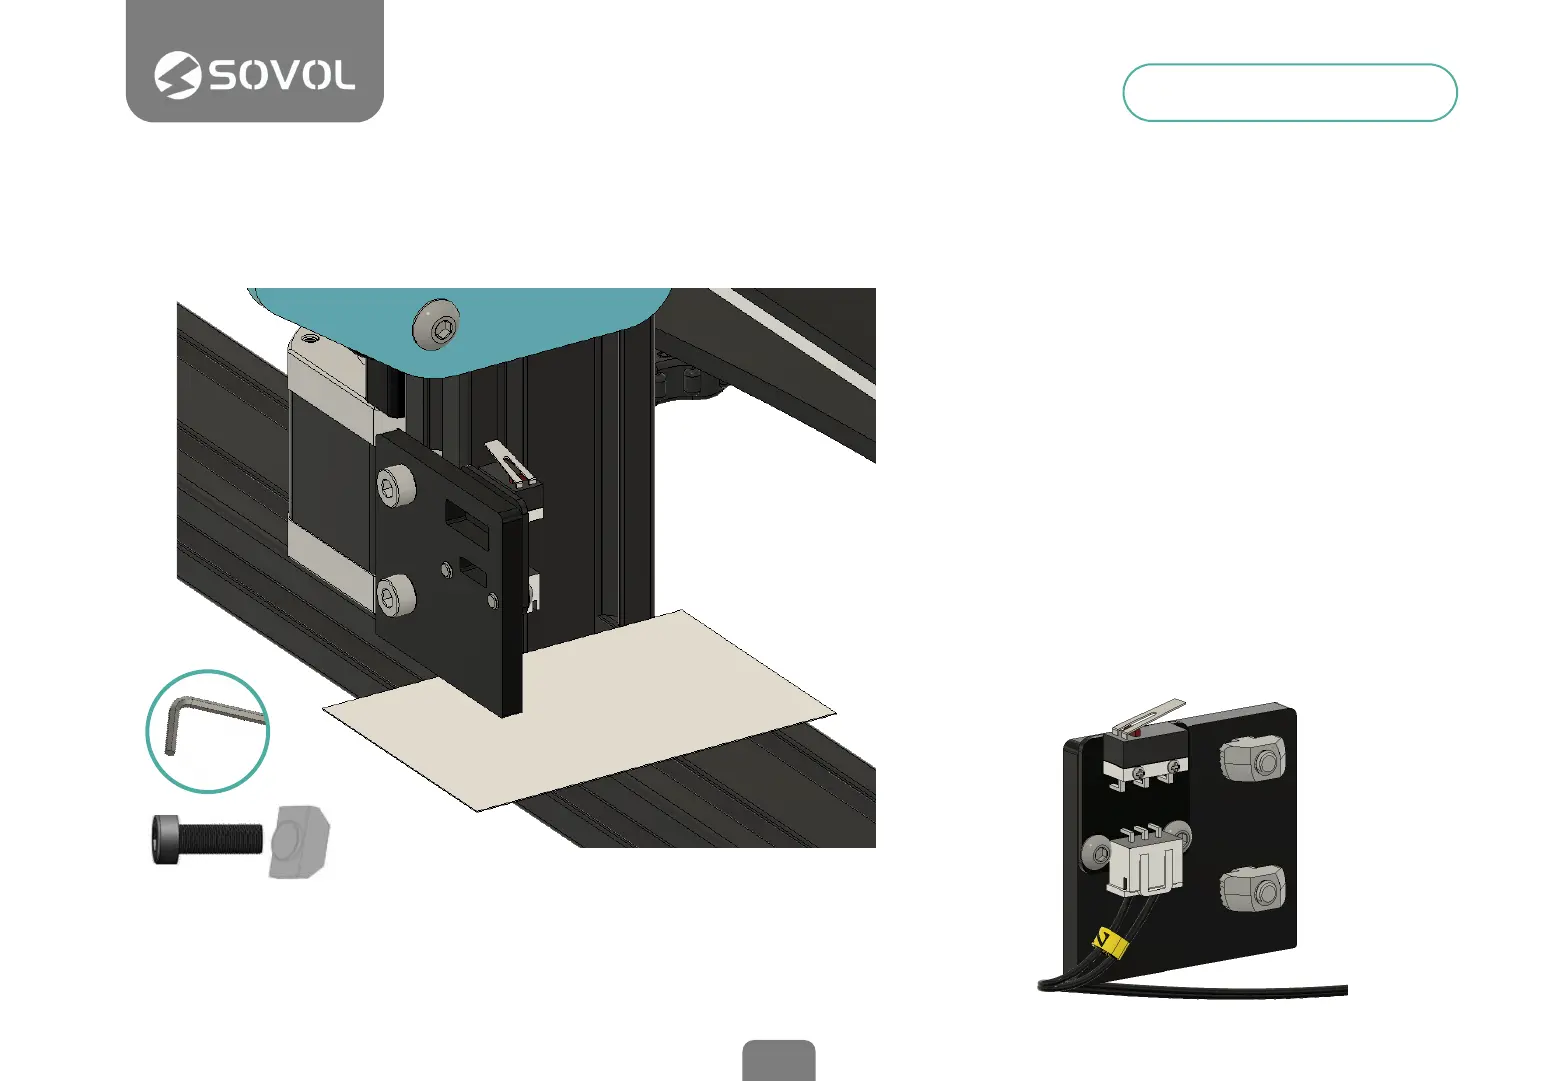
Install the Z limit switch
This device sets the starting height of the
Z axis, which is responsible for the up and
down movement of the print head.
It is placed next to the left Z stepper motor
and xed to the edge of the vertical frame
using the included T-nuts.
Loosen the T-nuts, place a card or slightly
thick paper in the bottom frame and rest
the sensor plate on the top. This will
provide the correct minimum height,
slightly above the horizontal prole. Tighten
the screws and connect the 2-wire
connector labeled "Z".
M4x10 + T-NUTS (2 Units)
3mm