2.
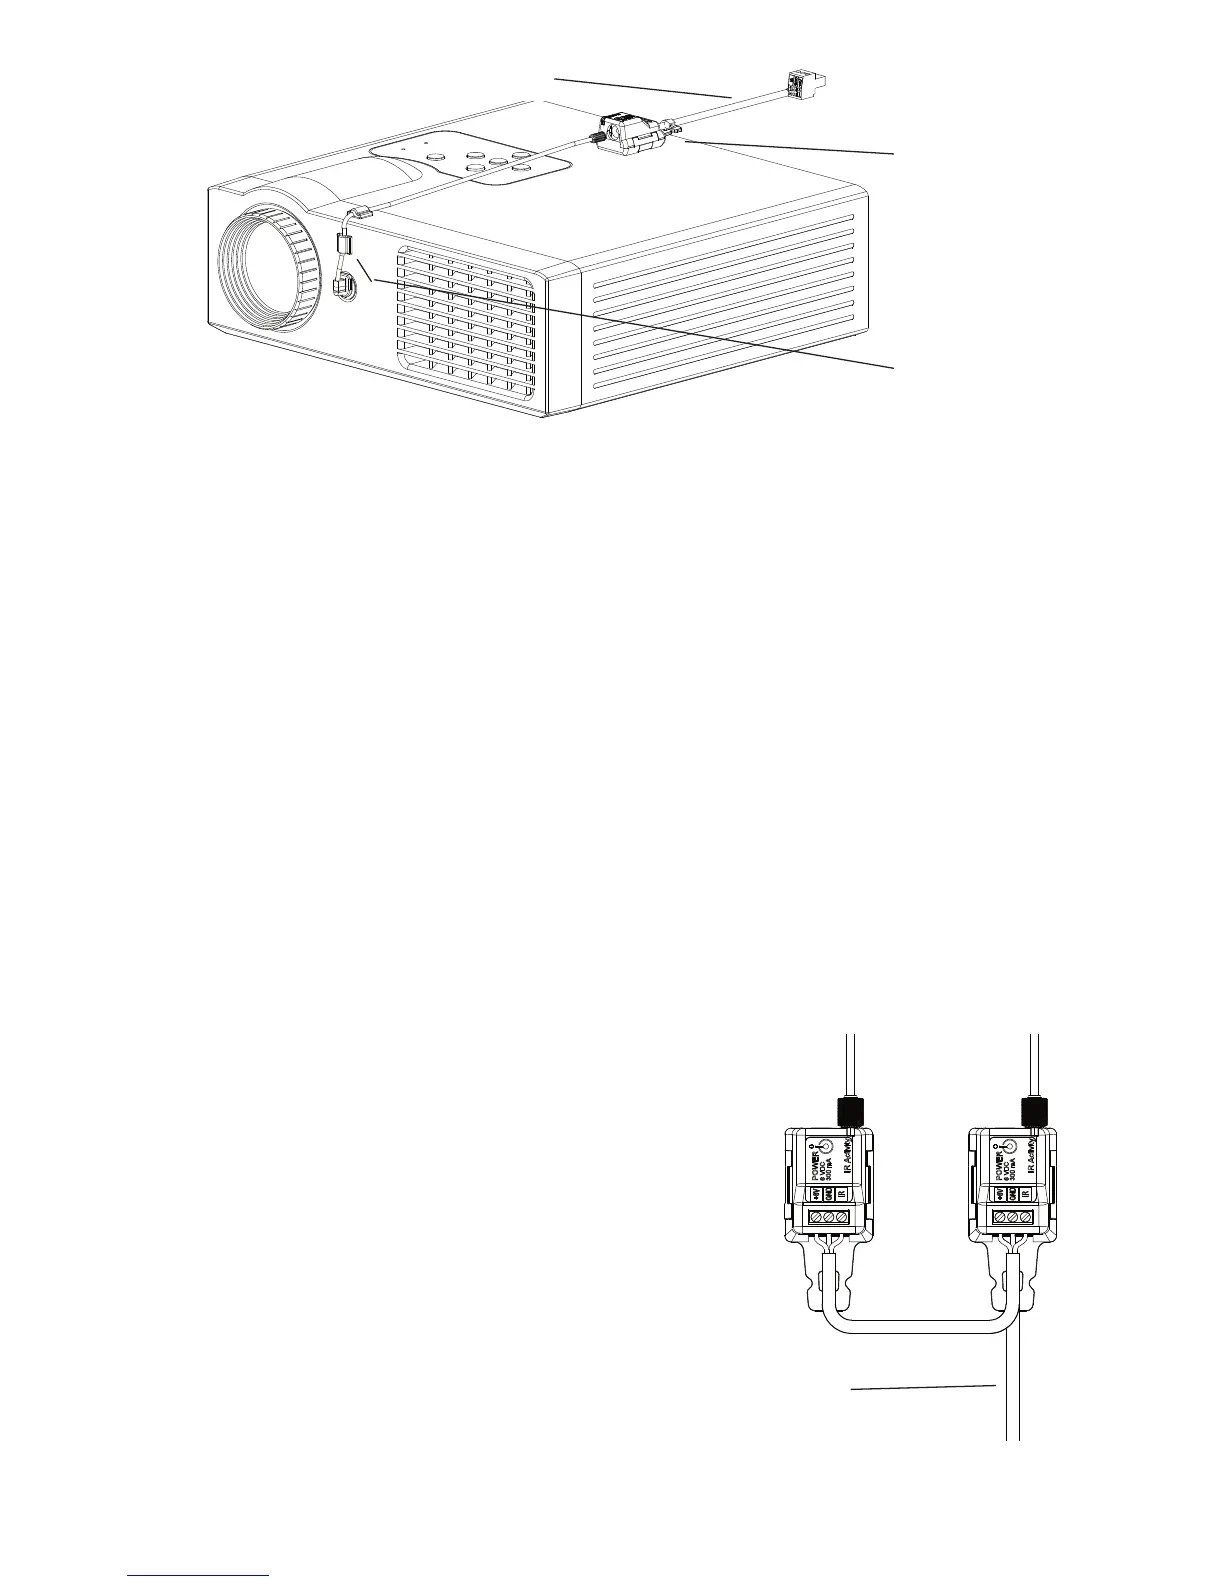
Position IR bud overIRwindowofthedevicetobecontrolled.Removethebackingtoexposethe
adhesiveandsecurebudtoIRreceiverwindow.Note:Thebudadhesivegraduallysolidifiesand
quicklybecomesverystrong,makingrepositioningthebuddifficult.Besurethatthebudiscorrectly
placed.Theadhesivewillsolidifytomaximumstrengthinapproximately24hours.
Somedevicesareextremelysensitivetoprecisebudplacement.Ifpossible,programthePixiePro
andtesttheIRbudpositionbeforeaffixingthebudpermanentlywiththeadhesive.
UnlikesomeIRemitters,theopticfiberbuddoesnotilluminatewhenitsendssignal.AnLEDinside
theplasticassemblydoesvisiblyilluminate,andmaybeseenthroughtheblackplasticinthearea
labeledIR Activity.
3. Anchor IR bud todisplaydevicewithincludedanchors.TheanchorswillholdtheIR budwirein
place.
4. Connect power supply barrelconnectortoIRemitterterminalblockwiththeincluded6-VDC
powersupply.
Wiring Multiple IR Emitters
WireeachadditionalPXE-EMIT inparalleltothePixiePro.
Theymaybedaisy-chained,orwireddirectlyfromthePixiePro
inastarpattern.EachpositiononthePixieProcaptivescrew
terminalmustbewireddirectlytothecorrespondingposition
onthePXE-EMIT assemblyasshowninthediagram.For
example,thePXE-EMIT positionlabeled+6Vmustbewiredto
thePixieProcaptivescrewterminalpositionlabeled+6V.
Note:ThePixieProcandriveuptosixIRemitterswithasingle
powersupply.Todrivemorethansix,additionalpowersupplies
mustbeorderedseparately(partno. PXE-DCM-PS).
Affixemitterwith
Velcro™Tape
(included)
Guidewirewith
adhesiveanchors
ToPixiePro
8
3-conductorcable
Figure 8: IRemitteraffixedtoaprojector
Figure 9: Daisy-chainedIR
emitters(PXE-EMIT)