III. Assembly
1. Preparation
Note: WhenassemblingthePixiePro,youwillbeworkingwithanumberofsmallparts.Besurethat
youassemblethePixieProinaclean,well-lightedworkarea.
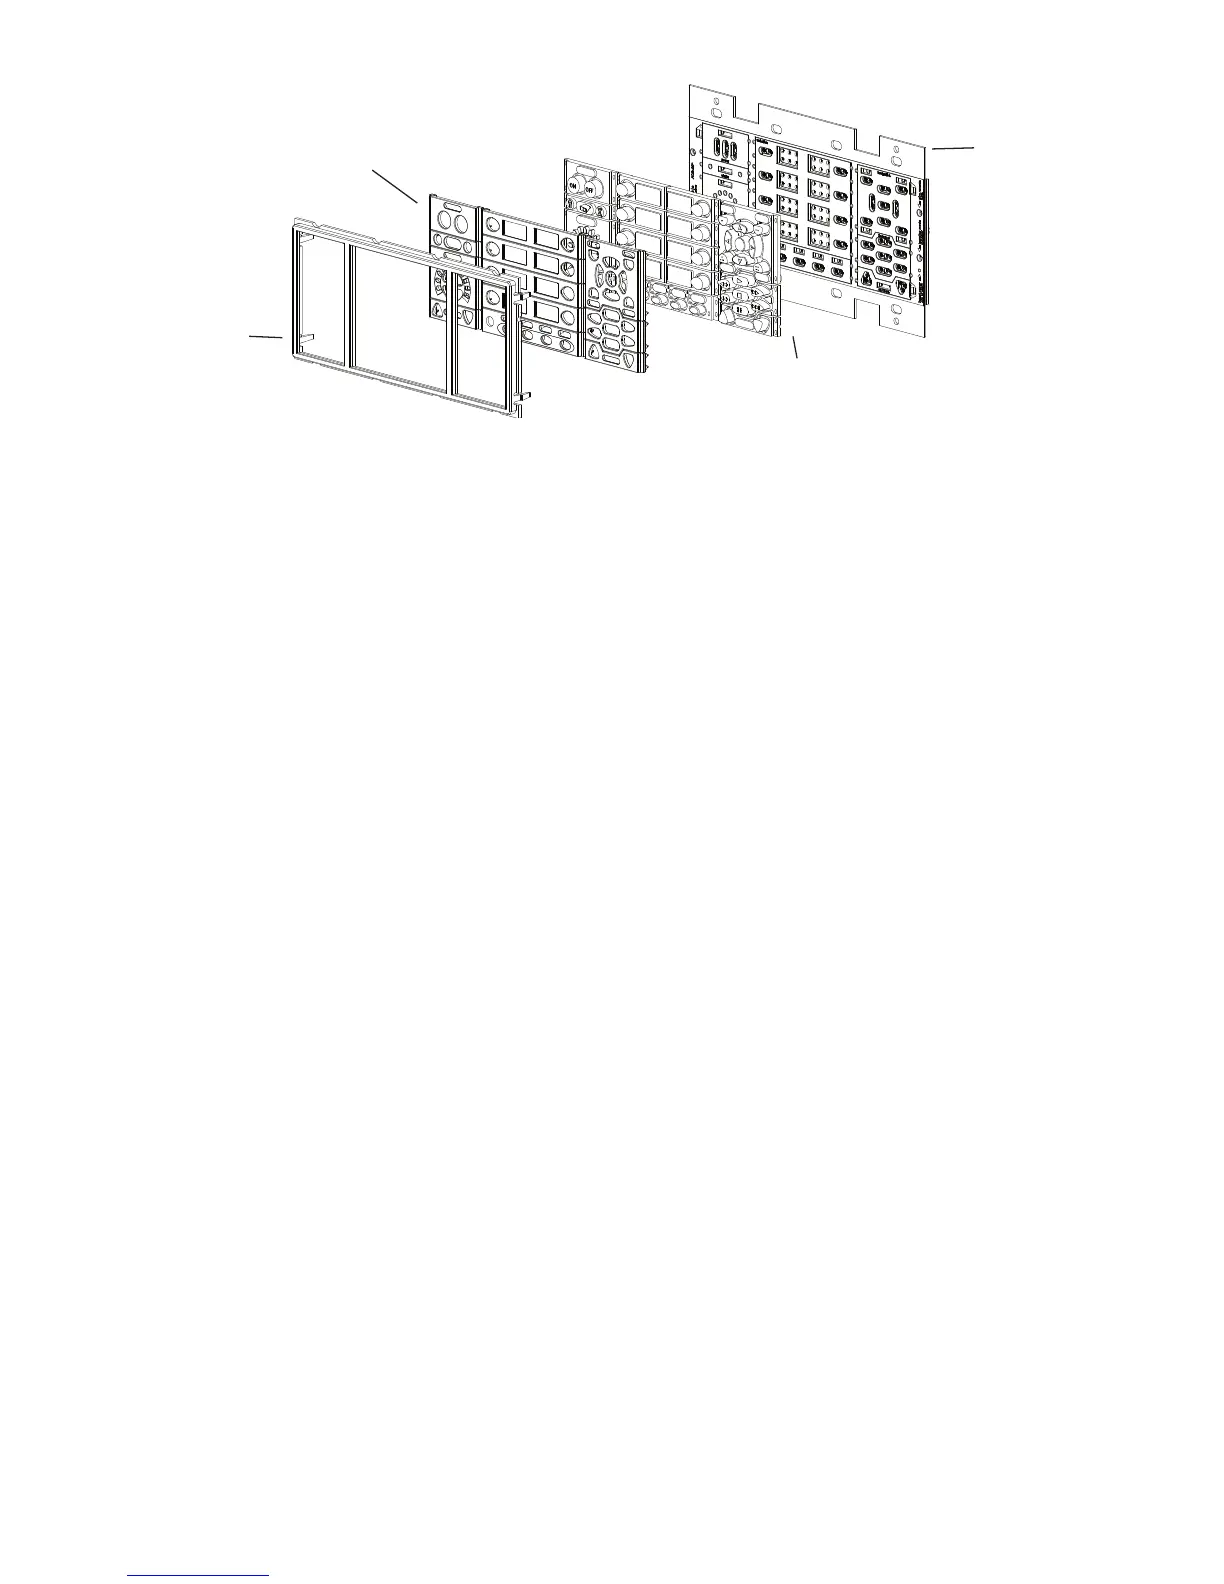
DisassemblethePixiePro(seeFigure 3 foranexampleofadisassembledunit)andselectdesired
buttoninsertmodules.Mostbuttonmodulesmaybereplacedwithblanksifdesired.Youmustuse
theStatusLEDmodule,atleastonesourceselectionmodule,andatleastonepowermodule.
Mostbuttonmodulesareoptionalandmaybereplacedwithblanks.Forexample,ifyoudonotwish
toincludecontrolofaDVDplayerorVCRinyourinstallation,youmayreplacetheVCR/DVDcon-
trolmodulewithblankinserts.YoumaylikewiseassemblethePixieProwithanywherefrom0-4aux
controlbuttonsand1-8sourceselectionbuttons.
Note:ProgrammingandconfiguringthePixieProrequiresuseofthevolumecontrol/displaymodule,
allfourauxbuttonmodules,andatleastthefirstsevensourcebuttons.Besuretoincludethese
modulesuntiltheunithasbeenconfigured.Theymaythenbereplacedwithblanks.Youmayclone
configurationfromanotherunitwithoutincludingthesemodules.
ThePixieProsecurityfeaturerequiresuseofthemenubuttonmoduleforenteringsecuritycodes.
Severalconfigurationsettingsrequireuseofthediscreteon/offpowerbuttonmodule.Seethe
Configuration sectiononpage19formoreinformation.
2. Assembly
a.Selecttheappropriatebuttonmodules.Buttonmodulesareconnectedinsets,butmaybeeasily
separatedforcustomizedconfiguration.Toseparatemodules,foldthebuttonsawayfromeachother
toexposethethinconnectingrubberandcutwitharazorknife.
b.Placethedesiredbuttonmodulesandblanksagainstthecircuitboard.
c.Labeltheselectedbuttons.Removethenon-adhesivetransparentlabelsfromtheincludedleg-
endsheetandinsertingthemintheplasticoverlaylegendreceptacles.Besuretoverifythecorrect
orientation.
d.Fittheplasticoverlaysovertherubberizedbuttonpadsand/orblanks.Securetheoverlaysin
placebyfittingtheplasticbezeloverallmodules.Besurethebezelisrightsideup.
Bezel
Plastic
Overlay
Rubberized
ButtonPads
Circuit
Board
4
Figure 3: ThefourbasiccomponentsofthePixiePro